How to Get Started with MongoDB Atlas and Confluent Cloud
May 6, 2021 | Updated: July 16, 2025
Every year more and more applications are leveraging the public cloud and reaping the benefits of elastic scale and rapid provisioning. Forward-thinking companies such as MongoDB and Confluent have embraced this trend, building cloud-based solutions such as MongoDB Atlas and Confluent Cloud that work across all three major cloud providers.
Companies across many industries have been leveraging Confluent and MongoDB to drive their businesses forward for years. From insurance providers gaining a customer-360 view for a personalized experience to global retail chains optimizing logistics with a real-time supply chain application, the connected technologies have made it easier to build applications with event-driven data requirements. The latest iteration of this technology partnership simplifies getting started with a cloud-first approach, ultimately improving developer’s productivity when building modern cloud-based applications with data in motion.
Today, the MongoDB Atlas source and sink connectors are generally available within Confluent Cloud. With Confluent’s cloud-native service for Apache Kafka® and these fully managed connectors, setup of your MongoDB Atlas integration is simple. There is no need to install Kafka Connect or the MongoDB Connector for Apache Kafka, or to worry about scaling your deployment. All the infrastructure provisioning and management is taken care of for you, enabling you to focus on what brings you the most value — developing and releasing your applications rapidly.
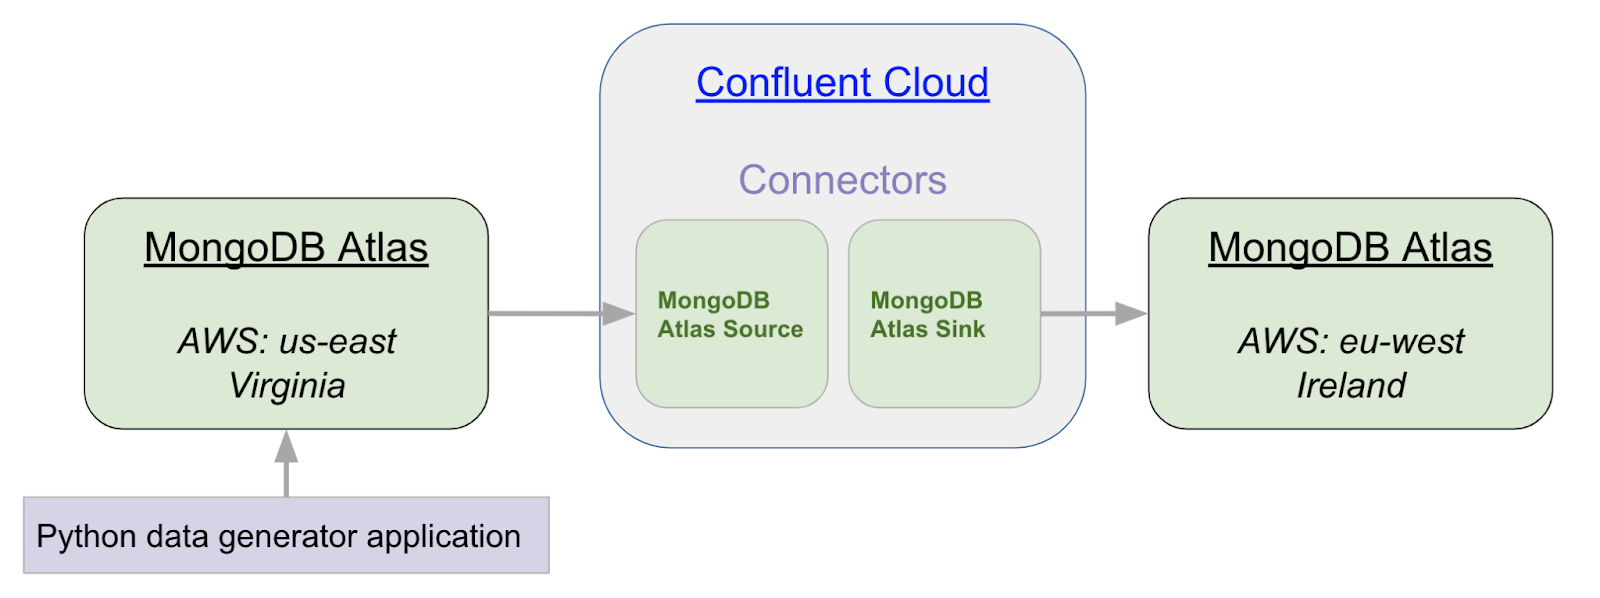
Let’s walk through a simple example of taking data from a MongoDB cluster in Virginia and writing it into a MongoDB cluster in Ireland. We will use a python application to write fictitious data into our source cluster.
Step 1: Set up Confluent Cloud
First, if you’ve not done so already, sign up for a free trial of Confluent Cloud. You can then use the Quick Start for Apache Kafka using Confluent Cloud tutorial to create a new Kafka cluster. Once the cluster is created, you need to enable egress IPs and copy the list of IP addresses. This list of IPs will be used as an IP Allow list in MongoDB Atlas. To locate this list, select “Custer Settings” and then the “Networking” tab.
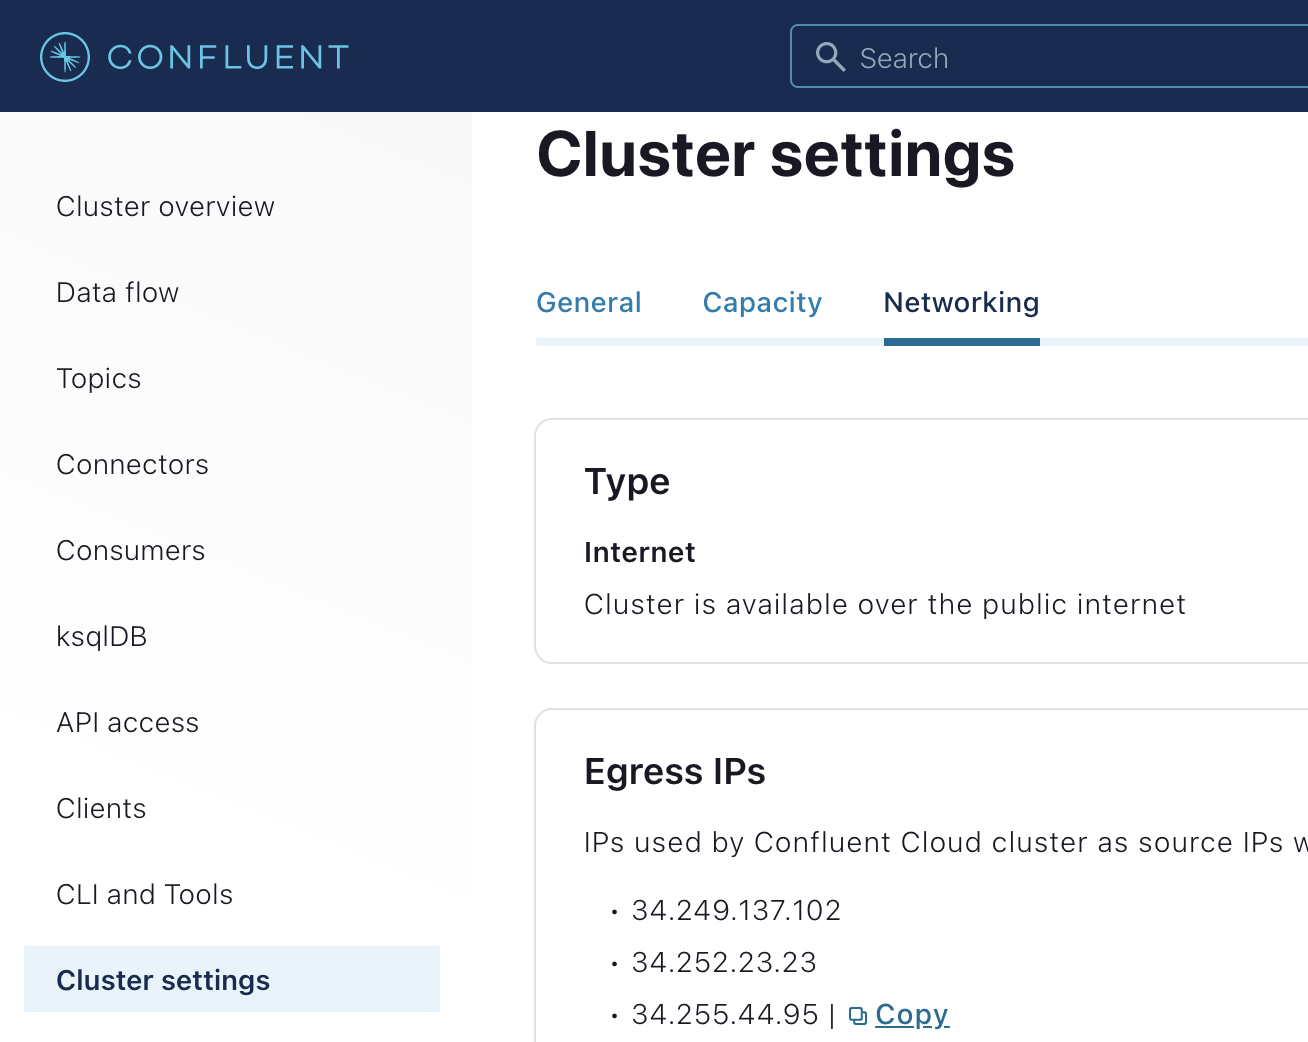
Keep this tab open for future reference: you will need to copy these IP addresses into the Atlas cluster in Step 2.
Step 2: Set Up the Source MongoDB Atlas Cluster
For a detailed guide on creating your own MongoDB Atlas cluster, see the Getting Started with Atlas tutorial. For the purposes of this article, we have created an M10 MongoDB Atlas cluster using the AWS cloud in the us-east-1 (Virginia) data center to be used as the source, and an M10 MongoDB Atlas cluster using the AWS cloud in the eu-west-1 (Ireland) data center to be used as the sink.
Once your clusters are created, you will need to configure two settings in order to make a connection: database access and network access.
Network Access
You have two options for allowing secure network access from Confluent Cloud to MongoDB Atlas: You can use AWS PrivateLink, or you can secure the connection by allowing only specific IP connections from Confluent Cloud to your Atlas cluster. In this article, we cover securing via IPs. For information on setting up using PrivateLink, read the article Using the Fully Managed MongoDB Atlas Connector in a Secure Environment.
To accept external connections in MongoDB Atlas via specific IP addresses, launch the “IP Access List” entry dialog under the Network Access menu. Here you add all the IP addresses that were listed in Confluent Cloud from Step 1.
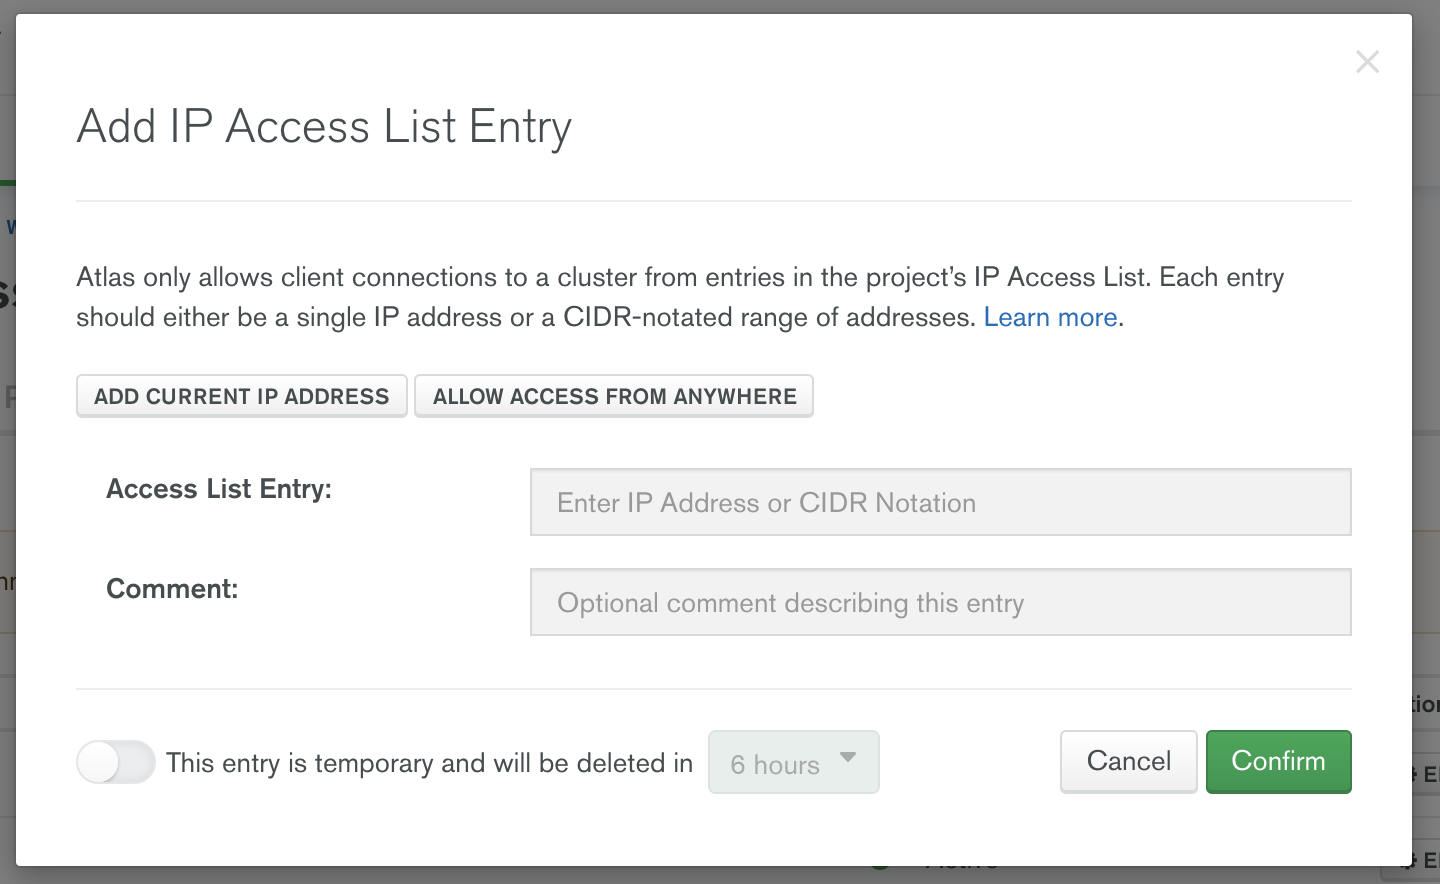
Once all the egress IPs from Confluent Cloud are added, you can configure the user account that will be used to connect from Confluent Cloud to MongoDB Atlas. Configure user authentication in the Database Access menu.
Database Access
You can authenticate to MongoDB Atlas using username/password, certificates, or AWS identity and access management (IAM) authentication methods. To create a username and password that will be used for connection from Confluent Cloud, select the “+ Add new Database User” option from the Database Access menu.
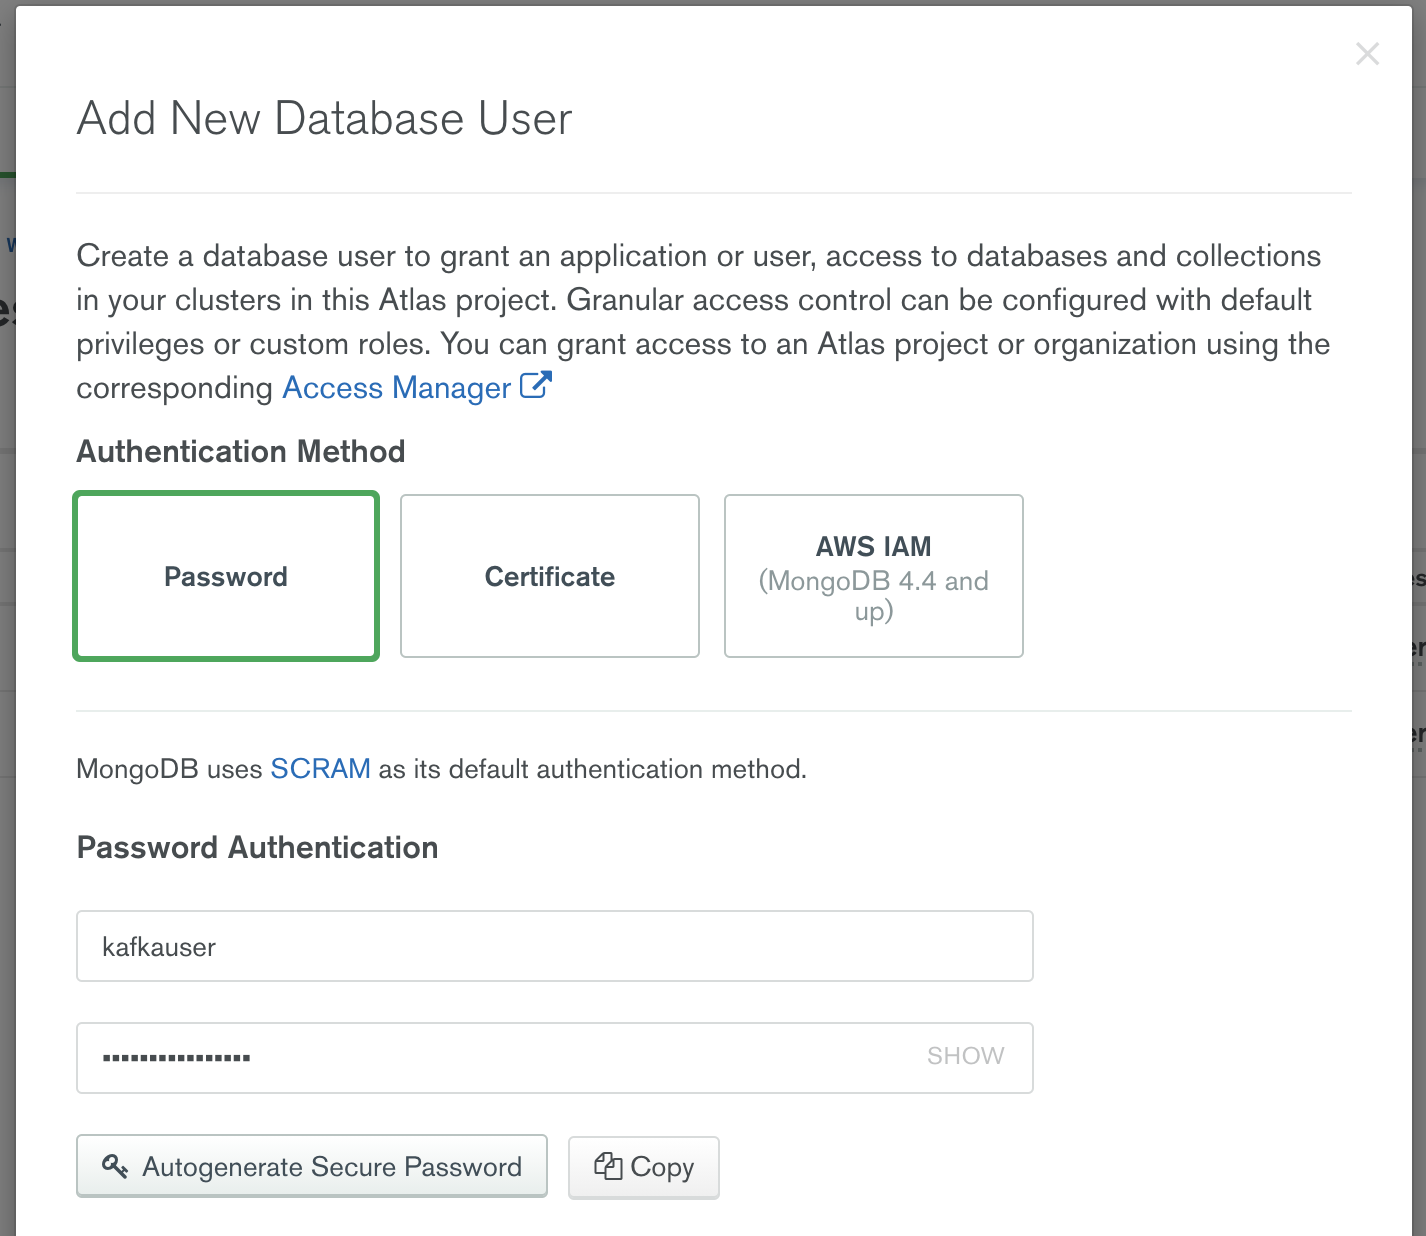
Provide a username and password and make a note of this credential, because you will need it in Step 3 and Step 4 when you configure the MongoDB Atlas source and sink connectors in Confluent Cloud.
Note: In this article we are creating one credential and using it for both the MongoDB Atlas source and MongoDB sink connectors. This is because both of the clusters used in this article are from the same Atlas project.
Now that the Atlas cluster is created, the Confluent Cloud egress IPs are added to the MongoDB Atlas Allow list, and the database access credentials are defined, you are ready to configure the MongoDB Atlas source and MongoDB Atlas sink connectors in Confluent Cloud.
Step 3: Configure the Atlas Source
Now that you have two clusters up and running, you can configure the MongoDB Atlas connectors in Confluent Cloud. To do this, select “Connectors” from the menu, and type “MongoDB Atlas” in the Filters textbox.
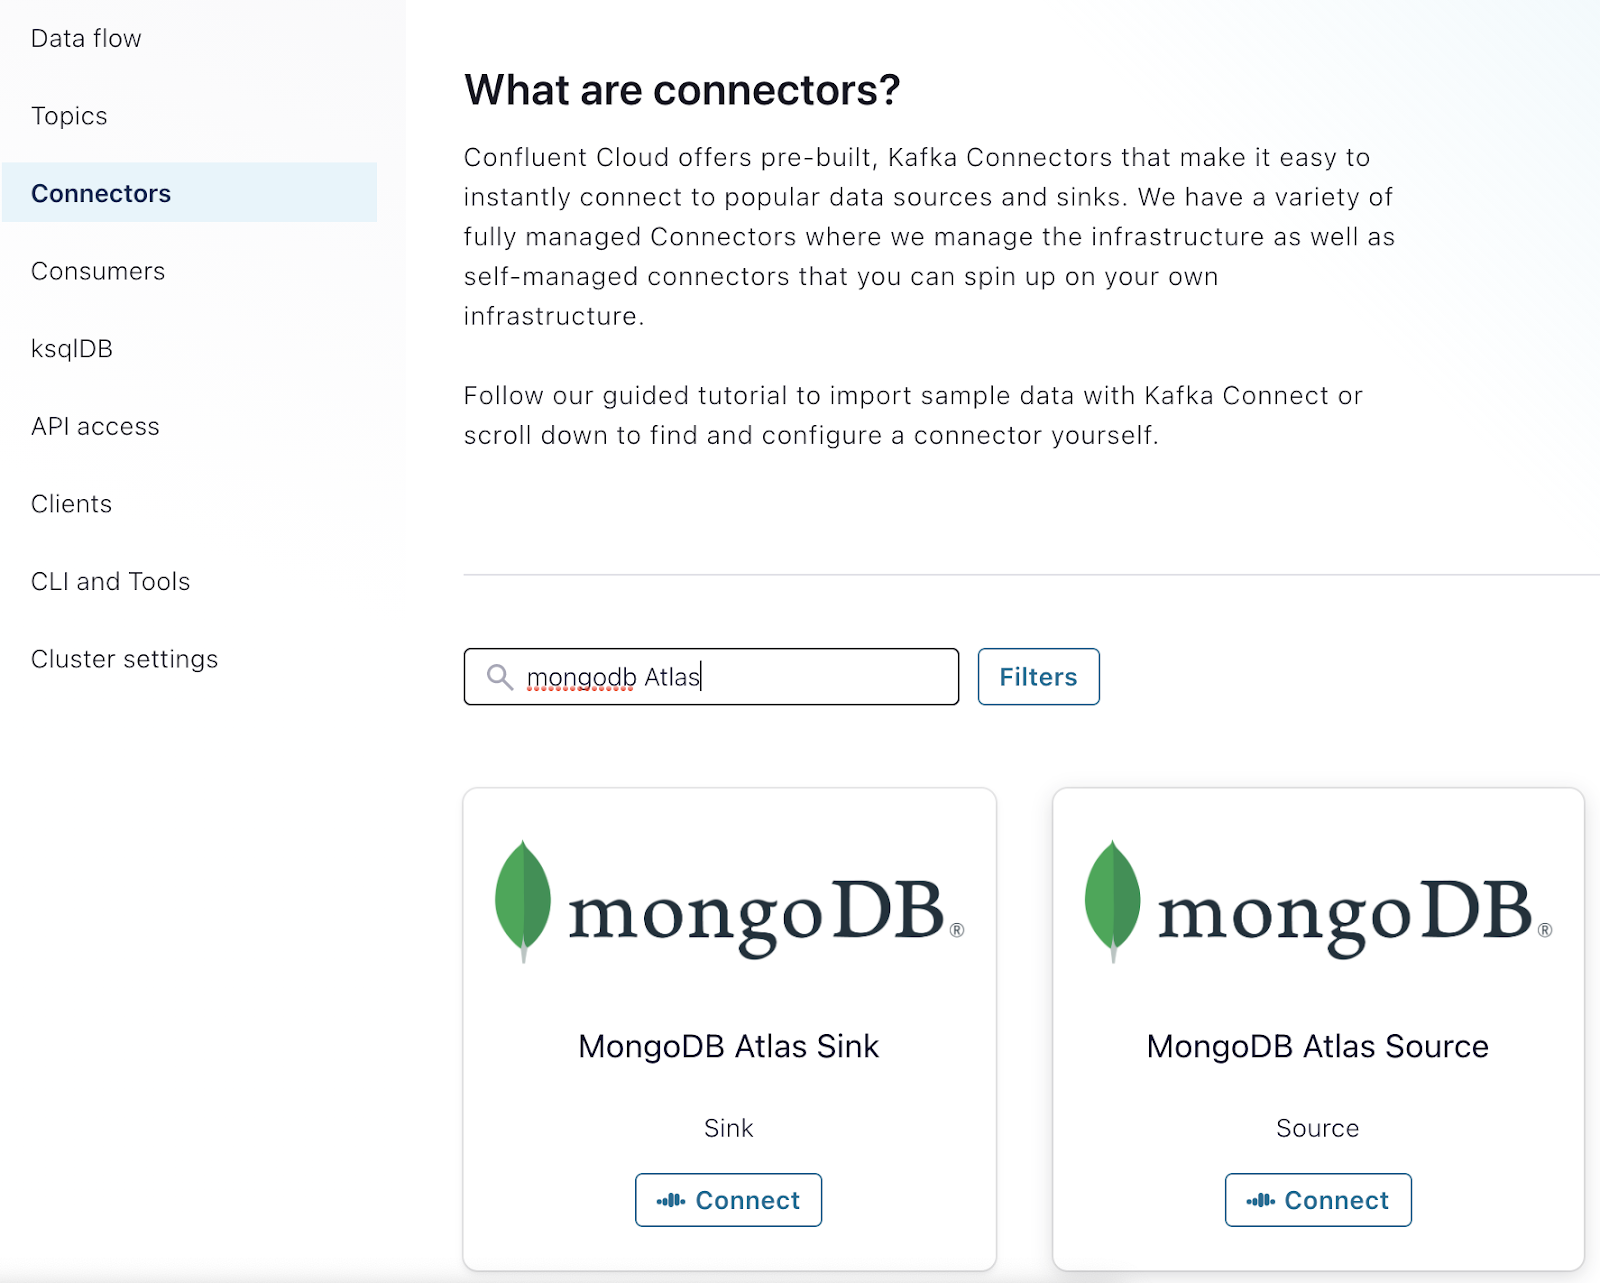
Note: When configuring MongoDB Atlas source And MongoDB Atlas sink, you will need the connection host name of your Atlas clusters. You can obtain this host name from the MongoDB connection string. An easy way to do this is by clicking on the "Connect" button for your cluster.
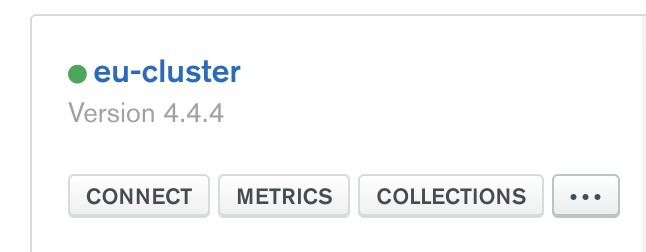
This will launch the Connect dialog. You can choose any of the Connect options. For purposes of illustration, if you click on “Connect using MongoDB Compass.” you will see the following:

The highlighted part in the above figure is the connection hostname you will use when configuring the source and sink connectors in Confluent Cloud.
Configuring the MongoDB Atlas Source Connector
Selecting “MongoDbAtlasSource” from the list of Confluent Cloud connectors presents you with several configuration options.
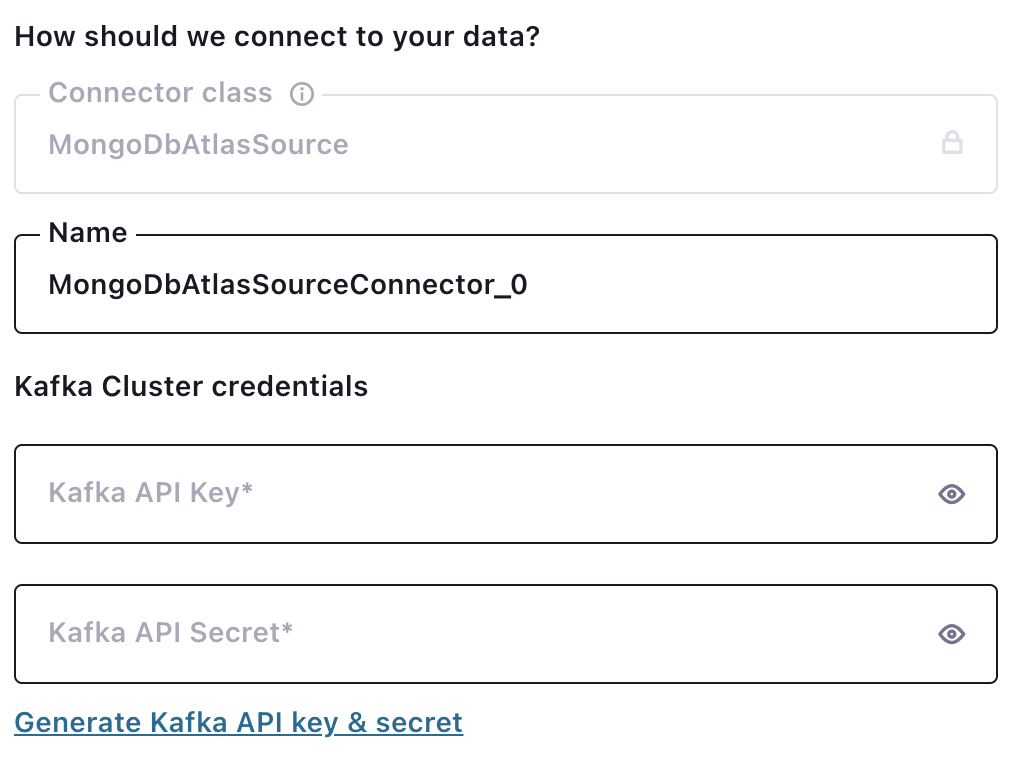
The “Kafka Cluster credentials” choice is an API-based authentication that the connector will use for authentication with the Kafka broker. You can generate a new API key and secret by using the hyperlink.
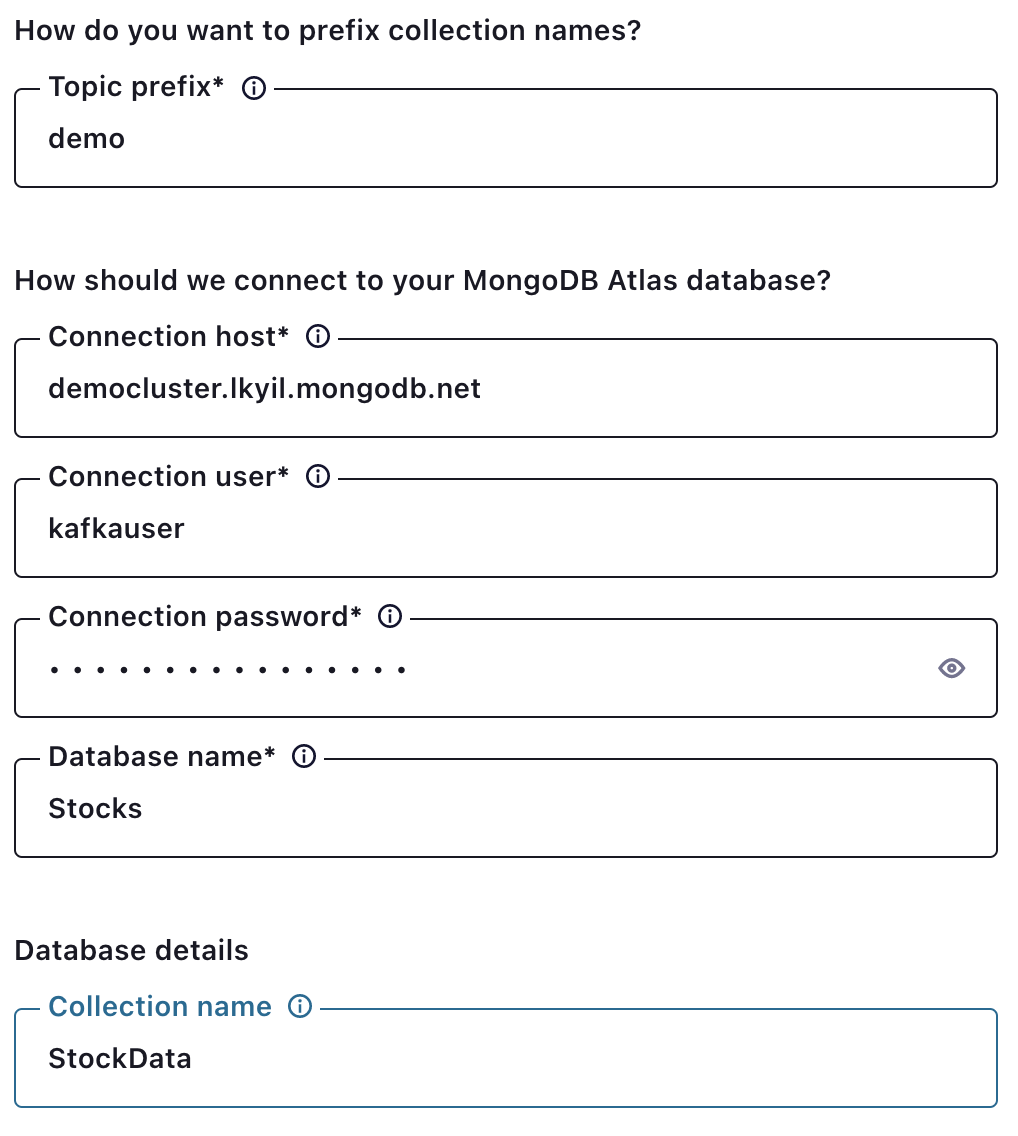
Recall that the connection host is obtained from the MongoDB connection string. Details on how to find this are described at the beginning of this section.
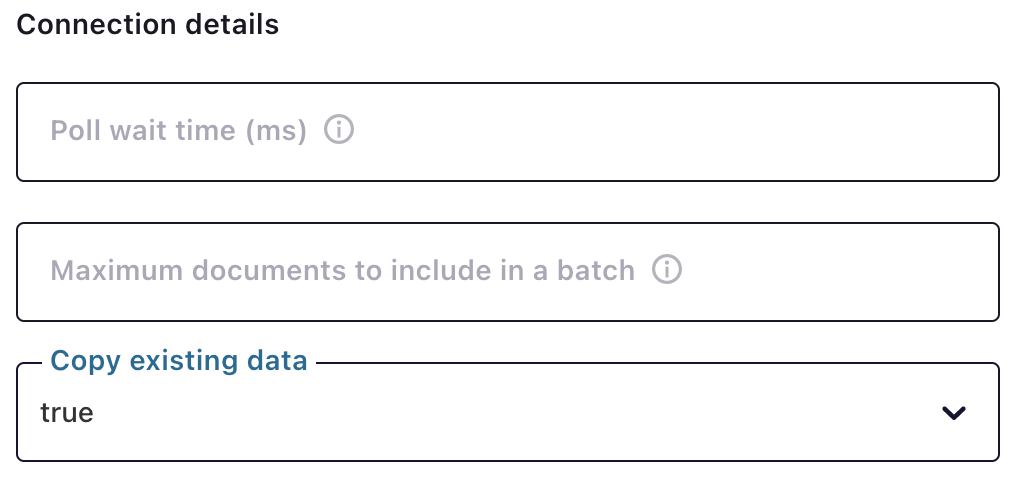
The “Copy existing data” choice tells the connector upon initial startup to copy all the existing data in the source collection into the desired topic. Any changes to the data that occur during the copy process are applied once the copy is completed.
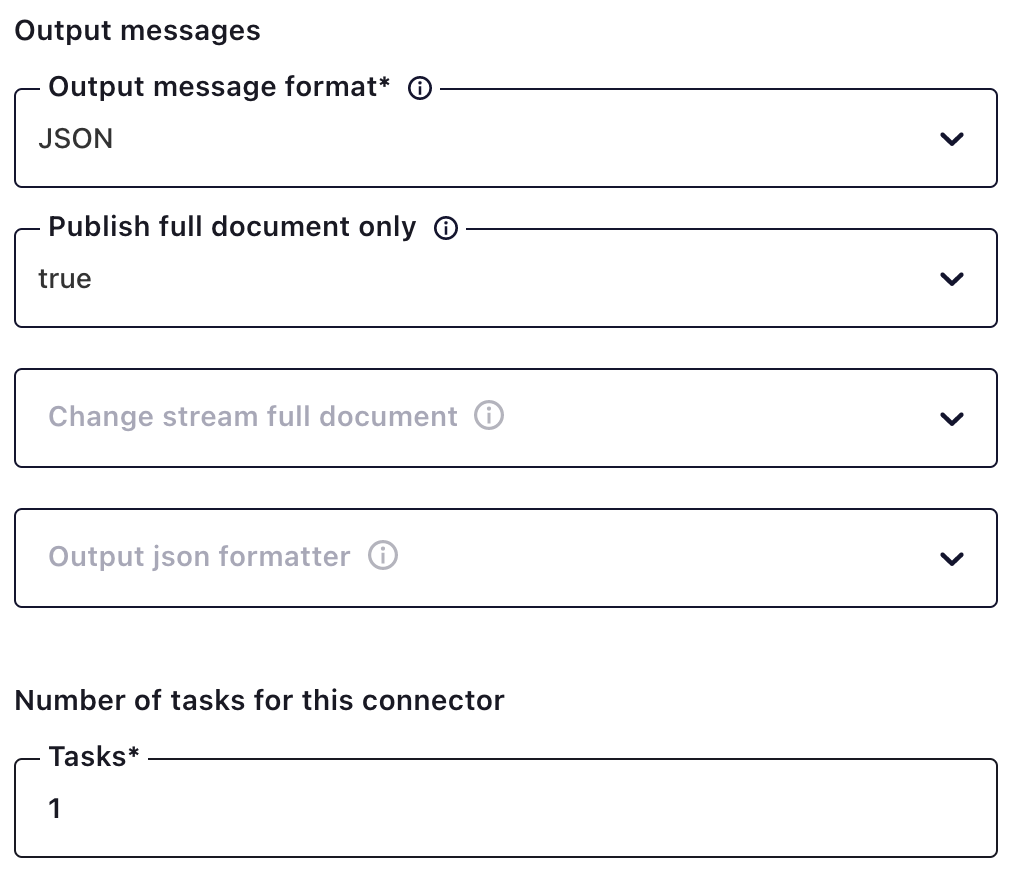
By default, messages from the MongoDB source are sent to the Kafka topic as strings. The connector supports outputting messages in formats such as JSON and AVRO.
Recall that the MongoDB source connector reads change stream data as events. Change stream event metadata is wrapped in the message sent to the Kafka topic. If you want just the message contents, you can set the “Publish full document only” output message to true.
Note: For source connectors, the number of tasks will always be “1”: otherwise you will run the risk of duplicate data being written to the topic, because multiple workers would effectively be reading from the same change stream event stream. To scale the source, you could create multiple source connectors and define a pipeline that looks at only a portion of the collection. Currently this capability for defining a pipeline is not yet available in Confluent Cloud.
Step 4: Generate Test Data
At this point, you could run your python data generator application and start inserting data into the Stocks.StockData collection at your source. This will cause the connector to automatically create the topic “demo.Stocks.StockData.” To use the generator, git-clone the stockgenmongo folder in the above-referenced repository and launch the data generation as follows:
python stockgen.py -c "<
Where the MongoDB connection URL is the full connection string obtained from the Atlas source cluster. An example connection string is as follows: mongodb+srv://kafkauser:kafkapassword123@democluster.lkyil.mongodb.net
Note: You might need to pip-install pymongo and dnspython first.
If you do not wish to use this data generator, you will need to create the Kafka topic first before configuring the MongoDB Atlas sink. You can do this by using the Add a Topic dialog in the Topics tab of the Confluent Cloud administration portal.
Step 5: Configuring the MongoDB Atlas Sink
Selecting “MongoDB Atlas Sink” from the list of Confluent Cloud connectors will present you with several configuration options.

After you pick the topic to source data from Kafka, you will be presented with additional configuration options.
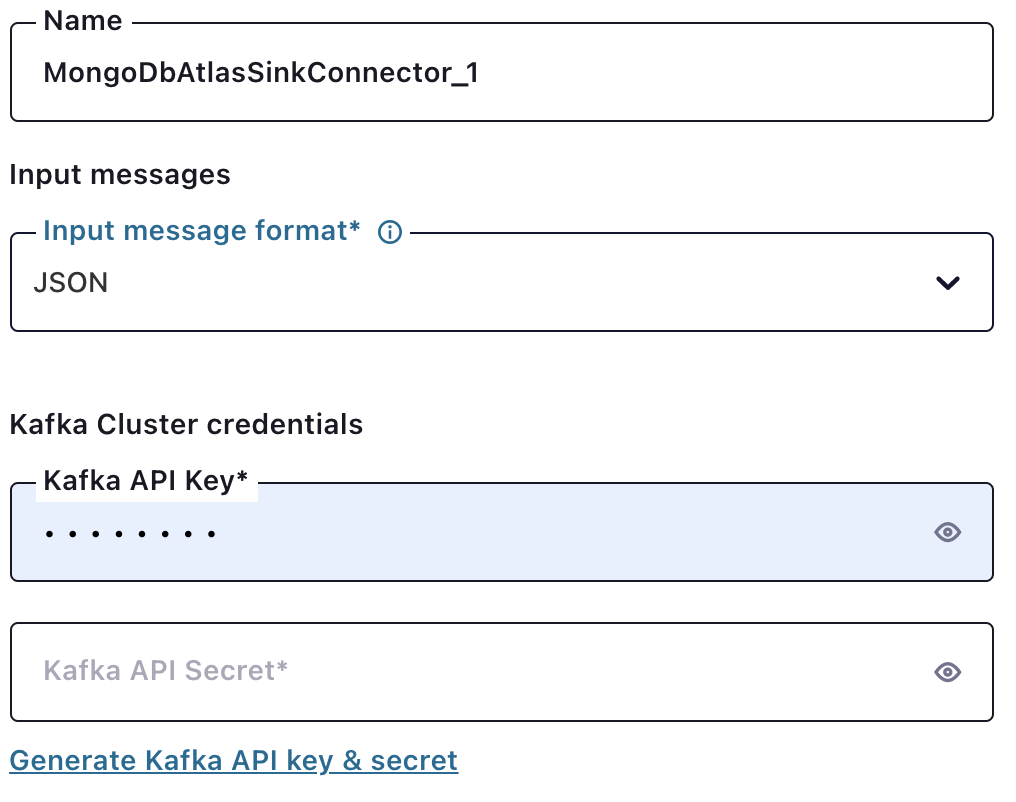
Because you chose to write your data in the source by using JSON, you need to select “JSON” in the input message format. The Kafka API key is an API key and secret used for connector authentication with Confluent Cloud.
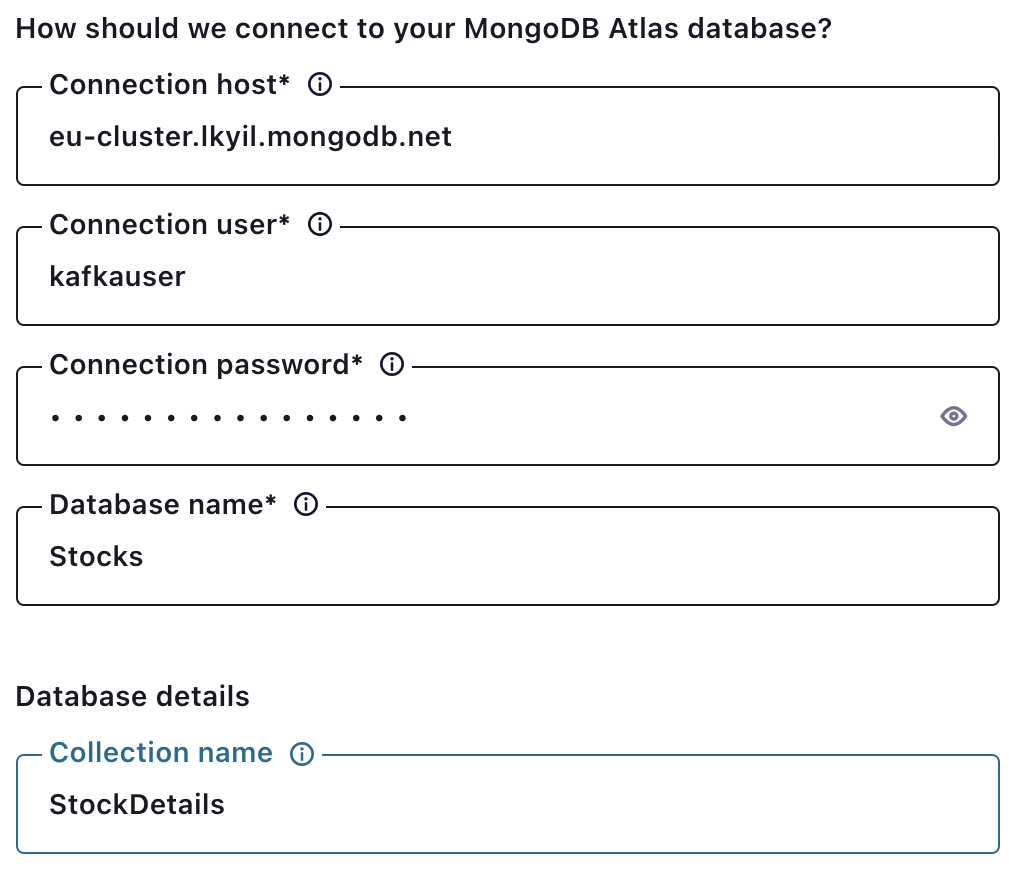
Recall that you obtain the connection host from the MongoDB connection string. Details on how to find this are described previously at the beginning of Step 3.
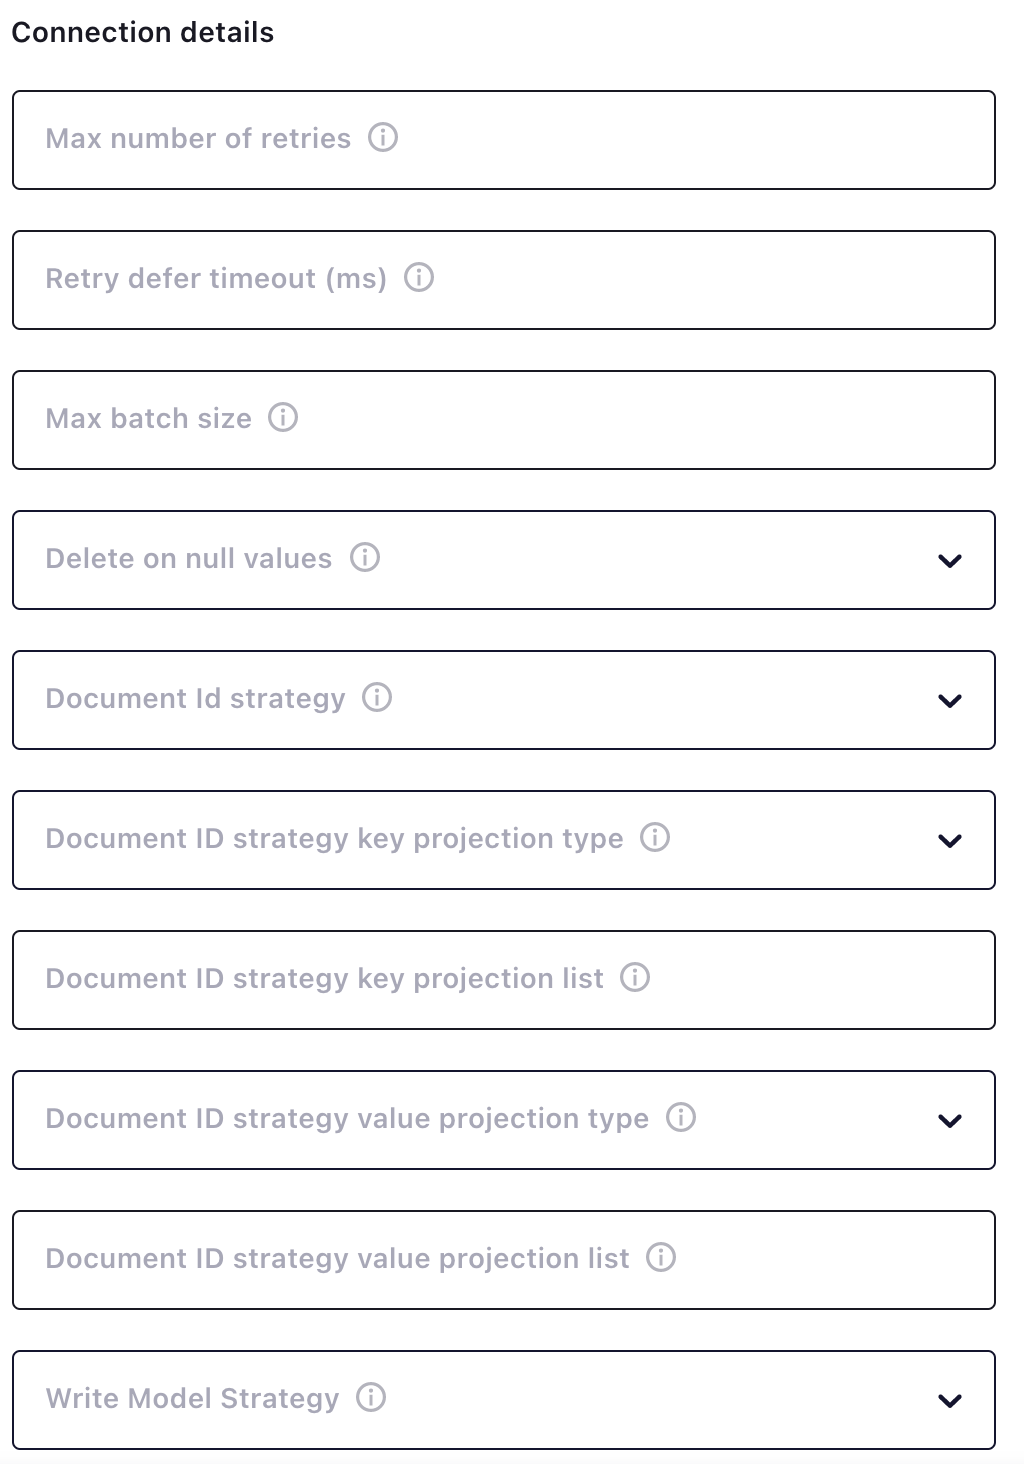
The “Connection details” section allows you to define behavior such as creating a new document for every topic message or updating an existing document based upon a value in the message. These behaviors are known as document ID and write model strategies. For more information, check out the MongoDB Connector for Apache Kafka sink documentation.

If order of the data in the sink collection is not important, you could spin up multiple tasks to gain an increase in write performance.
Step 6: Verify Your Data Arrived at the Sink
You can verify the data has arrived at the sink via the Atlas web interface. Navigate to the collection data via the Collections button.
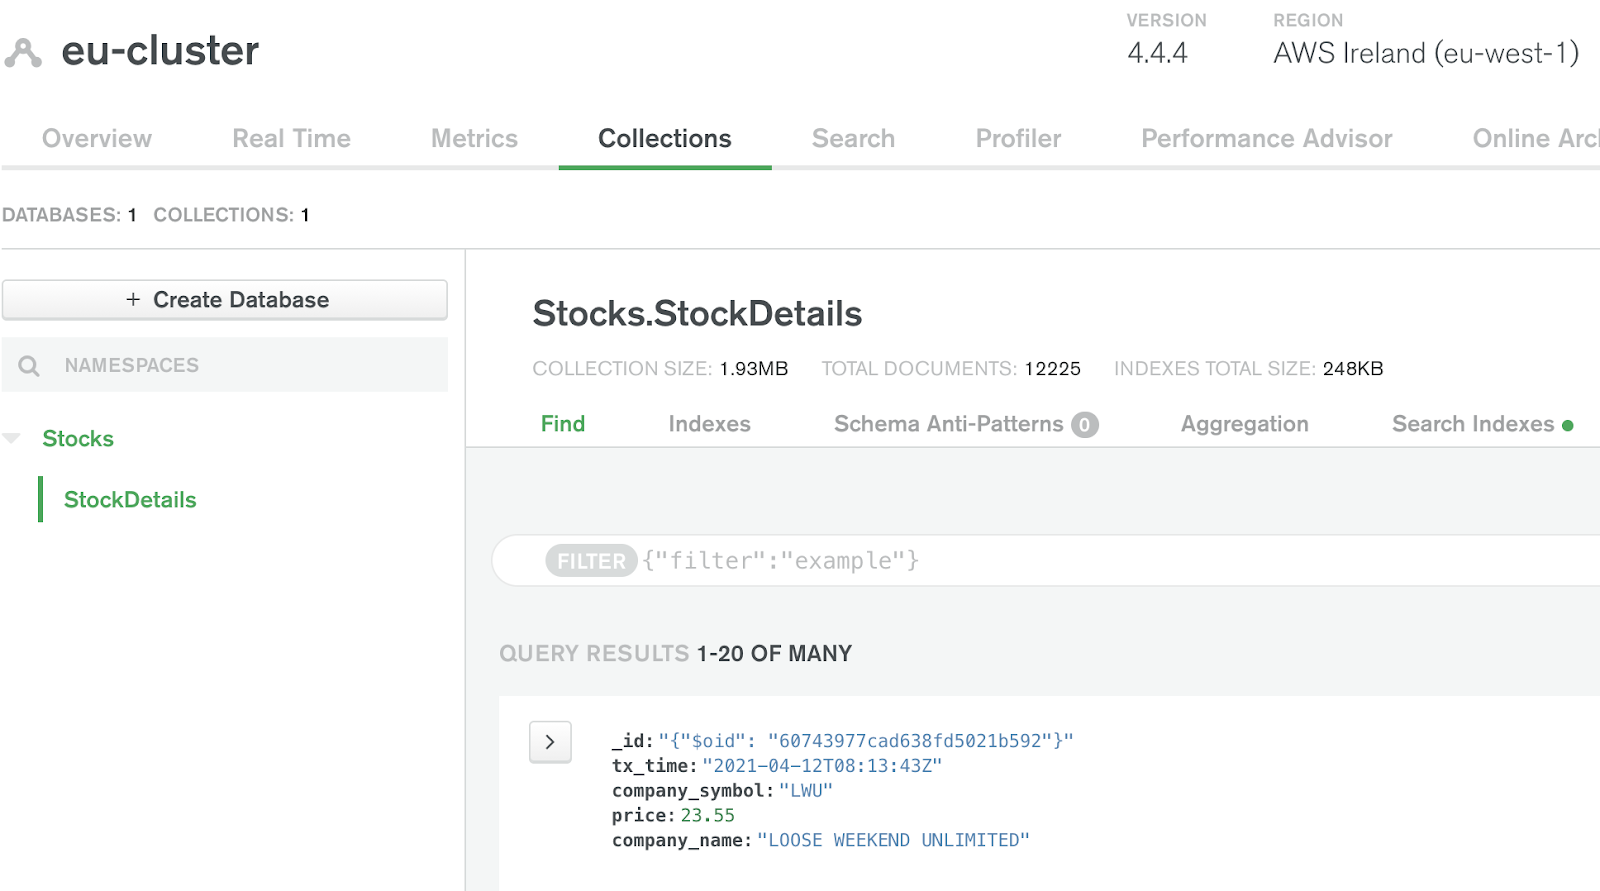
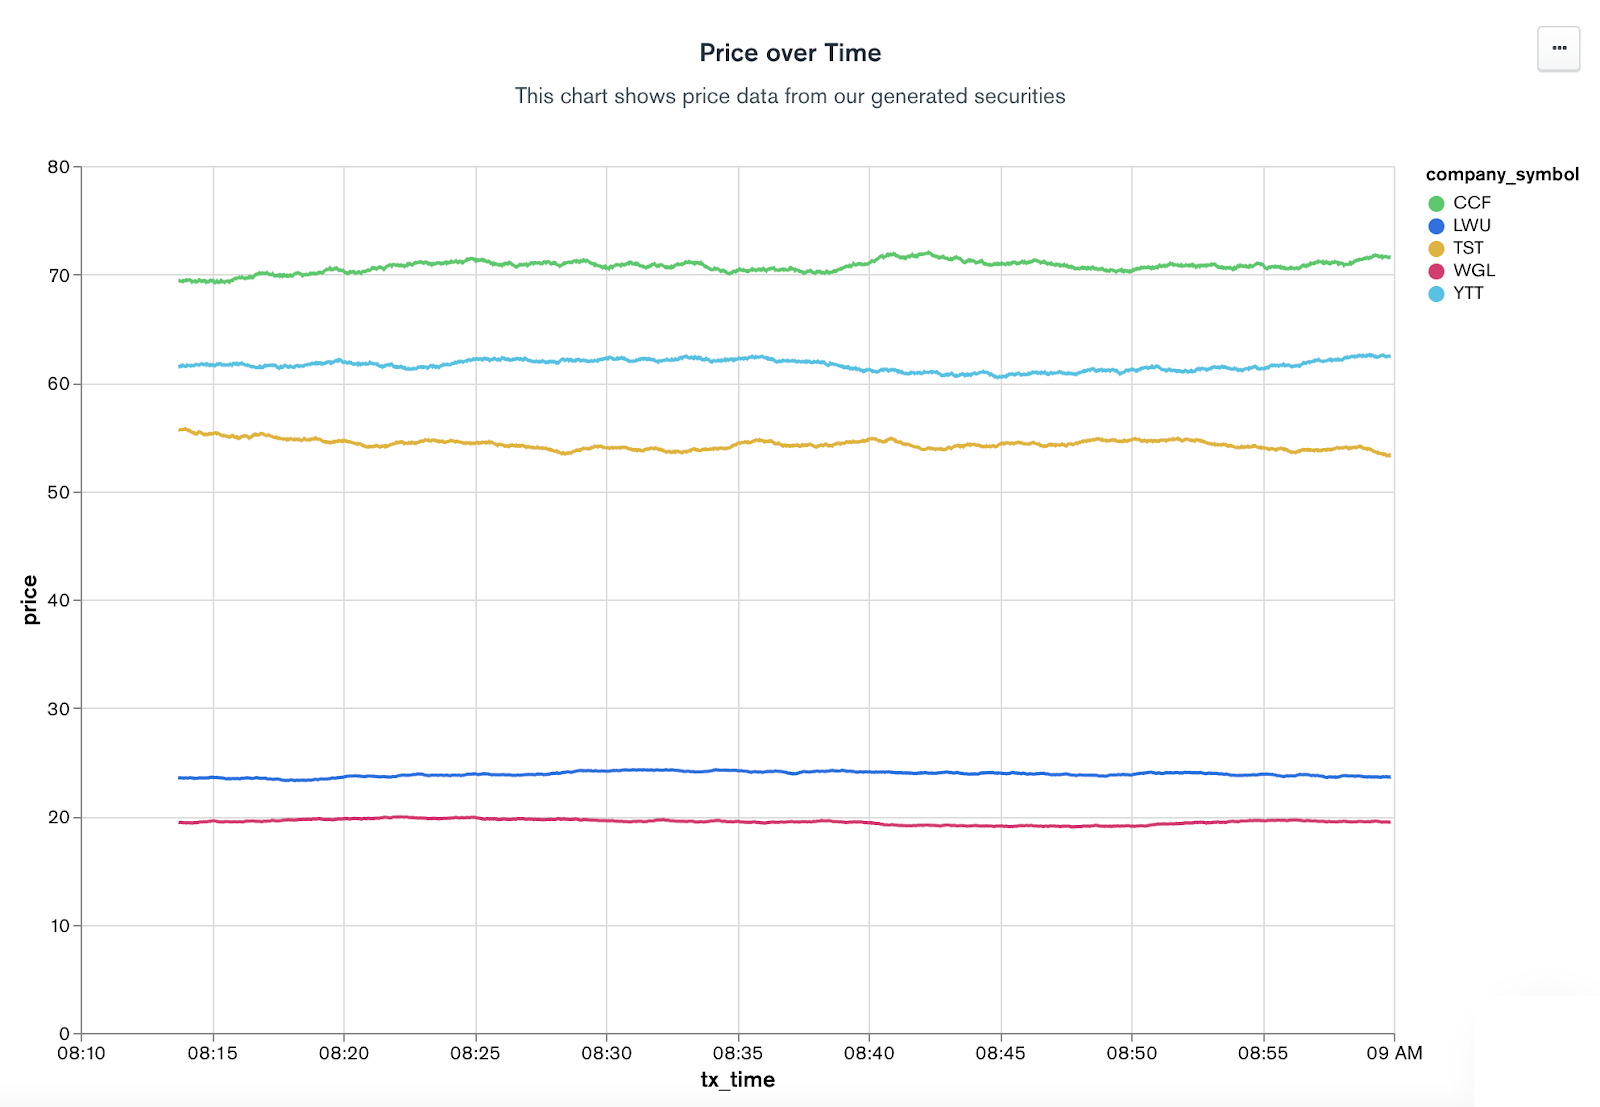
Now that your data is in Atlas, you can leverage many of the Atlas platform capabilities such as Atlas Search, Atlas Online Archive for easy data movement to low-cost storage, and MongoDB Charts for point-and-click data visualization. Here is a chart created in about one minute using the data generated from the sink cluster.
Summary
Apache Kafka and MongoDB help power many strategic business use cases, such as modernizing legacy monolithic systems, single views, batch processing, and event-driven architectures, to name a few. Today, Confluent and MongoDB Cloud and MongoDB Atlas provide fully managed solutions that enable you to focus on the business problem you are trying to solve versus spinning your tires in infrastructure configuration and maintenance.