Writing an API With MongoDB in Rust


Rate this tutorial


You’ve chosen to write an API that leverages MongoDB in Rust — memory management, lifetimes, database pooling, and more! You’ve made a great decision, and I look forward to showing you the basics and the excitement and ease with which you can create the API. I’m going to assume you know how to create a Rust project with
cargo and that you’re somewhat familiar with Cargo.toml and dependency usage in Rust.The MongoDB crate and its documentation come fully detailed and feature-rich, right out of the box (or crate)! The MongoDB crate is located on crates.io.
To add this to your project, go ahead and run
cargo add mongodb.You’ll notice an entry added to
Cargo.toml that looks a bit something like this:1 [dependencies] 2 mongodb = "2.8.1"
Once your MongoDB dependency is declared, we should pull up the documentation to have it by our side as we iterate on this API.
When using the MongoDB driver for Rust, you need to make a decision on which runtime to use. This namely boils down to two options: sync or async.
If you’re developing an API, you likely want an asynchronous runtime, which is what we will be using in this tutorial. By default, MongoDB’s Rust driver ships with
tokio as its runtime, but it can be configured to use async-std.There are such use cases where a blocking runtime (synchronous) can be useful, and the MongoDB Rust driver also provides that.
While we will be using the async runtime, you can choose the sync runtime by defining it in the
Cargo.toml entry:1 mongodb = {version = "2.8.1", features = ["sync"]}
Before we jump into the rest of the dependencies for our project, let’s get the most important dependency set up, if you have not done so already: a MongoDB instance! Lucky for us, we can leverage MongoDB’s Atlas to create our own MongoDB instance.
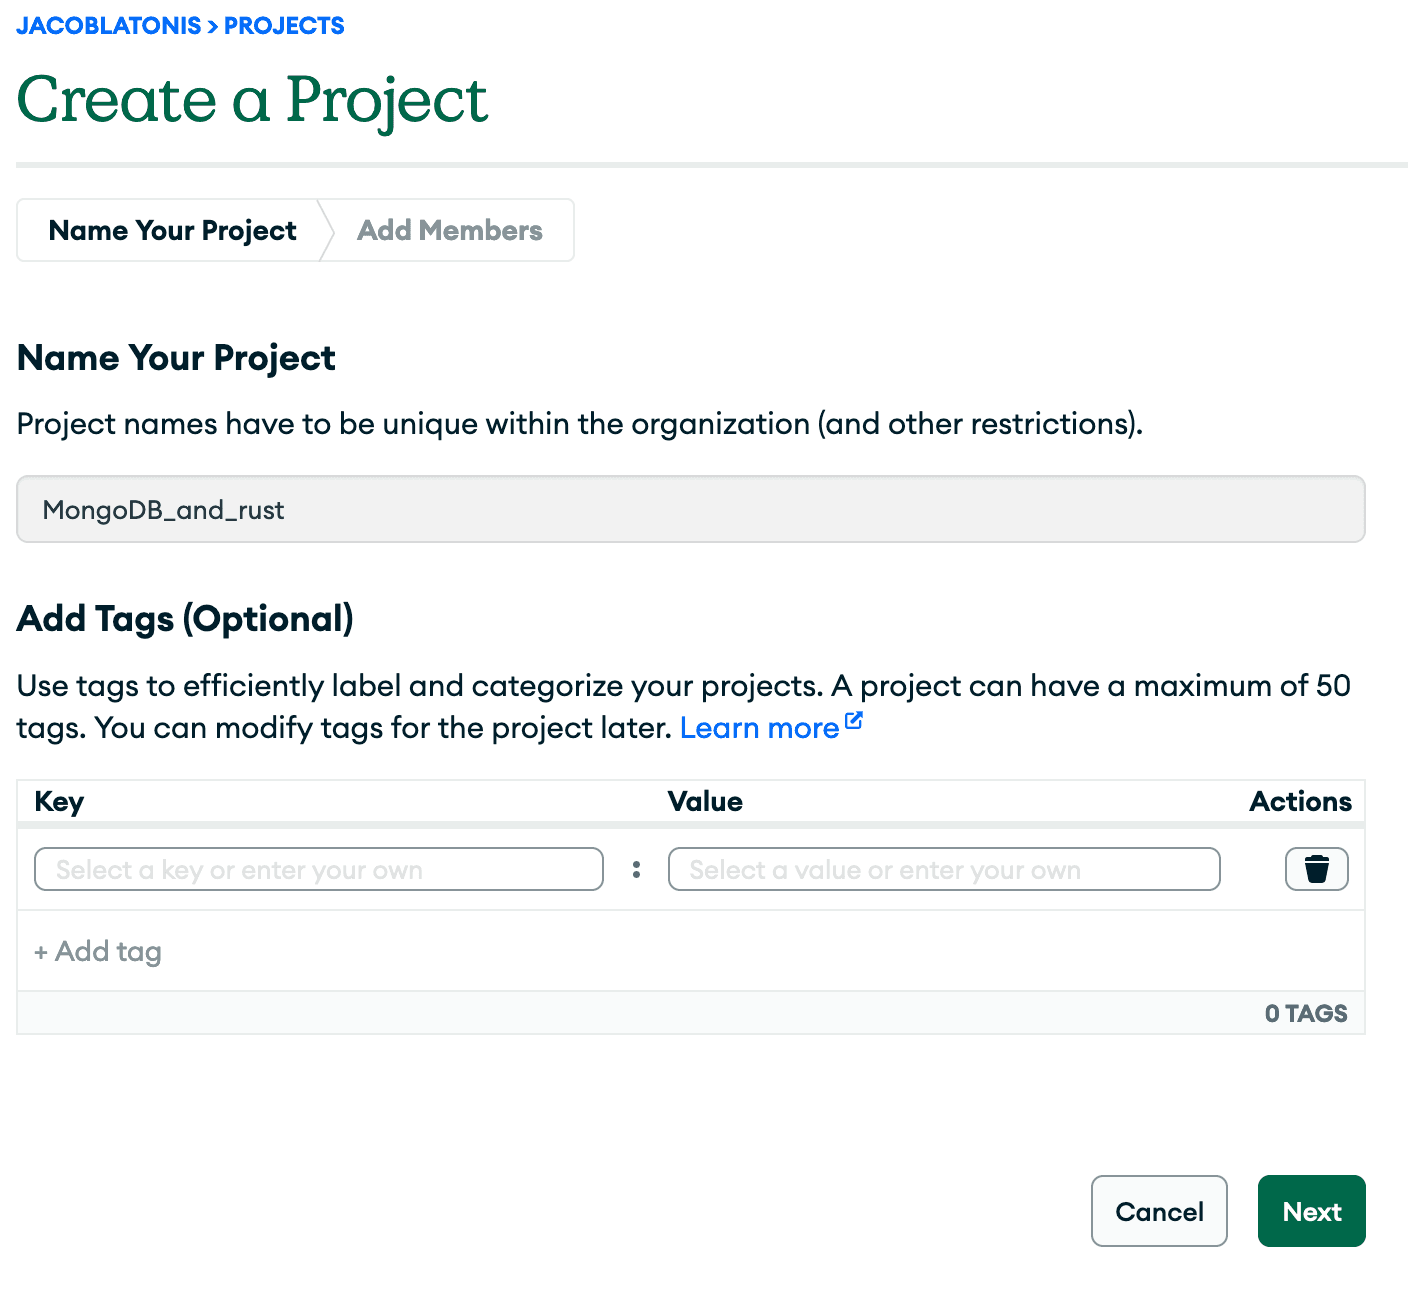
Let’s get started by creating a new project in MongoDB for this API and tutorial.
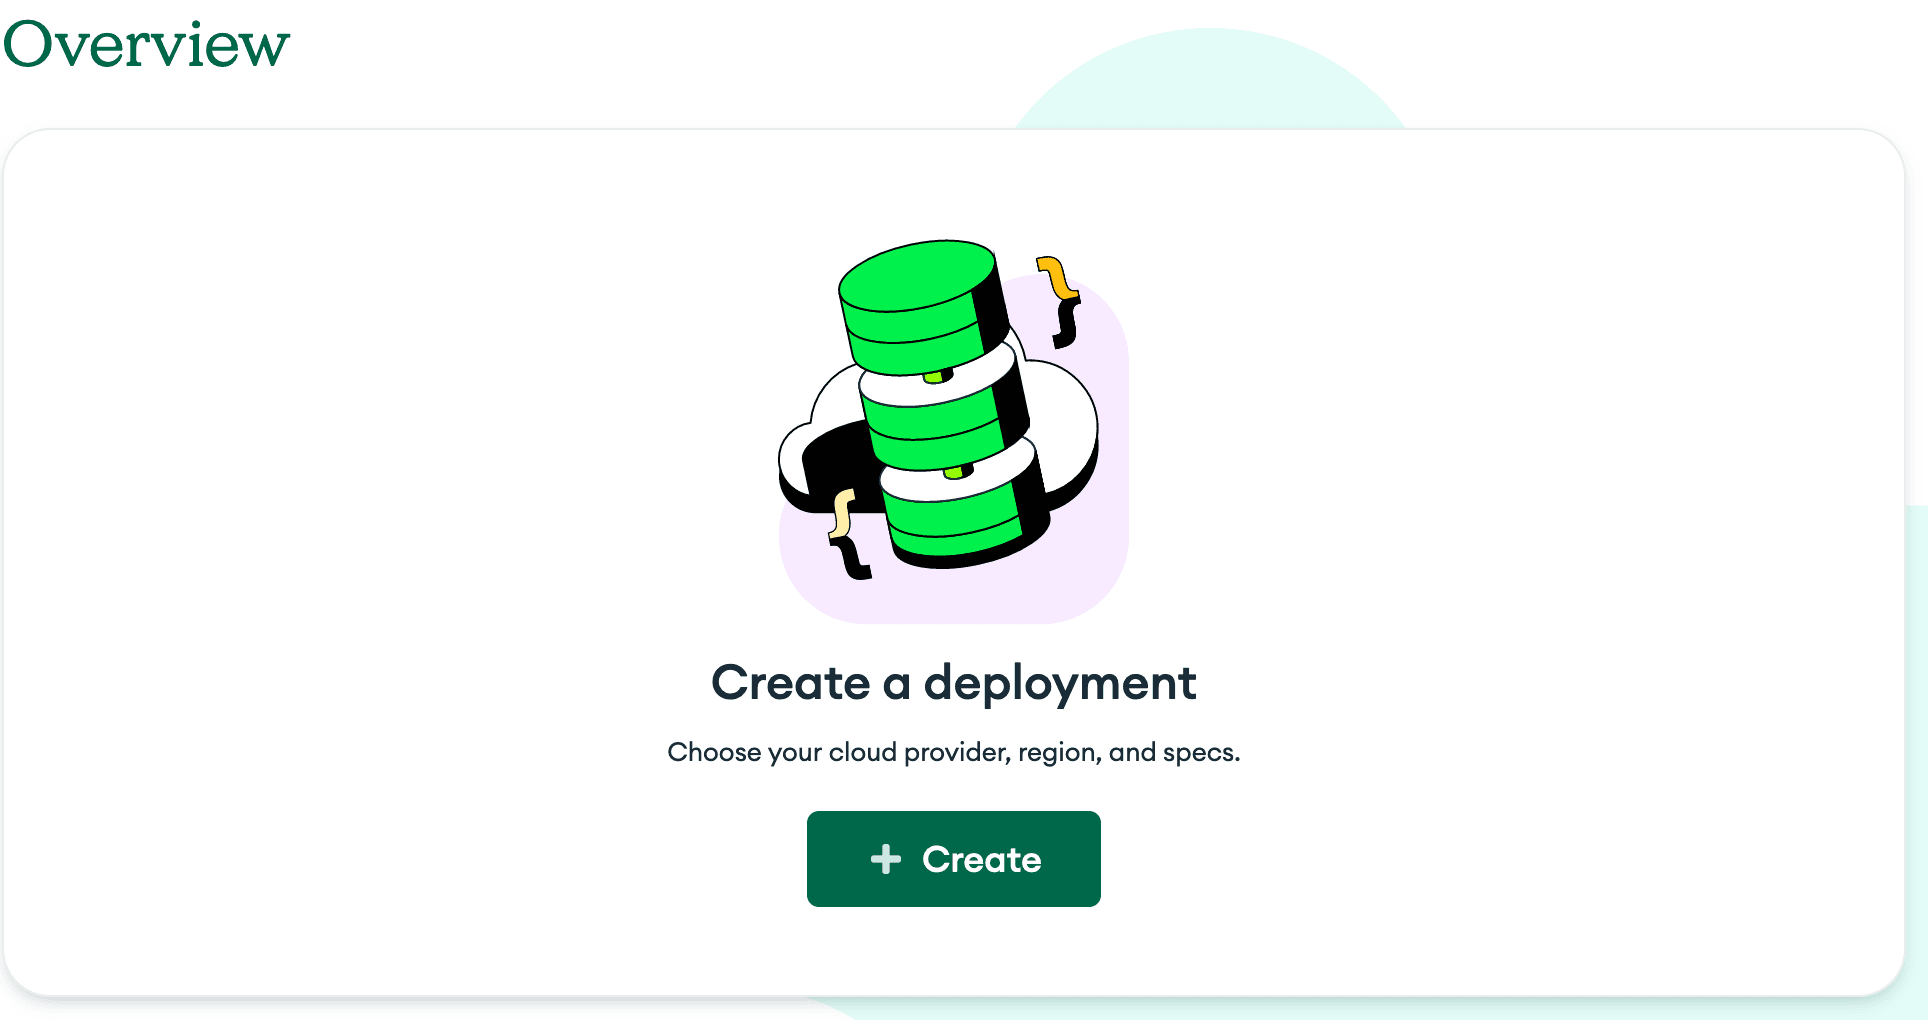
After creating the project, let’s create a deployment to host our actual MongoDB instance.
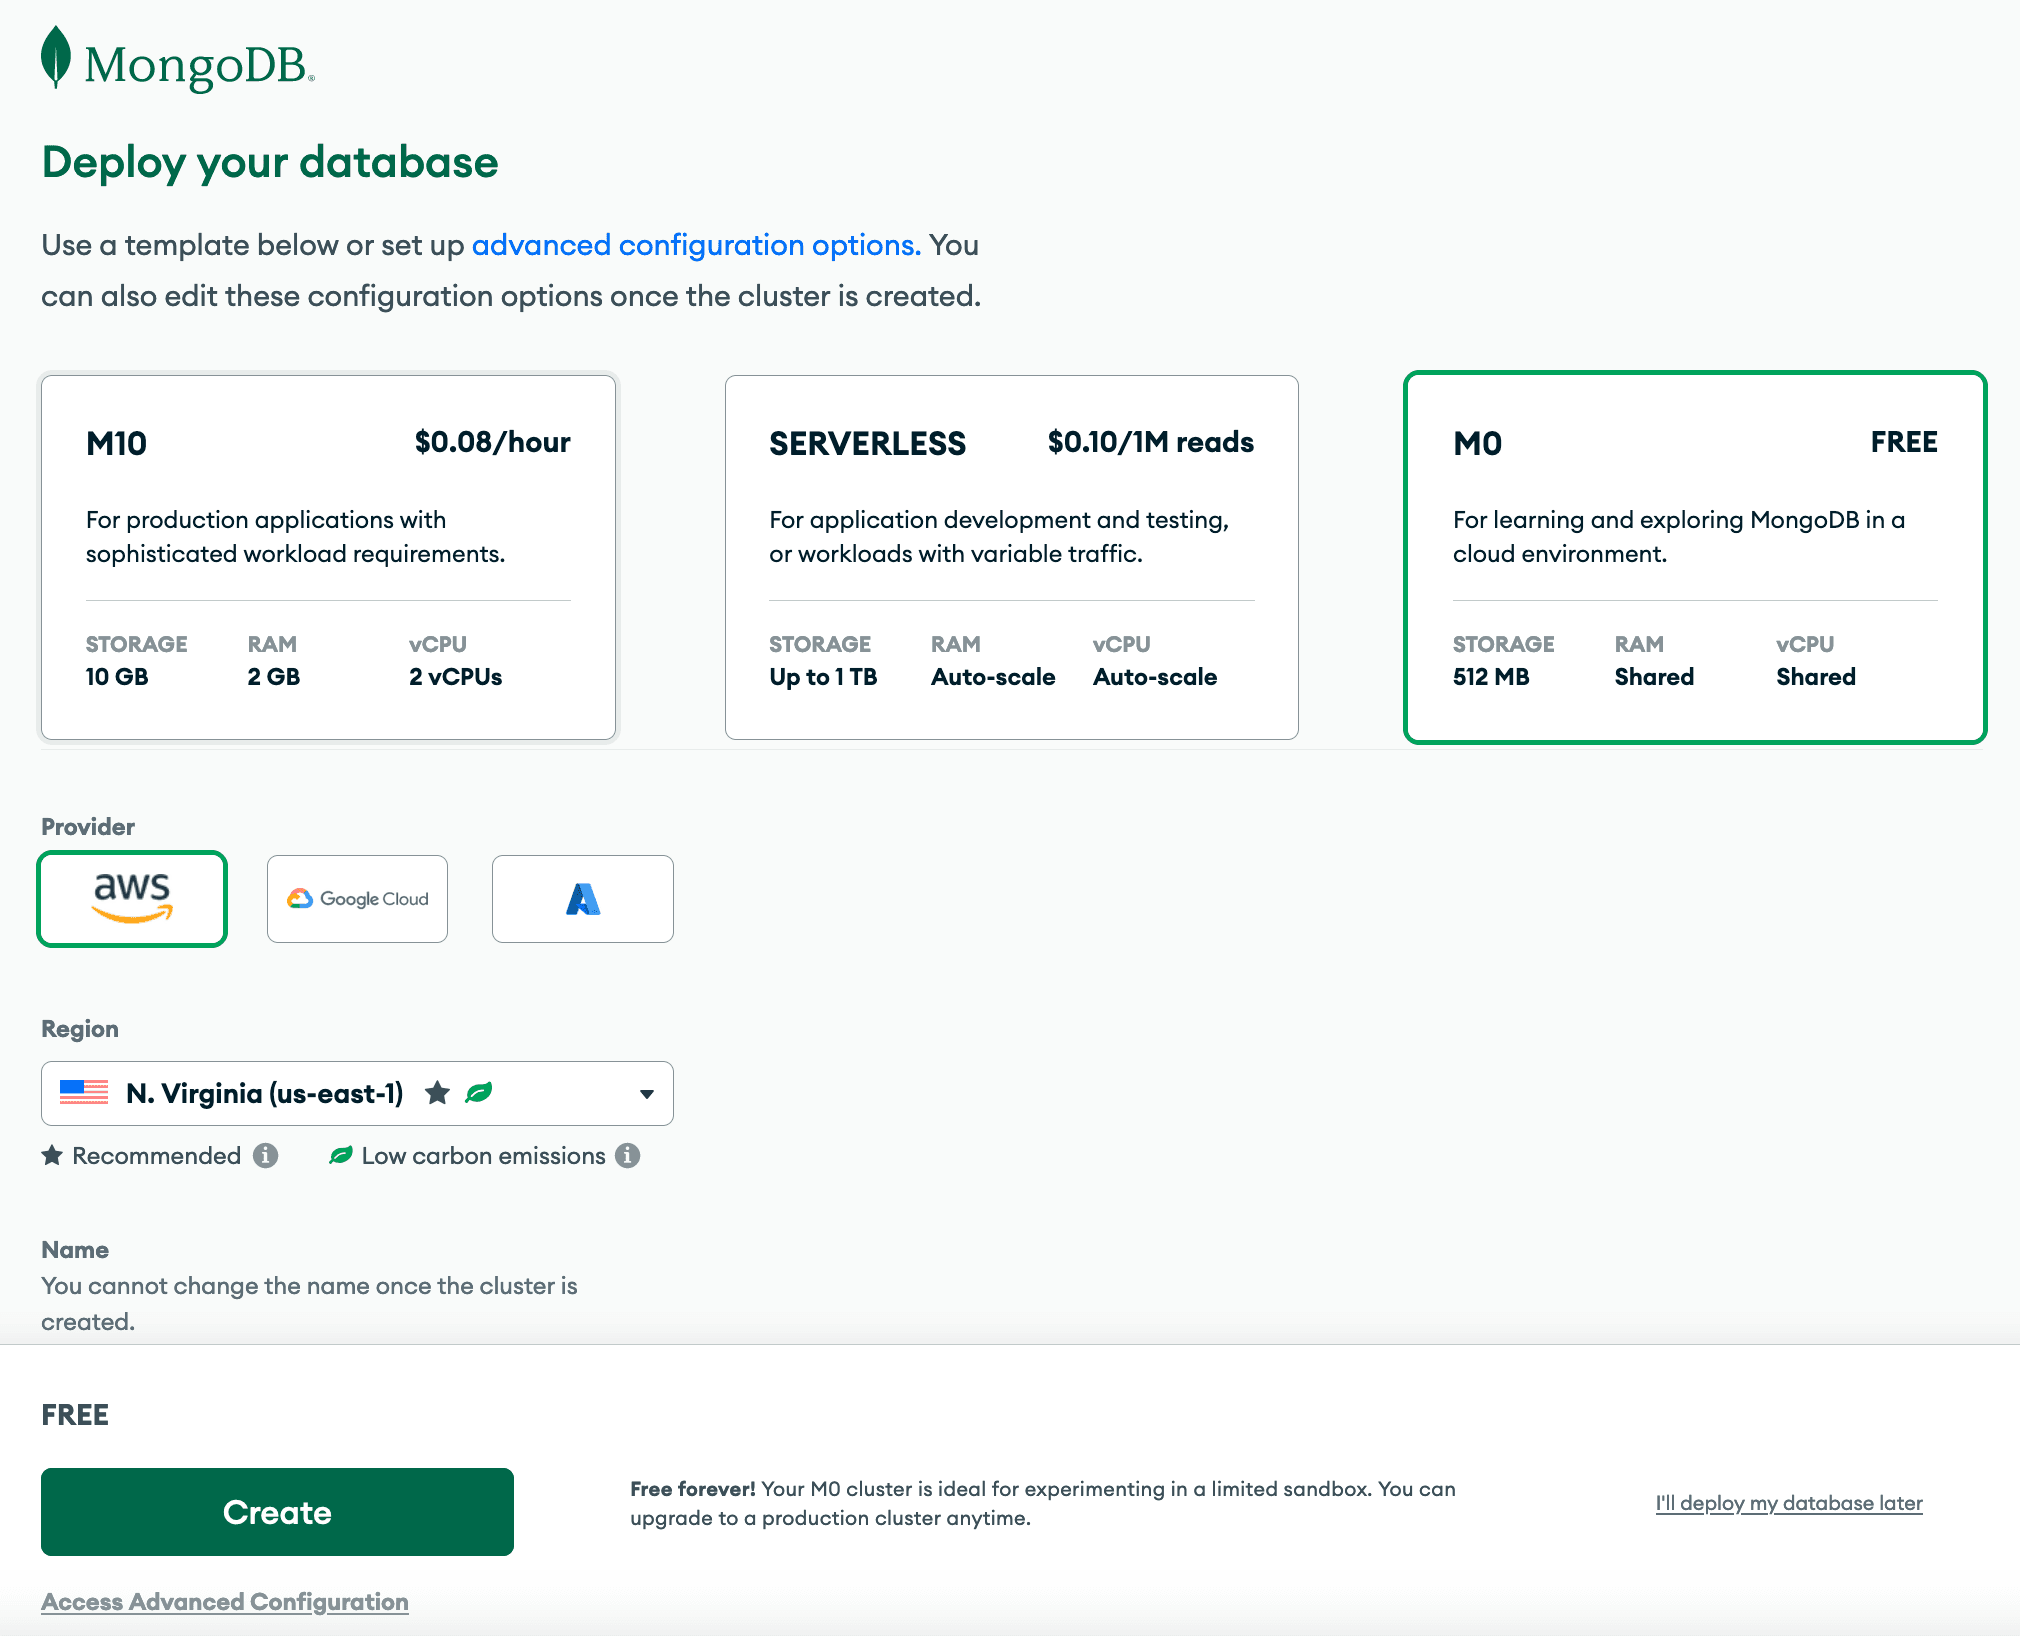
With a deployment, we can select the tier and hosting provider we’d like to use. MongoDB offers the M0 tier, which is perfect for our use of learning and initial development.
Once you’ve got all of that created and walked through the security steps, let’s add some data to our MongoDB instance. I’ve provided some sample data in the GitHub repository. It is named
bread_data.json.We can leverage MongoDB Atlas’ 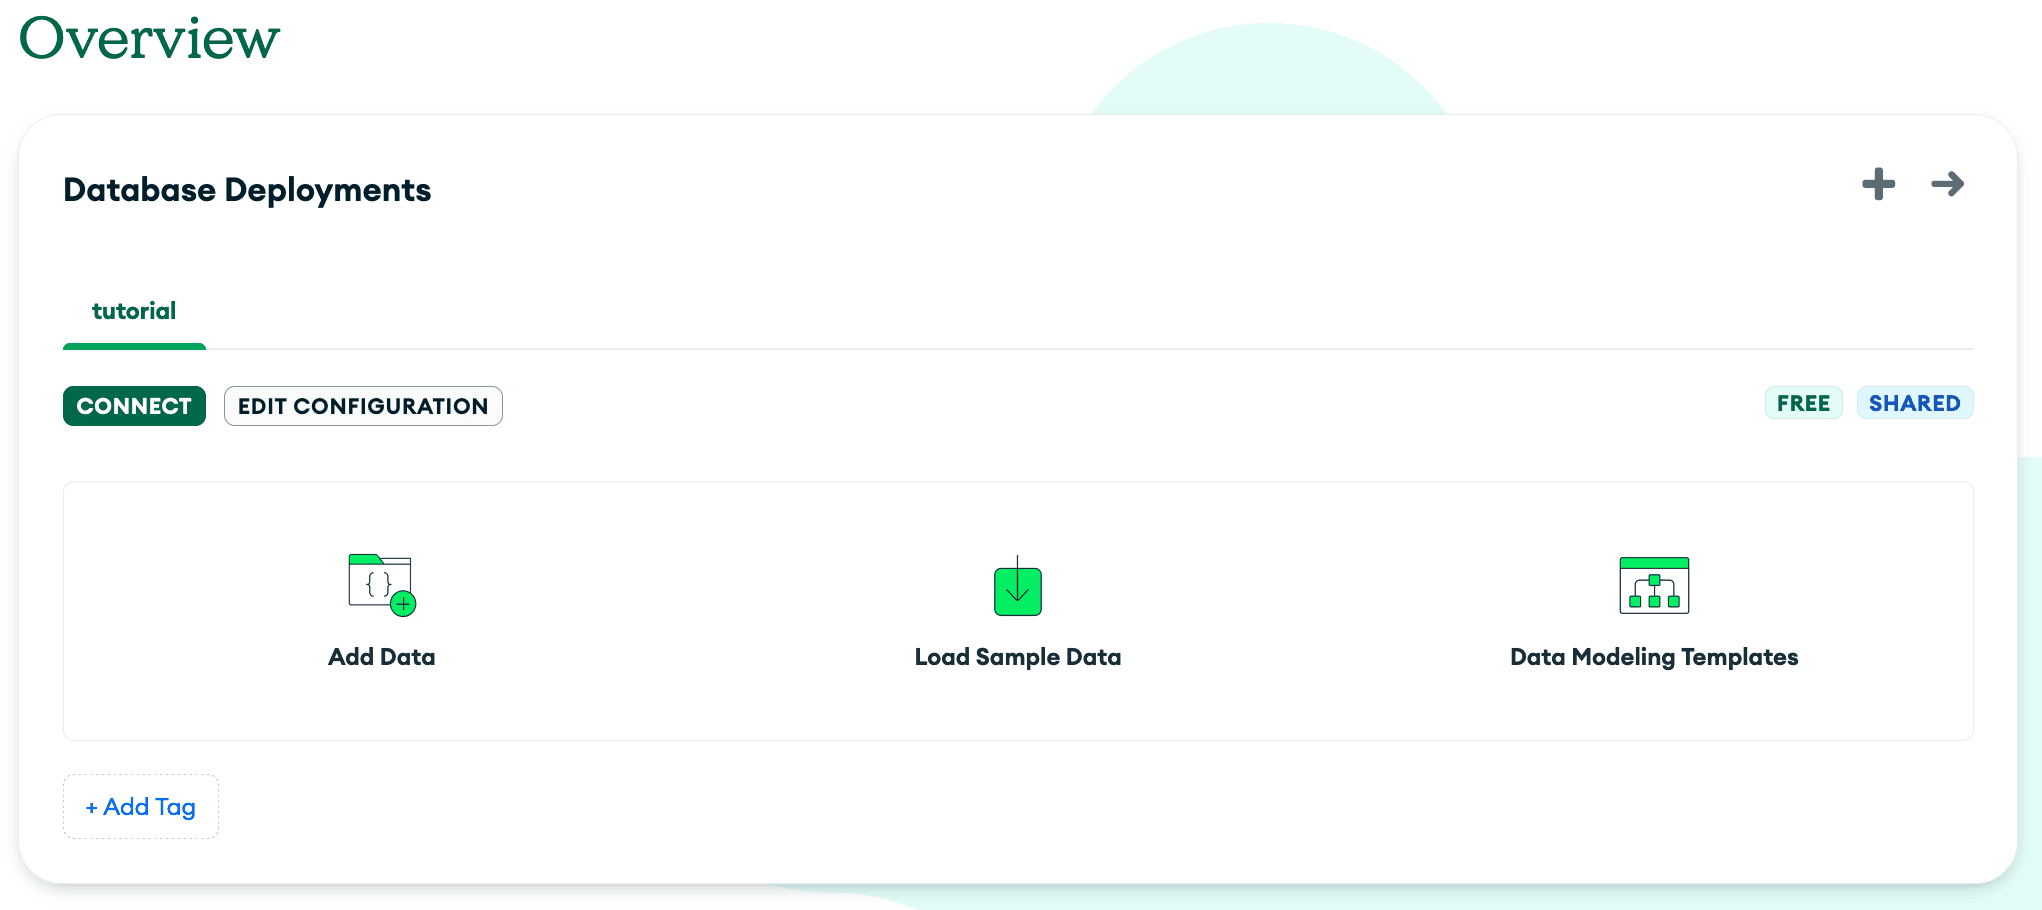
Add Data feature to accomplish this:
Next, we’ll go to 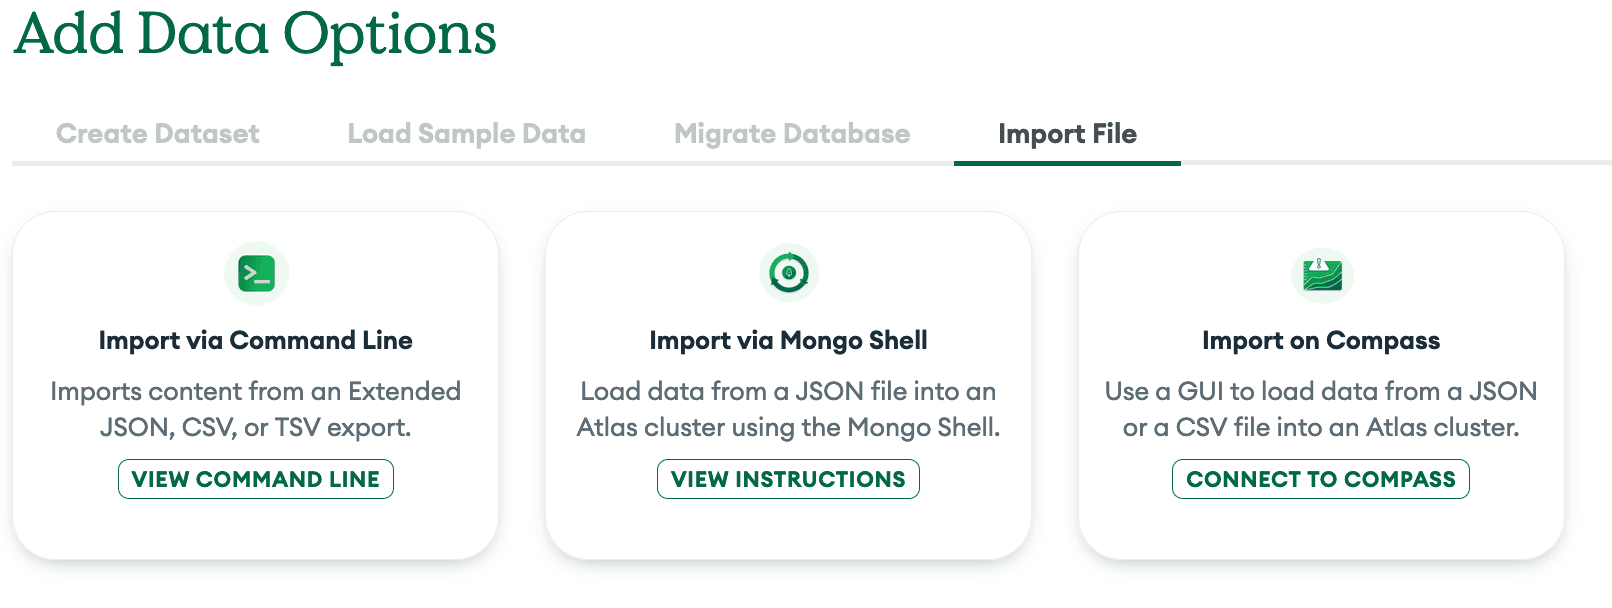
Import File. From here, we will leverage MongoDB Compass. Using Connect to Compass, Atlas will present you with a connection string that looks something like this: mongodb+srv://<user>:<password>@<db_name>.<identifier>.mongodb.net/. We will use that to connect to Compass.
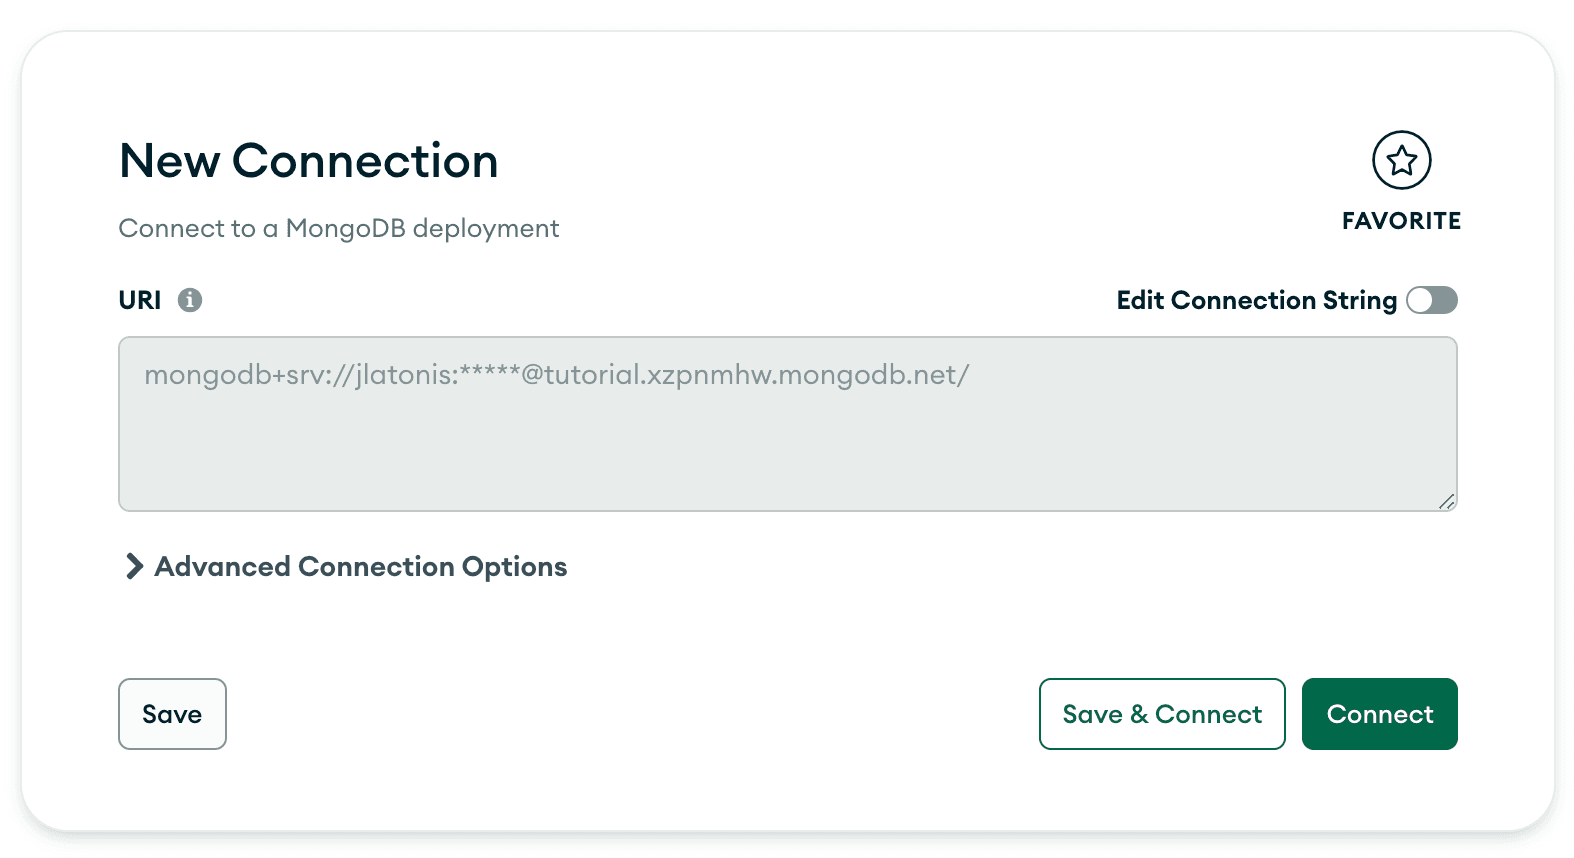
To connect to your MongoDB instance in Compass, enter the connection string when prompted:
Once connected in Compass, click the + to add a database to our instance:
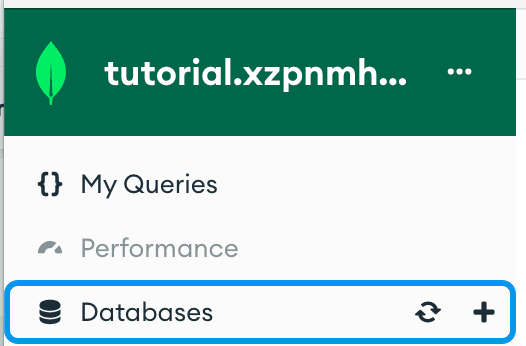
I named my database 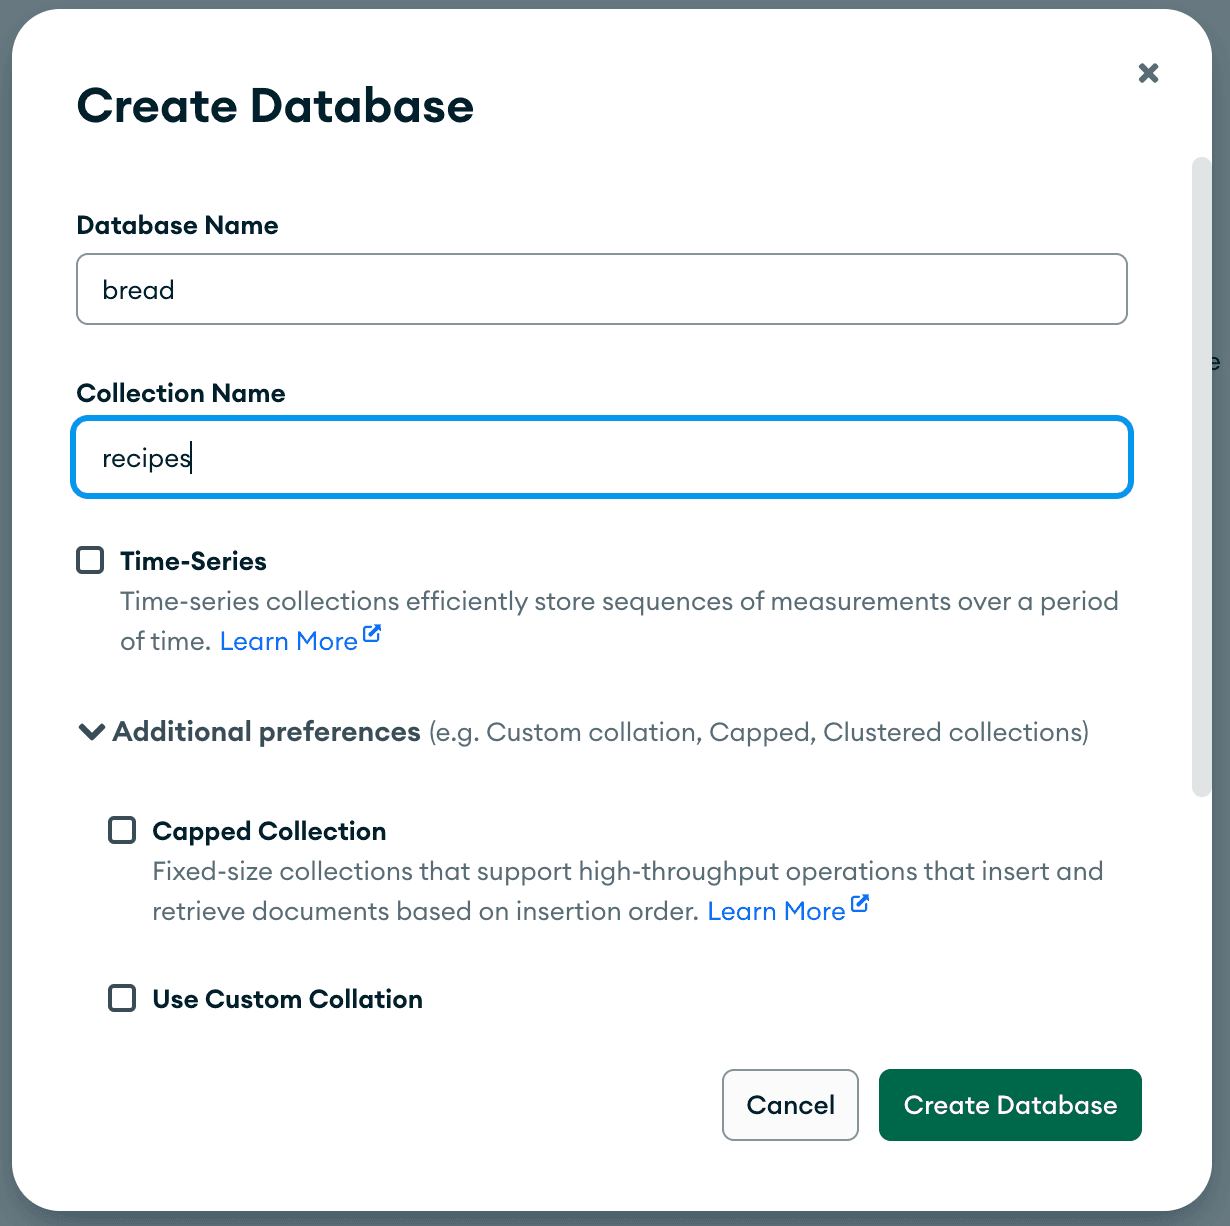
bread and the collection recipes.
You’ll see that Compass recognizes that we have no data in our newly created database and collection.
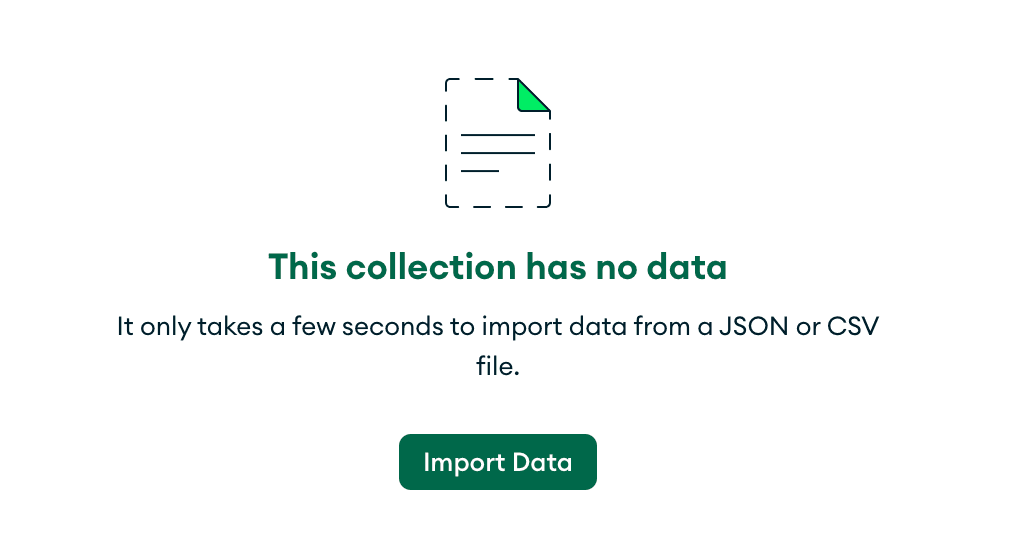
Let’s import some data! Click 
Import Data and select the bread_data.json to upload. You will see a small prompt to let you know it was successful:
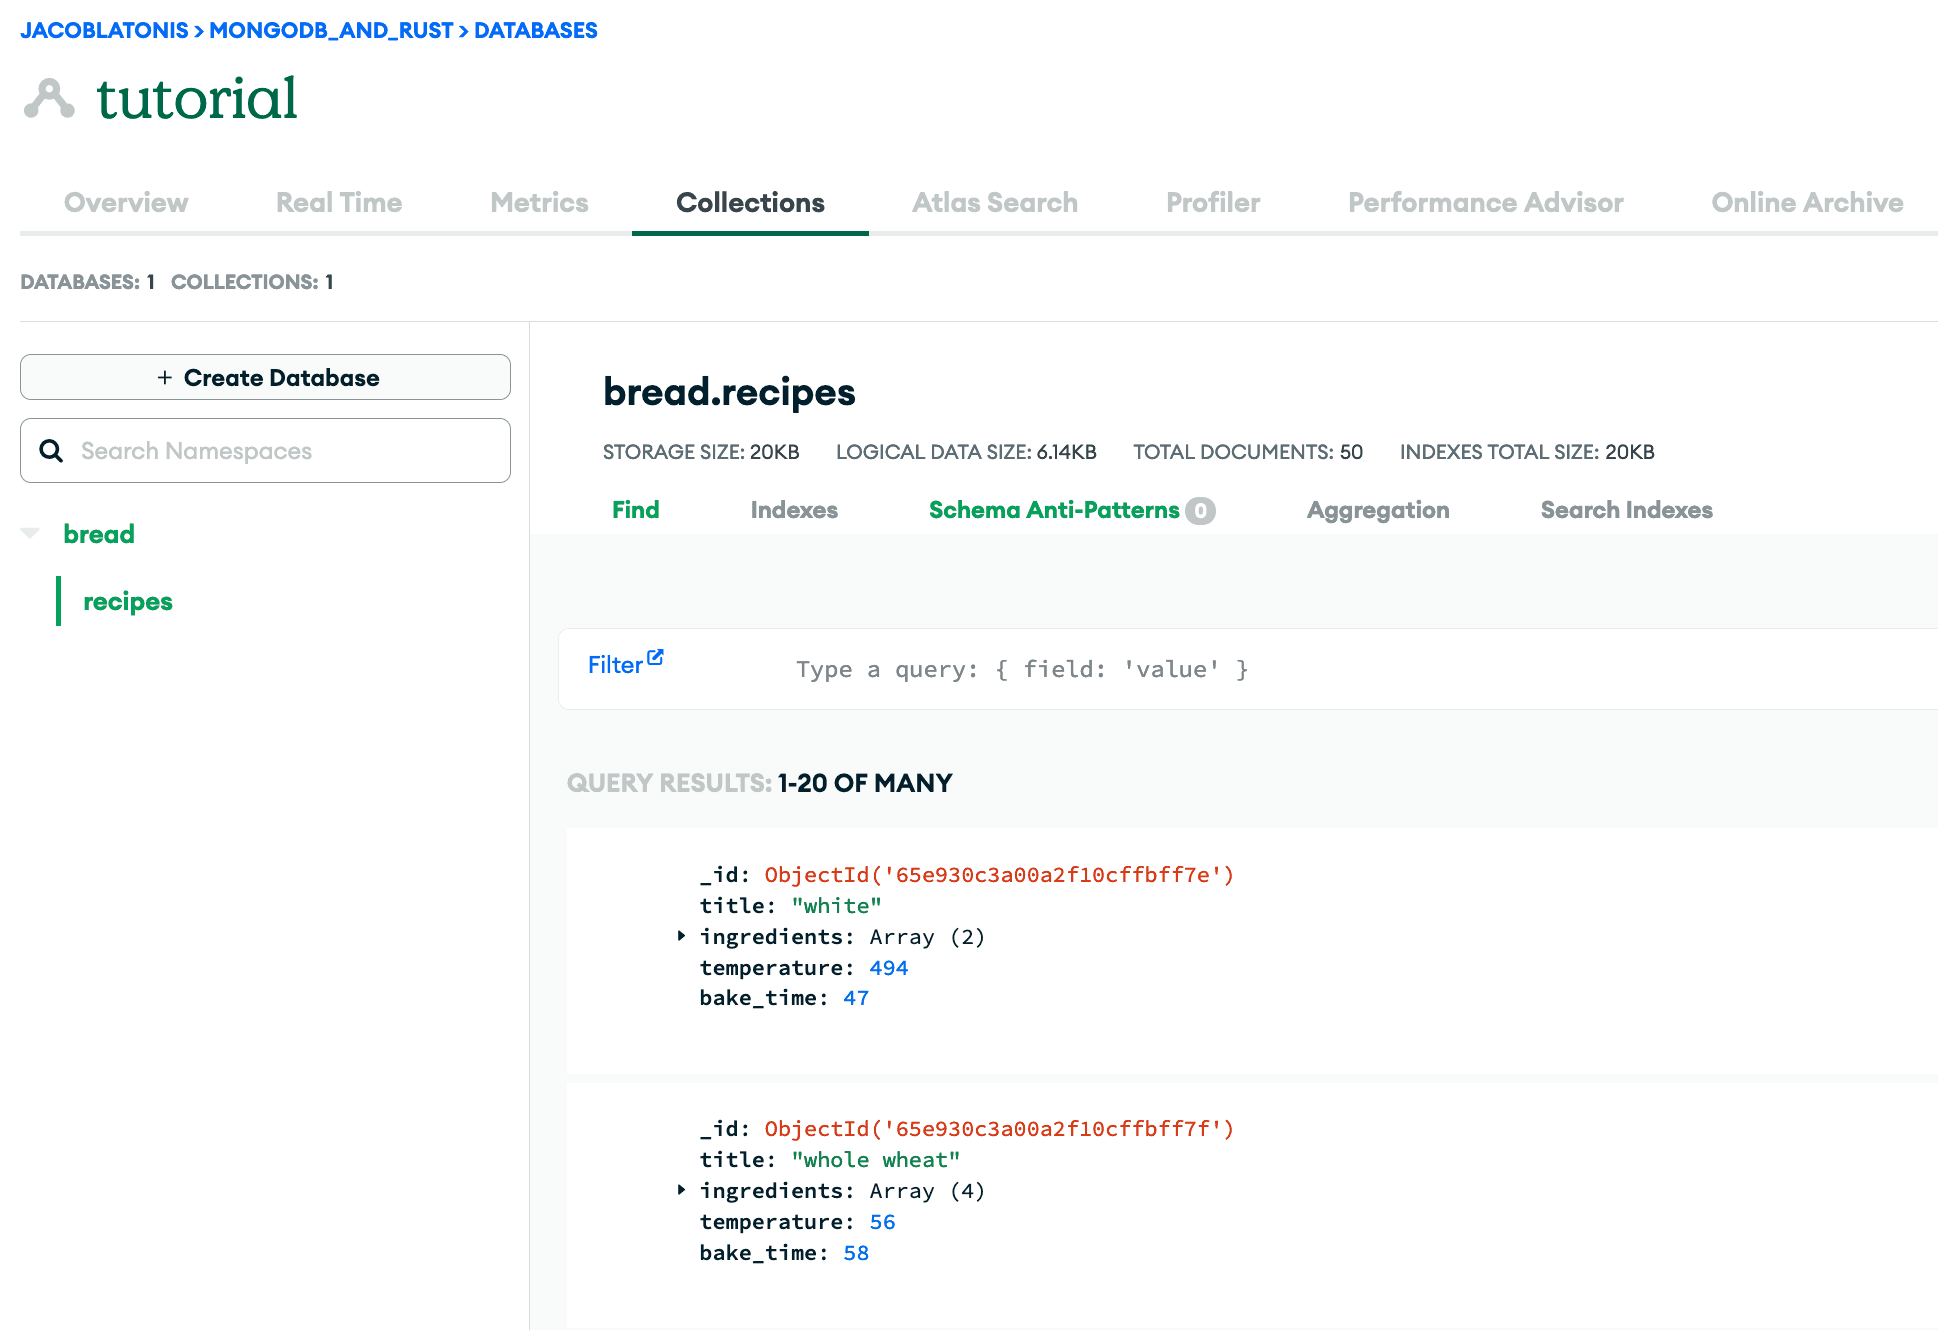
We can now pivot back to Atlas and see our data.
Now that we’ve got our MongoDB Atlas instance set up and filled with data, back to the Rust stuff!
There are quite a few different web frameworks available in the Rust ecosystem. There’s actix-web, axum, rocket, warp, and more. At first glance, you may think they all look pretty similar, and you’d be right! There can be performance differences between them when comparing certain operations and the like, but for my use case (a small- to medium-scale API for internal usage), we could pick any of these and they would suit the job just fine.
I’m a believer in building quickly and iterating a lot on my projects. I know we can get hung up on milliseconds (or even microseconds) of performance difference, but I think for most applications, you can choose the framework or project that interests you the most and go from there.
For me, the crate that stood out to me the most was Rocket. My main reason for choosing Rocket was the documentation, simplicity, and a great developer experience. This is not to say the previously mentioned (or unmentioned) crates don’t supply this as well, but I was drawn toward Rocket. Additionally, when I first started out in Rust, Rocket was one of the first crates I used to create an API.
If you’re interested in spinning up a performant API easily and rather quickly, Rocket allows us to do just that. It provides quick-start examples in its repository, and after a few glances, one can begin to get an idea of how the API is laid out.
We’ll go over the basics of setting up an API in Rocket.
First, let’s run
cargo add -F json rocket to add Rocket to the dependencies of the project. This will result in something like this being added under [dependencies]:1 rocket = {version = "0.5.0", features = ["json"]}
While we’re adding things to our dependency list, we should go ahead and add a crate developed by Rocket that allows us to have Rocket use a wrapper to manage a collection pool for the asynchronous connections made without the MongoDB client and crate. This will allow us to parameterize our MongoDB database and collections and have each function receive its own connection to use.
To add this to our dependencies, we run
cargo add -F mongodb rocket_db_pools which will result in something like this being added to [dependencies]:1 rocket_db_pools = { version = "0.1.0", features = ["mongodb"] }
To configure Rocket to use our MongoDB database we created earlier in MongoDB Atlas, go ahead and create a new configuration file and name it
Rocket.toml. This is a configuration file Rocket will read by default to pick up on certain configuration items. For our purposes, we’re going to define our MongoDB connection string as a field called url. To do this, the contents of Rocket.toml should have a format like this:1 [default.databases.<db_name>] 2 url = "<MongoDB Connection String>"
Following that format, my
Rocket.toml looks like this:1 [default.databases.db] 2 url = "mongodb+srv://<username>:<password>@tutorial.xzpnmhw.mongodb.net/?retryWrites=true&w=majority&appName=tutorial"
I’ve named mine bread because all of the test data I’ve used for this API are bread recipes. I randomly generated them, so no guarantees they’re edible! ;)
If you’d like to read more about what is possible with Rocket.toml, you can find it listed in the documentation.
Before we dive into the code itself and begin to write the API, I wanted to break down the structure of the API in
.rs files.I’ve diagrammed out each file and its usage below:
1 . 2 ├── Cargo.lock # dependency info 3 ├── Cargo.toml # project and dependency info 4 ├── Rocket.toml # rocket config info 5 └── src # directory where our rust code lives 6 ├── db.rs # file used to establish db 7 ├── main.rs # file used to start the API 8 ├── models.rs # file used for organization of data 9 └── routes.rs # file used for API routes
This file (
db.rs) is used to instantiate the connection to our MongoDB instance.You can name the struct whatever you’d like. The important part here is using the same
<db_name> that you defined in your Rocket.toml above.1 use rocket_db_pools::{mongodb::Client, Database}; 2 3 4 5 pub struct MainDatabase(Client);
In my API, it is defined like this. Note the “db” name usage, same as in my
Rocket.toml:1 use rocket_db_pools::{mongodb::Client, Database}; 2 3 4 5 pub struct MainDatabase(Client);
There’s one more important piece for initializing the MongoDB connection: We need to attach the database struct to our Rocket instance. In
main.rs, we need to initialize the database and attach it as so below:1 mod db; 2 mod models; 3 mod routes; 4 5 use rocket::{launch, routes}; 6 use rocket_db_pools::Database; 7 8 9 fn rocket() -> _ { 10 rocket::build().attach(db::MainDatabase::init()).mount() 11 }
For now,
rust-analyzer may complain about missing arguments for mount(). That is okay — we will add the routes and such later.Defining consistent and useful structures (models) to represent the data going back and forth in our API is especially helpful. It allows for assumptions to be made about what the data possesses, how we can use it, and so forth.
In my
models.rs file, I have defined a structure that represents a recipe for bread, and I’ve named it, shockingly, Recipe. We can enable the serialize and deserialize traits for our struct to and from JSON for easy interactivity when retrieving and sending data via the API. This is accomplished with the derive macro: #[derive(Debug, Serialize, Deserialize)]. I’ve also included the Debug trait in it so I can easily debug and see the contents of an entity if I need to.1 use mongodb::bson::oid::ObjectId; 2 use rocket::serde::{Deserialize, Serialize}; 3 4 5 6 pub struct Recipe { 7 8 pub id: Option<ObjectId>, 9 pub title: String, 10 pub ingredients: Vec<String>, 11 pub temperature: u32, 12 pub bake_time: u32, 13 }
Routing is an incredibly important part of an API. Routing allows the program to direct the request to the proper endpoint to serve or receive the data.
The file
routes.rs holds all of the routes defined in the API. Below is an example of a route, but the actual routes.rs will need to include your imports and other code.1 2 pub async fn get_recipes(db: Connection<MainDatabase>) -> Json<Vec<Recipe>> { 3 let recipes: Cursor<Recipe> = db 4 .database("bread") 5 .collection("recipes") 6 .find(None, None) 7 .await 8 .expect("Failed to retrieve recipes"); 9 10 Json(recipes.try_collect().await.unwrap()) 11 }
Don’t forget, we need to add the routes to the main launch function for Rocket.
In
main.rs, the routes should be added like so:1 mod db; 2 mod models; 3 mod routes; 4 5 use rocket::{launch, routes}; 6 use rocket_db_pools::Database; 7 8 9 fn rocket() -> _ { 10 rocket::build().attach(db::MainDatabase::init()).mount( 11 "/", 12 routes![ 13 routes::index, 14 routes::get_recipes, 15 routes::create_recipe, 16 routes::get_recipe 17 ], 18 ) 19 }
Now that we’ve started to define routes for our API, we also need to focus on error handling and custom responses, as things do not always go as planned when querying, accessing, or creating data!
We’re going to modify the simple
get_recipes() route shown above to avoid panics and return custom HTTP status codes.To do this, we can leverage Rocket’s
status::Custom structs, which allow us to specify the HTTP status code to return, as well as our data. To start, modify the return type to be status::Custom<Json<Value>>. This lets the Rust compiler know we’re going to be returning Rocket’s custom HTTP response struct, which includes an HTTP status code and a serde value that can be serialized into JSON.We will leverage the custom HTTP response struct for each of our routes. That way, we handle any errors or panics that may arise.
In our
create_recipe() route, we really only have two possibilities, assuming our MongoDB instance is functioning properly: the recipe is successfully created (return HTTP 201 [Created]), or the recipe could not be created, indicating a bad request (return HTTP 400 [Bad Request]).1 2 pub async fn create_recipe( 3 db: Connection<MainDatabase>, 4 data: Json<Recipe>, 5 ) -> status::Custom<Json<Value>> { 6 if let Ok(res) = db 7 .database("bread") 8 .collection::<Recipe>("recipes") 9 .insert_one(data.into_inner(), None) 10 .await 11 { 12 if let Some(id) = res.inserted_id.as_object_id() { 13 return status::Custom( 14 Status::Created, 15 Json( 16 json!({"status": "success", "message": format!("Recipe ({}) created successfully", id.to_string())}), 17 ), 18 ); 19 } 20 } 21 22 status::Custom( 23 Status::BadRequest, 24 Json(json!({"status": "error", "message":"Recipe could not be created"})), 25 ) 26 }
The
get_recipes() route also only has two realistic possibilities: return the vector of recipes found in the MongoDB instance, or return an empty vector, which contains no recipes (either due to no recipes being present in the collection or query failing).
Due to these expected outcomes, I am going to return a type of Json<Vec<Recipe>>, as we will always return a vector, even if it is empty with an HTTP status 200.1 2 pub async fn get_recipes(db: Connection<MainDatabase>) -> Json<Vec<Recipe>> { 3 let recipes = db 4 .database("bread") 5 .collection("recipes") 6 .find(None, None) 7 .await; 8 9 if let Ok(r) = recipes { 10 if let Ok(collected) = r.try_collect::<Vec<Recipe>>().await { 11 return Json(collected); 12 } 13 } 14 15 return Json(vec![]); 16 }
The
get_recipe() is slightly more complicated, as we can encounter a few different errors or areas which can panic. We need to account for these: a bad document_id provided (return HTTP 400 [Bad Request]), a recipe being found via the document_id (return HTTP 200 [Ok]), or a recipe not being found via the document_id (return HTTP 404 [Not Found]).As we have numerous possibilities, I am returning a type of
status::Custom<Json<Value>>. I will provide a success status for the query itself in the status field, a message if the data is not found/present, and a data field containing the data if it was found.1 2 pub async fn get_recipe(db: Connection<MainDatabase>, id: &str) -> status::Custom<Json<Value>> { 3 let b_id = ObjectId::parse_str(id); 4 5 if b_id.is_err() { 6 return status::Custom( 7 Status::BadRequest, 8 Json(json!({"status": "error", "message":"Recipe ID is invalid"})), 9 ); 10 } 11 12 if let Ok(Some(recipe)) = db 13 .database("bread") 14 .collection::<Recipe>("recipes") 15 .find_one(doc! {"_id": b_id.unwrap()}, None) 16 .await 17 { 18 return status::Custom( 19 Status::Ok, 20 Json(json!({"status": "success", "data": recipe})), 21 ); 22 } 23 24 return status::Custom( 25 Status::NotFound, 26 Json(json!({"status": "success", "message": "Recipe not found"})), 27 ); 28 }
There are a few ways we can approach updating records via the API. Via PUT, the user provides the identifier and the entire replacement document.
1 2 pub async fn update_recipe( 3 db: Connection<MainDatabase>, 4 data: Json<Recipe>, 5 id: &str, 6 ) -> status::Custom<Json<Value>> { 7 let b_id = ObjectId::parse_str(id); 8 9 if b_id.is_err() { 10 return status::Custom( 11 Status::BadRequest, 12 Json(json!({"status": "error", "message":"Recipe ID is invalid"})), 13 ); 14 } 15 16 if let Ok(_) = db 17 .database("bread") 18 .collection::<Recipe>("recipes") 19 .update_one( 20 doc! {"_id": b_id.as_ref().unwrap()}, 21 doc! {"$set": mongodb::bson::to_document(&data.into_inner()).unwrap()}, 22 None, 23 ) 24 .await 25 { 26 return status::Custom( 27 Status::Created, 28 Json( 29 json!({"status": "success", "message": format!("Recipe ({}) updated successfully", b_id.unwrap())}), 30 ), 31 ); 32 }; 33 34 status::Custom( 35 Status::BadRequest, 36 Json( 37 json!({"status": "success", "message": format!("Recipe ({}) could not be updated successfully", b_id.unwrap())}), 38 ), 39 ) 40 }
Not every API will have its uses for the DELETE method and deleting entities from the database, but I wanted to include it for posterity and to show how one can implement it with Rocket. This implementation is assuming one knows the BSON identifier of the object, but you could create the route and function to delete how you see fit.
1 2 pub async fn delete_recipe(db: Connection<MainDatabase>, id: &str) -> status::Custom<Json<Value>> { 3 let b_id = ObjectId::parse_str(id); 4 5 if b_id.is_err() { 6 return status::Custom( 7 Status::BadRequest, 8 Json(json!({"status": "error", "message":"Recipe ID is invalid"})), 9 ); 10 } 11 12 if db 13 .database("bread") 14 .collection::<Recipe>("recipes") 15 .delete_one(doc! {"_id": b_id.as_ref().unwrap()}, None) 16 .await 17 .is_err() 18 { 19 return status::Custom( 20 Status::BadRequest, 21 Json( 22 json!({"status": "error", "message":format!("Recipe ({}) could not be deleted", b_id.unwrap())}), 23 ), 24 ); 25 }; 26 27 status::Custom( 28 Status::Accepted, 29 Json( 30 json!({"status": "", "message": format!("Recipe ({}) successfully deleted", b_id.unwrap())}), 31 ), 32 ) 33 }
If you’d like to test the endpoints via curl or wget, I am including the following curl commands to show functionality of the API. We will dive into fully testing the API in a future blog post :).
1 curl -v --header "Content-Type: application/json" --request POST --data '{"title":"simple bread recipe","ingredients":["water, flour"], "temperature": 250, "bake_time": 120}' http://localhost:8000/recipes
1 curl -v --header "Content-Type: application/json" \ 2 --request PUT --data '{"title":"new, updated title!","ingredients":["water", "flour", "salt", "sugar"], "temperature": 440, "bake_time": 60}' \ 3 http://localhost:8000/recipes/<_id>
1 curl -v --header "Content-Type: application/json" --header "Accept: application/json" http://localhost:8000/recipes/ 2 3 curl -v --header "Content-Type: application/json" --header "Accept: application/json" http://localhost:8000/recipes/<_id>
1 curl -v --header "Content-Type: application/json" --header "Accept: application/json" --request DELETE http://localhost:8000/recipes/<_id>
If you’re curious about seeing the full result and repository for all of the code in totality, you can find that on my GitHub. And if you have any questions or want to share your work, join us in the MongoDB Developer Community.
Rate this tutorial
Related
Article
MongoDB Field Level Encryption is now Available for Rust applications
Jan 24, 2023 | 1 min read
Tutorial
Red Mosquitto: Implement a Noise Sensor With an MQTT Client in an ESP32
Sep 17, 2024 | 25 min read