Overview
Atlas App Services は MongoDB ワイヤプロトコルのサブセットをネイティブで実装しています。これにより、標準の MongoDB ドライバーとツールを使用して、リンクされた MongoDB Atlas データソースの 1 つを介してアプリに接続できます。 クライアントは専用の App Services 接続文字列を使用して接続とリクエストを送信します。 App Services は、ロールベースのデータ アクセス ルール、関数、サービス アクション など、ワイヤプロトコル経由でほとんどのクライアント機能をサポートしています。
これは、現在 Realm SDK がない言語に適しています。 以下の例は、 Python 、 C++ 11、 mongo shellです。 {4 接続 パラメータをサポートする ドライバー は、ワイヤプロトコルを使用してMongoDB Atlas App Services に接続できます。appNamestring
注意
フェデレーティッド データソースはワイヤプロトコル経由の接続をサポートしていません。
互換性のあるクライアント
次のツールとドライバーを使用して、 接続文字列を使用して App Services と通信できます。
mongo shellのバージョン4.0 + 。
MongoDB接続
appNamestringパラメータをサポートする任意の ドライバーすべての公式 MongoDB ドライバーは、現在のリリースでこのパラメーターをサポートしています。
注意
ワイヤプロトコルを介して App Services への接続では、 MongoDB Serviceの全機能にアクセスできます。 ただし、App Services は標準ツールとクライアントで利用可能なすべての操作と機能をサポートしていません。 詳細については、「 MongoDB サービスの制限 」を参照してください。
接続文字列
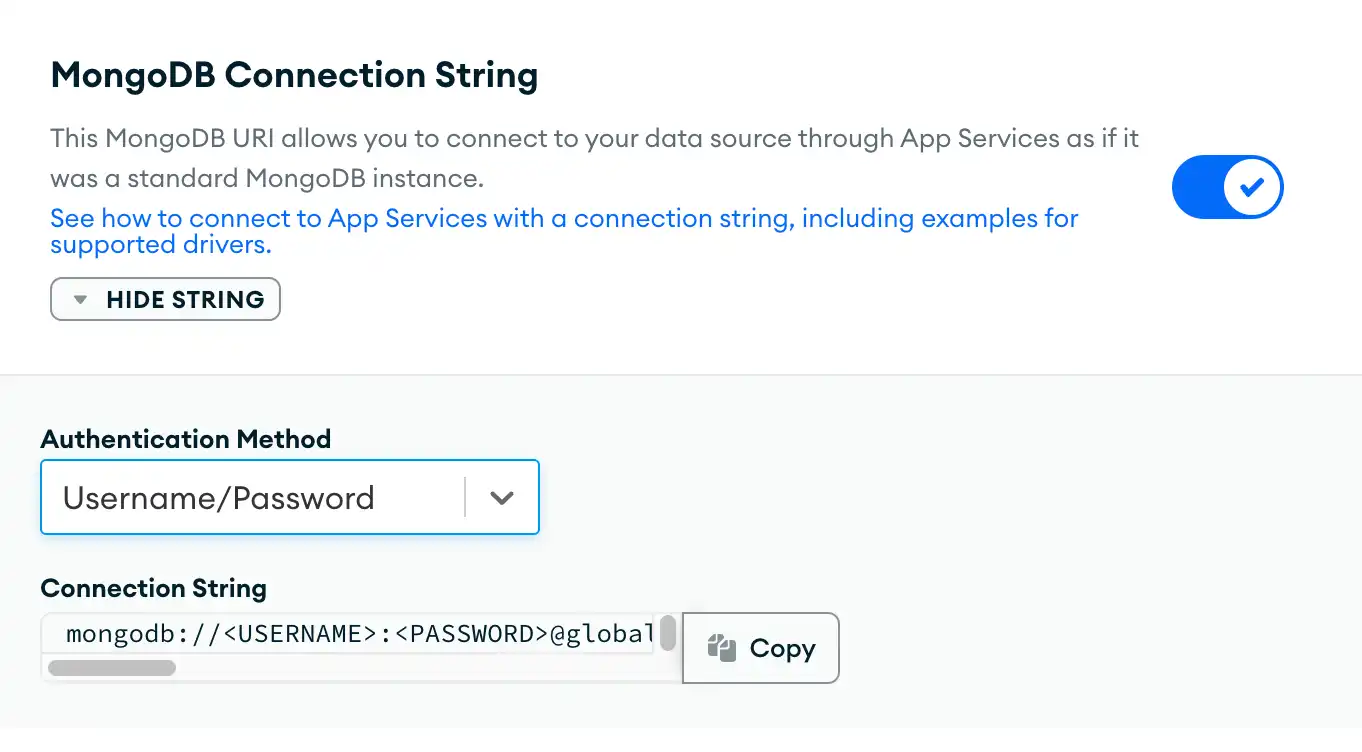
ワイヤプロトコル経由で App Services に接続するには、アプリケーションMongoDB stringユーザー の認証情報とアプリケーション固有のappName クエリ パラメータを含む 接続 を構築する必要があります。
重要
URL エンコーディング
App Services 接続文字列の形式は次のとおりです。
mongodb://<credentials>@<region>.services.cloud.mongodb.com:27020/?<parameters>
Credentials
ワイヤプロトコル経由で発行するすべての操作は、 接続文字列で指定した特定のアプリケーション ユーザーのコンテキストで実行されます。 ユーザーは、次の認証プロバイダのいずれかに登録されている必要があります。
接続文字列認証情報の内容は、ユーザーが以下を登録した認証プロバイダによって異なります。
形式 |
| ||||
フィールド |
| ||||
例 | |
形式 |
| ||
フィールド |
| ||
例 | |
形式 |
| |||
フィールド |
| |||
例 | |
リージョン
接続文字列は、アプリがホストされている配置リージョンとクラウドプロバイダーを指定する必要があります。
グローバルアプリはglobalリージョンを使用します。
mongodb://<credentials>@global.services.cloud.mongodb.com:27020/?<parameters>
ローカルアプリは、 <region>.<cloud>形式を使用してクラウドプロバイダーとリージョン名を指定します。 たとえば、aws-us-east-1 に配置されたアプリは、次の接続文字列を使用します。
mongodb://<credentials>@us-east-1.aws.services.cloud.mongodb.com:27020/?<parameters>
パラメーター
App Services には、提供したstring 認証情報 に関連付けられたアプリケーションと認証プロバイダを識別する特定の接続 オプションが必要です。
App Services 接続文字列には次のクエリ パラメーターがあります。
Parameter | 説明 | |||||||
|---|---|---|---|---|---|---|---|---|
| このパラメータは常に | |||||||
| このパラメータは常に | |||||||
| 接続するアプリケーション、MongoDB サービス、および認証プロバイダを一意に識別します。
|
ワイヤプロトコル接続の有効化
接続 を使用してApp Services App stringに接続する前に、リンクされたクラスターのワイヤプロトコル接続を有効にする必要があります。
アプリの最新バージョンを取得する
App Services CLIを使用して MongoDB ワイヤプロトコル接続を有効にするには、アプリケーションの構成ファイルのローカル コピーが必要です。
アプリの最新バージョンのローカルコピーを取得するには、次のコマンドを実行します。
appservices pull --remote="<Your App ID>"
Tip
App Services UI のDeploy > Export App画面からアプリケーションの構成ファイルのコピーをダウンロードすることもできます。
クラスターのワイヤプロトコルを有効にする
連結クラスターのワイヤプロトコル接続を有効にするには、クラスターのconfig.jsonファイルを開き、 config.wireProtocolEnabledの値をtrueに設定します。
{ "name": "mongodb-atlas", "type": "mongodb-atlas", "config": { "wireProtocolEnabled": true, ... } }
注意
フェデレーティッド データソースはワイヤプロトコル経由の接続をサポートしていません。
ワイヤプロトコル経由で接続
接続文字列を使用した App Services への接続
ワイヤプロトコル経由で App Services に接続するには、クライアントを作成する ときに、通常の 接続文字列 を使用する場合と同様に、 URLでエンコードされた App Services接続文字列 を渡します。
mongo "mongodb://<user>:<password>@services.cloud.mongodb.com:27020/?authMechanism=PLAIN&authSource=%24external&ssl=true&appName=realm-application-abcde:mongodb-atlas:local-userpass"
mongocxx::instance instance{}; mongocxx::uri uri("mongodb://<user>:<password>@services.cloud.mongodb.com:27020/?authMechanism=PLAIN&authSource=%24external&ssl=true&appName=realm-application-abcde:mongodb-atlas:local-userpass"); mongocxx::client client(uri);
client = pymongo.MongoClient("mongodb://<user>:<password>@services.cloud.mongodb.com:27020/?authMechanism=PLAIN&authSource=%24external&ssl=true&appName=realm-application-abcde:mongodb-atlas:local-userpass")
データの読み取りと変更
ワイヤプロトコル経由で App Services に接続している間は、標準の MongoDB CRUD 操作を使用できます。 App Services は、接続 の認証情報で指定された認証済みユーザーのコンテキストで、すべてのクエリに ロールベースのデータ アクセス ルール を適用しstring ます。
> use HR > db.employees.findOne(); { "_id": ObjectId("5ae782e48f25b9dc5c51c4a5"), "employeeId": 854271626, "name": { "first": "Lucas", "last": "Lewis" }, "role": "PM", "salary": 200000, "email": "Lucas.Lewis.0271@company.com", "password": "<password>", "manager": { "id": 328892725, "email": "Daniel.Wilson.0474@company.com", "name": { "first": "Daniel", "last": "Wilson" } } }
mongocxx::database db = client["HR"]; mongocxx::collection employees = db["employees"]; bsoncxx::stdx::optional<bsoncxx::document::value> result = collection.find_one({}); if(result) { std::cout << bsoncxx::to_json(result) << "\n"; }
db = client["HR"] employee = db["employees"].find_one(); pprint(employee) {'_id': ObjectId('5ae782e48f25b9dc5c51c4a5'), 'email': 'Lucas.Lewis.0271@company.com', 'employeeId': 854271626.0, 'manager': {'email': 'Daniel.Wilson.0474@company.com', 'id': 328892725.0, 'name': {'first': 'Daniel', 'last': 'Wilson'}}, 'name': {'first': 'Lucas', 'last': 'Lewis'}, 'password': '<password>', 'role': 'PM', 'salary': 200000}
関数の呼び出し
callFunctionデータベースコマンドを使用して関数を呼び出すことができます。
コマンド | 説明 | プロトタイプ | ||||
|---|---|---|---|---|---|---|
指定された関数を呼び出し、結果を返します。 | |
db.runCommand({ ... callFunction: "getEmployeeById", ... arguments: ["5ae782e48f25b9dc5c51c4a5"] ...}); { "ok" : 1, "response" : { "_id": ObjectId("5ae782e48f25b9dc5c51c4a5"), "employeeId": 854271626, "name": { "first": "Lucas", "last": "Lewis" }, "role": "PM", "salary": 200000, "email": "Lucas.Lewis.0271@company.com", "password": "<password>", "manager": { "id": 328892725, "email": "Daniel.Wilson.0474@company.com", "name": { "first": "Daniel", "last": "Wilson" } } } }
db.runCommand({ callFunction: "getEmployeeById", arguments: ["5ae782e48f25b9dc5c51c4a5"] });
function_result = db.command("callFunction", "getEmployeeById", arguments=["5ae782e48f25b9dc5c51c4a5"] ...) pprint.pprint(function_result) {'ok': 1, 'response': {'_id': ObjectId('5ae782e48f25b9dc5c51c4a5'), 'email': 'Lucas.Lewis.0271@company.com', 'employeeId': 854271626.0, 'manager': {'email': 'Daniel.Wilson.0474@company.com', 'id': 328892725.0, 'name': {'first': 'Daniel', 'last': 'Wilson'}}, 'name': {'first': 'Lucas', 'last': 'Lewis'}, 'password': '<password>', 'role': 'PM', 'salary': 200000}}
サービス アクションの呼び出し
callServiceFunctionデータベースコマンドを使用して、サービス アクションを呼び出すことができます。
コマンド | 説明 | プロトタイプ | |||||
|---|---|---|---|---|---|---|---|
指定されたサービス アクションを呼び出し、結果を返します。 | |
> db.runCommand({ ... callServiceFunction: "get", ... service: "http", ... arguments: [{ url: "https://jsonplaceholder.typicode.com/todos/1" }] ... }); { "ok" : 1, "response" : { "status" : "200 OK", "statusCode" : 200, "contentLength" : NumberLong(-1), "headers" : { "Content-Type" : ["application/json; charset=utf-8"], "Connection" : ["keep-alive"], "Vary" : ["Origin, Accept-Encoding"], "X-Content-Type-Options" : ["nosniff"], "Via" : ["1.1 vegur"], "X-Powered-By" : ["Express"], "Cf-Cache-Status" : ["HIT"], "Expect-Ct" : ["max-age=604800, report-uri=\"https://example.com/cdn-cgi/beacon/expect-ct\""], "Set-Cookie" : ["__cfduid=d7f650e765d41beb7598ce2ab62d0c0191536867096; expires=Fri, 13-Sep-19 19:31:36 GMT; path=/; domain=.typicode.com; HttpOnly"], "Access-Control-Allow-Credentials" : ["true"], "Cache-Control" : ["public, max-age=14400"], "Pragma" : ["no-cache"], "Etag" : ["W/\"53-hfEnumeNh6YirfjyjaujcOPPT+s\""], "Server" : ["example.com"], "Cf-Ray" : ["459d08f88e1e56db-IAD"], "Date" : ["Thu, 13 Sep 2018 19:31:36 GMT"], "Expires" : ["Thu, 13 Sep 2018 23:31:36 GMT"] }, "cookies" : { "__cfduid" : { "value" : "d7f650e765d41beb7598ce2ab62d0c0191536867096", "path" : "/", "domain" : ".typicode.com", "expires" : "Mon, 01 Jan 0001 00:00:00 GMT", "maxAge" : 0, "secure" : false, "httpOnly" : true } }, "body" : BinData(0,"ewogICJ1c2VySWQiOiAxLAogICJpZCI6IDEsCiAgInRpdGxlIjogImRlbGVjdHVzIGF1dCBhdXRlbSIsCiAgImNvbXBsZXRlZCI6IGZhbHNlCn0=") } }
db.runCommand({ callServiceFunction: "get", service: "http", arguments: [{ url: "https://jsonplaceholder.typicode.com/todos/1" }] });
result = db.command("callServiceFunction", "get", service="http", arguments=[{"url": "https://jsonplaceholder.typicode.com/todos/1"}] ...) pprint.pprint(result) {'ok': 1, 'response': {'body': b'{\n "userId": 1,\n "id": 1,\n "title": "delectus aut' b' autem",\n "completed": false\n}', 'contentLength': -1, 'cookies': {'__cfduid': {'domain': '.typicode.com', 'expires': 'Mon, 01 Jan 0001 00:00:00 ' 'GMT', 'httpOnly': True, 'maxAge': 0, 'path': '/', 'secure': False, 'value': 'd4b10004e96ca7fee0be03dceebaf2ab71536866400'}}, 'headers': {'Access-Control-Allow-Credentials': ['true'], 'Cache-Control': ['public, max-age=14400'], 'Cf-Cache-Status': ['HIT'], 'Cf-Ray': ['459cf7fc7e20c1bd-IAD'], 'Connection': ['keep-alive'], 'Content-Type': ['application/json; charset=utf-8'], 'Date': ['Thu, 13 Sep 2018 19:20:00 GMT'], 'Etag': ['W/"53-hfEnumeNh6YirfjyjaujcOPPT+s"'], 'Expect-Ct': ['max-age=604800, ' 'report-uri="https://example.com/cdn-cgi/beacon/expect-ct"'], 'Expires': ['Thu, 13 Sep 2018 23:20:00 GMT'], 'Pragma': ['no-cache'], 'Server': ['example.com'], 'Set-Cookie': ['__cfduid=d4b10004e96ca7fee0be03dceebaf2ab71536866400; ' 'expires=Fri, 13-Sep-19 19:20:00 GMT; ' 'path=/; domain=.typicode.com; ' 'HttpOnly'], 'Vary': ['Origin, Accept-Encoding'], 'Via': ['1.1 vegur'], 'X-Content-Type-Options': ['nosniff'], 'X-Powered-By': ['Express']}, 'status': '200 OK', 'statusCode': 200}}
ログインユーザーのデータを取得する
認証されたユーザーのユーザー オブジェクトは、 userProfileデータベースコマンドを使用して取得できます。
コマンド | 説明 | プロトタイプ | |||
|---|---|---|---|---|---|
認証されたユーザーのユーザー オブジェクトを返します。 | |
> db.runCommand({ userProfile: 1 }); { "ok" : 1, "profile" : { "userid" : "5ad7a79e8f25b975898d77b8", "domainid" : ObjectId("5ad7a69746224c054067c8b1"), "identities" : [ { } ], "data" : "{\"email\":\"joe.mango@company.com\"}", "type" : "normal", "roleassignments" : [ ] } }
db.runCommand({ userProfile: 1 });
result = db.command("userProfile", 1) pprint.pprint(result) {'ok': 1, 'profile': {'data': '{"email":"joe.mango@company.com"}', 'domainid': ObjectId('5ad7a69746224c054067c8b1'), 'identities': [{}], 'roleassignments': [], 'type': 'normal', 'userid': '5ad7a79e8f25b975898d77b8'}}
