Overview
このガイドでは、MongoDB Node.js ドライバーを使用して MongoDB Atlas でホストされている MongoDB クラスターに接続するアプリケーションを作成する方法について説明します。Node.js ドライバーは、MongoDB に接続して通信するために使用できる関数のライブラリです。
Tip
MongoDB Atlas は、MongoDB 配置をホストする完全管理のクラウドデータベース サービスです。このガイドの手順に従い、独自の無料(クレジット カード不要)MongoDB Atlas 配置を作成できます。
このガイドの手順に従って、サンプルNode.jsアプリケーションをMongoDB Atlas配置に接続します。別のドライバーまたはプログラミング言語を使用して MongoDB に接続する場合は、公式ドライバーのリストを参照してください。
ダウンロードとインストール
依存関係のインストール
開発環境に次の依存関係がインストールされていることを確認してください。
Node.js v16.20.1 以降
npm (Node Package Manager)
Node.jsとnpmをインストールする方法については、 npmドキュメントの「 Node.jsとnpm のダウンロードとインストール 」を参照してください。
これらの手順を完了すると、ドライバーの依存関係がインストールされた新しいプロジェクトディレクトリが作成されます。
MongoDB 配置の作成
MongoDB Atlas では無料階層の MongoDB 配置を作成して、データを保存および管理できます。 MongoDB Atlas は、MongoDB databaseをクラウドでホストおよび管理します。
Atlas で無料の MongoDB 配置を作成
MongoDB の使用開始ガイドを完了して、新しい Atlas アカウントを設定し、サンプルデータを新しい無料階層の MongoDB 配置にロードします。
これらの手順を完了すると、Atlas に新しい無料階層の MongoDB 配置、データベースユーザーの認証情報、データベースに サンプル データがロードされます 。
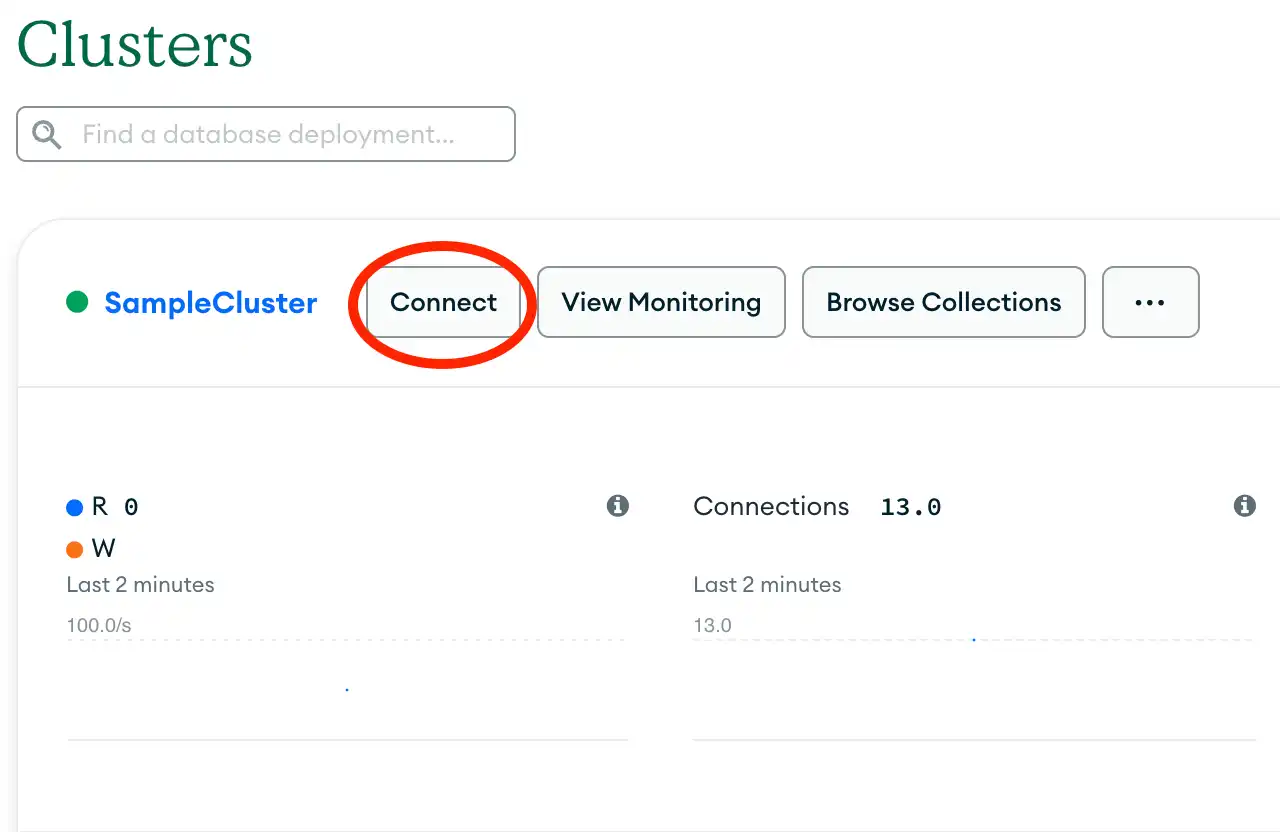
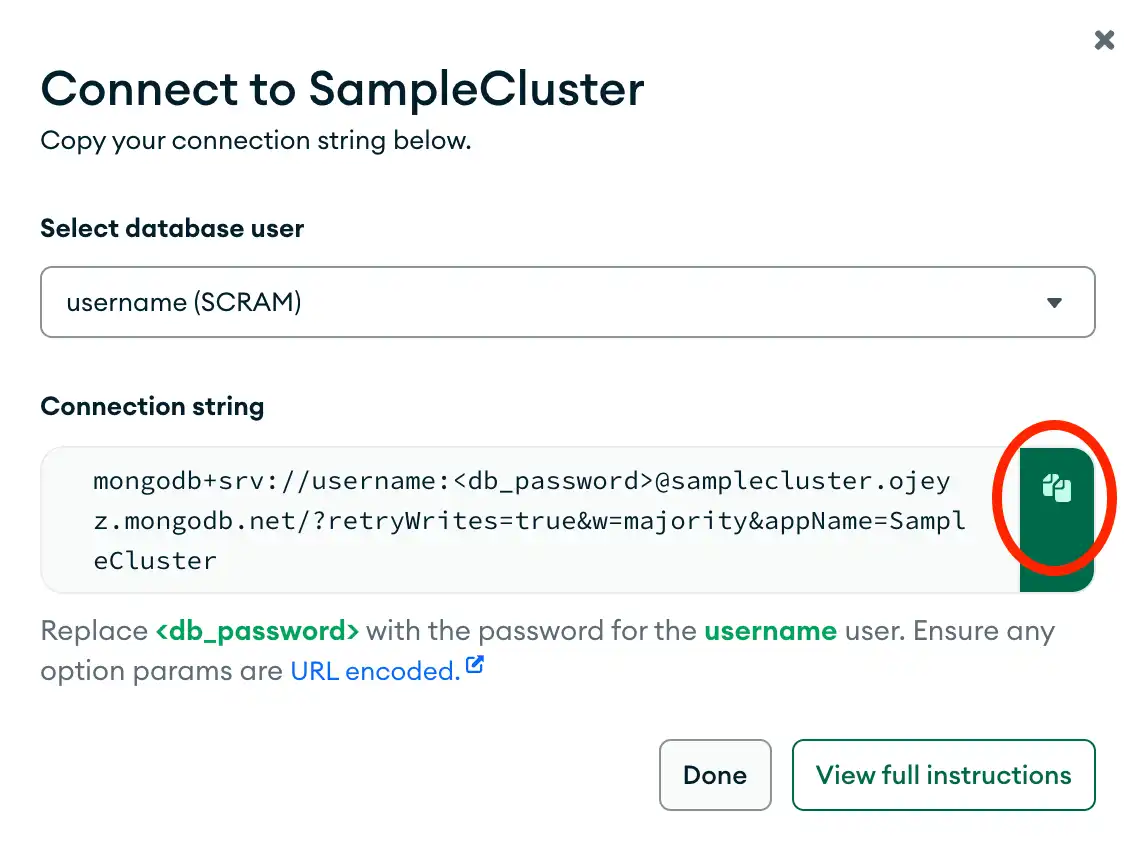
接続文字列の作成
MongoDB配置に接続するには、 接続string とも呼ばれる 接続 URIMongoDB を提供します。これは、 配置に接続する方法と接続中の動作をドライバーに指示します。
接続stringには、配置のホスト名またはIPアドレスとポート、認証メカニズム、ユーザー認証情報(該当する場合)、および接続オプションが含まれます。
これらの手順を完了すると、データベースのユーザー名とパスワードを含む接続stringが作成されます。
MongoDB に接続する
Node.js アプリケーションの作成
node_quickstartディレクトリに、アプリケーション用の index.js というファイルを作成します。
以下のコードをコピーして、index.js ファイルに貼り付けます。
const { MongoClient } = require('mongodb'); async function runGetStarted() { // Replace the uri string with your connection string const uri = '<connection string URI>'; const client = new MongoClient(uri); try { const database = client.db('sample_mflix'); const movies = database.collection('movies'); // Queries for a movie that has a title value of 'Back to the Future' const query = { title: 'Back to the Future' }; const movie = await movies.findOne(query); console.log(movie); } finally { await client.close(); } } runGetStarted().catch(console.dir);
接続文字列の割り当て
<connection string uri> プレースホルダーを、このガイドの接続文字列の作成ステップからコピーした接続文字列に置き換えます。
Node.js アプリケーションの実行
プロジェクトディレクトリから、次のコマンドを実行してアプリケーションを起動します。
node index.js
出力には、検索された映画ドキュメントの詳細が含まれます。
{ _id: ..., plot: 'A young man is accidentally sent 30 years into the past...', genres: [ 'Adventure', 'Comedy', 'Sci-Fi' ], ... title: 'Back to the Future', ... }
エラーが発生した場合や出力が表示されない場合は、index.jsファイルに適切な接続文字列が指定されていること、およびサンプルデータがロードされていることを確認してください。
これらの手順を完了すると、ドライバーを使用してMongoDBデプロイに接続し、サンプルデータをクエリして、結果を出力する動作するアプリケーションが作成されます。
次のステップ
クイック スタート チュートリアルを完了しました。
注意
この手順で問題が発生した場合は、 MongoDB Stack Overflowタグ または MongoDB Reddit Community を使用してサポートをリクエストしてください。このページの右側または右下にある Rate this pageタブを使用してフィードバックを送信できます。
このチュートリアルでは、MongoDB Atlas でホストされている MongoDB 配置に接続し、クエリに一致するドキュメントを検索する Node.js アプリケーションを作成しました。
次のリソースからNode.jsドライバーの詳細を学習します。
MongoDB接続の構成方法については、「MongoDBへの接続」セクションを参照してください。
「 CRUD 操作 」セクションでは、読み取りおよび書込み (write) 操作を実行する方法について説明します。

