유선 프로토콜
이 페이지의 내용
개요
Atlas App Services 는 기본적으로 MongoDB 유선 프로토콜 의 하위 집합을 구현하며, 이를 통해 표준 MongoDB 드라이버 및 도구를 사용하여 연결된 MongoDB Atlas 데이터 소스 중 하나를 통해 앱에 연결할 수 있습니다. 클라이언트는 특수 App Services 연결 string 을 사용하여 연결하고 요청을 보냅니다. App Services 는 역할 기반 데이터 액세스 규칙, 기능 및 서비스 작업을 포함하여 대부분의 클라이언트 기능을 유선 프로토콜 을 통해 지원합니다.
이는 현재 Realm SDK 가 없는 언어에 적합합니다. 여기에 있는 예제는 Python, C++11 및 mongo shell 에 대한 것입니다. 연결 MongoDB 매개변수를 지원하는 모든 appName string 운전자 는 유선 프로토콜 을 사용하여 App Services 에 연결할 수 있습니다.
참고
연합 데이터 소스 는 유선 프로토콜 을 통한 연결을 지원 하지 않습니다.
호환되는 클라이언트
다음 도구 및 드라이버를 사용하면 연결 문자열을 통해 App Services와 통신할 수 있습니다.
연결 MongoDB 매개변수를 지원하는 모든
appNamestring 운전자 입니다. 모든 공식 MongoDB 드라이버는 현재 릴리스에서 이 매개변수를 지원 합니다.
참고
유선 프로토콜 을 통해 App Services 에 연결하면 MongoDB 서비스 의 전체 기능에 액세스 할 수 있습니다. 그러나 App Services 는 표준 도구 및 클라이언트에서 사용할 수 있는 모든 작업 및 기능을 지원 하지 않습니다. 자세한 내용은 MongoDB 서비스 제한 사항을 참조하세요.
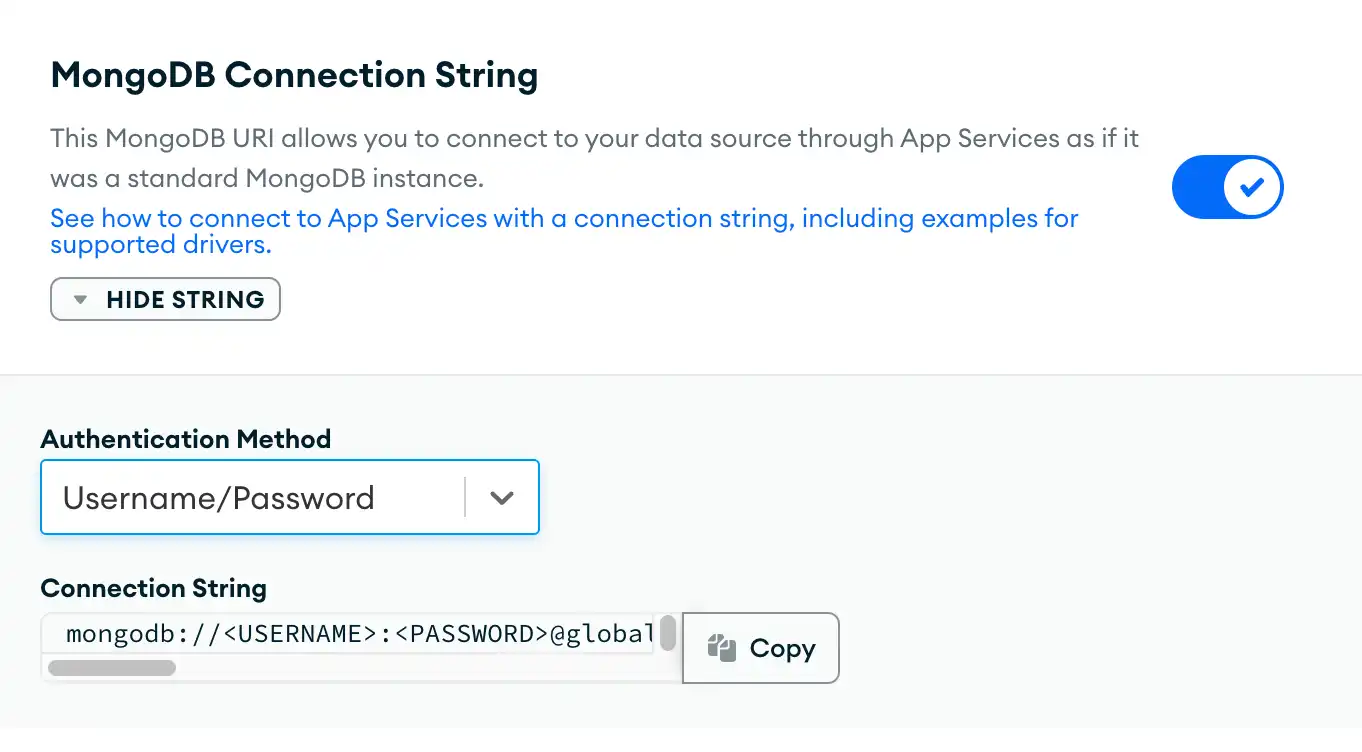
연결 문자열
유선 프로토콜 MongoDB string appName 을 통해 App Services 에 연결하려면 애플리케이션 사용자 에 대한 자격 증명 과 애플리케이션별 쿼리 매개변수를 포함하는 연결 을 구성해야 합니다.
중요
URL 인코딩
URL 인코딩 을(를) 해야 합니다. 연결 문자열을 사용하여 Atlas App Services에 연결할 수 있습니다. Atlas App Services UI의 연결 문자열은 기본적으로 올바르게 인코딩됩니다.
App Services 연결 문자열의 형식은 다음과 같습니다.
mongodb://<credentials>@<region>.services.cloud.mongodb.com:27020/?<parameters>
자격 증명
유선 프로토콜을 통해 실행하는 모든 작업은 연결 문자열에서 지정한 특정 애플리케이션 사용자의 컨텍스트에서 실행됩니다. 사용자는 다음 인증 제공자 중 하나에 등록되어 있어야 합니다.
연결 문자열 자격 증명의 내용은 사용자가 등록되어 있는 인증 제공자에 따라 다릅니다.
형식 |
| ||||
필드 |
| ||||
예시 | |
형식 |
| ||
필드 |
| ||
예시 | |
형식 |
| |||
필드 |
| |||
예시 | |
리전
연결 string 은 앱이 호스팅되는 배포서버 리전 과 cloud 제공자 를 지정해야 합니다.
글로벌 앱은 global 리전 을 사용합니다.
mongodb://<credentials>@global.services.cloud.mongodb.com:27020/?<parameters>
로컬 앱은 <region>.<cloud> 형식을 사용하여 cloud 제공자 와 리전 이름을 지정합니다. 예를 예시 aws-us-east-1 에 배포된 앱 은 다음 연결 string 을 사용합니다.
mongodb://<credentials>@us-east-1.aws.services.cloud.mongodb.com:27020/?<parameters>
매개변수
Atlas App Services에는 연결하려는 string 애플리케이션과 사용자가 제공하는 자격 증명 과 연결된 인증 제공자를 식별하는 특정 연결 옵션이 필요합니다.
App Services 연결 문자열에는 다음과 같은 쿼리 매개 변수가 있습니다.
Parameter | 설명 | |||||||
|---|---|---|---|---|---|---|---|---|
| 이 매개변수는 항상 | |||||||
| 이 매개변수는 항상 | |||||||
| 연결하려는 애플리케이션, MongoDB 서비스 및 인증 제공자를 고유하게 식별합니다.
|
유선 프로토콜 연결 활성화
연결 문자열을 사용하여 App Services App에 연결하려면 먼저 연결된 클러스터에 대해 유선 프로토콜 연결을 활성화해야 합니다.

앱의 최신 버전 가져오기
App Services CLI 를 사용하여 MongoDB 유선 프로토콜 연결을 활성화 하려면 애플리케이션 구성 파일의 로컬 복사본이 필요합니다.
최신 버전의 앱의 로컬 사본을 가져오려면 다음을 실행하세요.
appservices pull --remote="<Your App ID>"
팁
Realm UI의 Deploy > Export App 화면에서 애플리케이션의 구성 파일 사본을 다운로드할 수도 있습니다.
클러스터에 유선 프로토콜 활성화
연결된 클러스터 에 대해 유선 프로토콜 연결을 활성화 하려면 클러스터의 config.json 파일 을 열고 config.wireProtocolEnabled 값을 true 로 설정하다 합니다.
{ "name": "mongodb-atlas", "type": "mongodb-atlas", "config": { "wireProtocolEnabled": true, ... } }
참고
연합 데이터 소스 는 유선 프로토콜 을 통한 연결을 지원 하지 않습니다.
유선 프로토콜을 통한 연결
연결 string을 사용하여 Atlas App Services에 연결
유선 프로토콜을 통해 Atlas App Services에 연결하려면 다음과 같이 인코딩된 URL을 전달합니다. 일반 연결 문자열과 마찬가지로 클라이언트를 만들 때 Atlas App Services 연결 string 을 생성 string.
mongo "mongodb://<user>:<password>@services.cloud.mongodb.com:27020/?authMechanism=PLAIN&authSource=%24external&ssl=true&appName=realm-application-abcde:mongodb-atlas:local-userpass"
mongocxx::instance instance{}; mongocxx::uri uri("mongodb://<user>:<password>@services.cloud.mongodb.com:27020/?authMechanism=PLAIN&authSource=%24external&ssl=true&appName=realm-application-abcde:mongodb-atlas:local-userpass"); mongocxx::client client(uri);
client = pymongo.MongoClient("mongodb://<user>:<password>@services.cloud.mongodb.com:27020/?authMechanism=PLAIN&authSource=%24external&ssl=true&appName=realm-application-abcde:mongodb-atlas:local-userpass")
데이터 읽기 및 수정
유선 프로토콜을 통해 Atlas App Services에 연결되어 있는 동안 표준 MongoDB CRUD 작업을 사용할 수 있습니다. Atlas App Services는 연결 자격 증명에 지정된 인증된 사용자의 string 컨텍스트에 있는 모든 쿼리에 역할 기반 데이터 액세스 규칙 을 적용합니다 .
> use HR > db.employees.findOne(); { "_id": ObjectId("5ae782e48f25b9dc5c51c4a5"), "employeeId": 854271626, "name": { "first": "Lucas", "last": "Lewis" }, "role": "PM", "salary": 200000, "email": "Lucas.Lewis.0271@company.com", "password": "<password>", "manager": { "id": 328892725, "email": "Daniel.Wilson.0474@company.com", "name": { "first": "Daniel", "last": "Wilson" } } }
mongocxx::database db = client["HR"]; mongocxx::collection employees = db["employees"]; bsoncxx::stdx::optional<bsoncxx::document::value> result = collection.find_one({}); if(result) { std::cout << bsoncxx::to_json(result) << "\n"; }
db = client["HR"] employee = db["employees"].find_one(); pprint(employee) {'_id': ObjectId('5ae782e48f25b9dc5c51c4a5'), 'email': 'Lucas.Lewis.0271@company.com', 'employeeId': 854271626.0, 'manager': {'email': 'Daniel.Wilson.0474@company.com', 'id': 328892725.0, 'name': {'first': 'Daniel', 'last': 'Wilson'}}, 'name': {'first': 'Lucas', 'last': 'Lewis'}, 'password': '<password>', 'role': 'PM', 'salary': 200000}
함수 호출
callFunction 데이터베이스 명령을 사용하여 함수를 호출할 수 있습니다.
명령 | 설명 | 프로토타입 | ||||
|---|---|---|---|---|---|---|
지정된 함수 를 호출하고 결과를 반환합니다. | |
db.runCommand({ ... callFunction: "getEmployeeById", ... arguments: ["5ae782e48f25b9dc5c51c4a5"] ...}); { "ok" : 1, "response" : { "_id": ObjectId("5ae782e48f25b9dc5c51c4a5"), "employeeId": 854271626, "name": { "first": "Lucas", "last": "Lewis" }, "role": "PM", "salary": 200000, "email": "Lucas.Lewis.0271@company.com", "password": "<password>", "manager": { "id": 328892725, "email": "Daniel.Wilson.0474@company.com", "name": { "first": "Daniel", "last": "Wilson" } } } }
db.runCommand({ callFunction: "getEmployeeById", arguments: ["5ae782e48f25b9dc5c51c4a5"] });
function_result = db.command("callFunction", "getEmployeeById", arguments=["5ae782e48f25b9dc5c51c4a5"] ...) pprint.pprint(function_result) {'ok': 1, 'response': {'_id': ObjectId('5ae782e48f25b9dc5c51c4a5'), 'email': 'Lucas.Lewis.0271@company.com', 'employeeId': 854271626.0, 'manager': {'email': 'Daniel.Wilson.0474@company.com', 'id': 328892725.0, 'name': {'first': 'Daniel', 'last': 'Wilson'}}, 'name': {'first': 'Lucas', 'last': 'Lewis'}, 'password': '<password>', 'role': 'PM', 'salary': 200000}}
서비스 작업 호출 [사용 중단됨]
callServiceFunction 데이터베이스 명령을 사용하여 서비스 작업을 호출할 수 있습니다.
명령 | 설명 | 프로토타입 | |||||
|---|---|---|---|---|---|---|---|
지정된 서비스 조치 을 호출하고 결과를 반환합니다. | |
> db.runCommand({ ... callServiceFunction: "get", ... service: "http", ... arguments: [{ url: "https://jsonplaceholder.typicode.com/todos/1" }] ... }); { "ok" : 1, "response" : { "status" : "200 OK", "statusCode" : 200, "contentLength" : NumberLong(-1), "headers" : { "Content-Type" : ["application/json; charset=utf-8"], "Connection" : ["keep-alive"], "Vary" : ["Origin, Accept-Encoding"], "X-Content-Type-Options" : ["nosniff"], "Via" : ["1.1 vegur"], "X-Powered-By" : ["Express"], "Cf-Cache-Status" : ["HIT"], "Expect-Ct" : ["max-age=604800, report-uri=\"https://example.com/cdn-cgi/beacon/expect-ct\""], "Set-Cookie" : ["__cfduid=d7f650e765d41beb7598ce2ab62d0c0191536867096; expires=Fri, 13-Sep-19 19:31:36 GMT; path=/; domain=.typicode.com; HttpOnly"], "Access-Control-Allow-Credentials" : ["true"], "Cache-Control" : ["public, max-age=14400"], "Pragma" : ["no-cache"], "Etag" : ["W/\"53-hfEnumeNh6YirfjyjaujcOPPT+s\""], "Server" : ["example.com"], "Cf-Ray" : ["459d08f88e1e56db-IAD"], "Date" : ["Thu, 13 Sep 2018 19:31:36 GMT"], "Expires" : ["Thu, 13 Sep 2018 23:31:36 GMT"] }, "cookies" : { "__cfduid" : { "value" : "d7f650e765d41beb7598ce2ab62d0c0191536867096", "path" : "/", "domain" : ".typicode.com", "expires" : "Mon, 01 Jan 0001 00:00:00 GMT", "maxAge" : 0, "secure" : false, "httpOnly" : true } }, "body" : BinData(0,"ewogICJ1c2VySWQiOiAxLAogICJpZCI6IDEsCiAgInRpdGxlIjogImRlbGVjdHVzIGF1dCBhdXRlbSIsCiAgImNvbXBsZXRlZCI6IGZhbHNlCn0=") } }
db.runCommand({ callServiceFunction: "get", service: "http", arguments: [{ url: "https://jsonplaceholder.typicode.com/todos/1" }] });
result = db.command("callServiceFunction", "get", service="http", arguments=[{"url": "https://jsonplaceholder.typicode.com/todos/1"}] ...) pprint.pprint(result) {'ok': 1, 'response': {'body': b'{\n "userId": 1,\n "id": 1,\n "title": "delectus aut' b' autem",\n "completed": false\n}', 'contentLength': -1, 'cookies': {'__cfduid': {'domain': '.typicode.com', 'expires': 'Mon, 01 Jan 0001 00:00:00 ' 'GMT', 'httpOnly': True, 'maxAge': 0, 'path': '/', 'secure': False, 'value': 'd4b10004e96ca7fee0be03dceebaf2ab71536866400'}}, 'headers': {'Access-Control-Allow-Credentials': ['true'], 'Cache-Control': ['public, max-age=14400'], 'Cf-Cache-Status': ['HIT'], 'Cf-Ray': ['459cf7fc7e20c1bd-IAD'], 'Connection': ['keep-alive'], 'Content-Type': ['application/json; charset=utf-8'], 'Date': ['Thu, 13 Sep 2018 19:20:00 GMT'], 'Etag': ['W/"53-hfEnumeNh6YirfjyjaujcOPPT+s"'], 'Expect-Ct': ['max-age=604800, ' 'report-uri="https://example.com/cdn-cgi/beacon/expect-ct"'], 'Expires': ['Thu, 13 Sep 2018 23:20:00 GMT'], 'Pragma': ['no-cache'], 'Server': ['example.com'], 'Set-Cookie': ['__cfduid=d4b10004e96ca7fee0be03dceebaf2ab71536866400; ' 'expires=Fri, 13-Sep-19 19:20:00 GMT; ' 'path=/; domain=.typicode.com; ' 'HttpOnly'], 'Vary': ['Origin, Accept-Encoding'], 'Via': ['1.1 vegur'], 'X-Content-Type-Options': ['nosniff'], 'X-Powered-By': ['Express']}, 'status': '200 OK', 'statusCode': 200}}
로그인한 사용자의 데이터 가져오기
userProfile 데이터베이스 명령 을 사용하여 인증된 사용자의 사용자 객체 를 가져올 수 있습니다.
명령 | 설명 | 프로토타입 | |||
|---|---|---|---|---|---|
인증된 사용자의 사용자 객체 를 반환합니다. | |
> db.runCommand({ userProfile: 1 }); { "ok" : 1, "profile" : { "userid" : "5ad7a79e8f25b975898d77b8", "domainid" : ObjectId("5ad7a69746224c054067c8b1"), "identities" : [ { } ], "data" : "{\"email\":\"joe.mango@company.com\"}", "type" : "normal", "roleassignments" : [ ] } }
db.runCommand({ userProfile: 1 });
result = db.command("userProfile", 1) pprint.pprint(result) {'ok': 1, 'profile': {'data': '{"email":"joe.mango@company.com"}', 'domainid': ObjectId('5ad7a69746224c054067c8b1'), 'identities': [{}], 'roleassignments': [], 'type': 'normal', 'userid': '5ad7a79e8f25b975898d77b8'}}