What is MongoDB Atlas?
Database-as-a-Service (DBaaS) is a service that allows you to set up, deploy, and scale a database without worrying about on-premise physical hardware, software updates, and the details of configuring for performance. With DBaaS, a cloud provider does all that for you—and gets you up and running right away.
MongoDB Atlas is a fully-managed cloud database that handles all the complexity of deploying, managing, and healing your deployments on the cloud service provider of your choice (AWS , Azure, and GCP). MongoDB Atlas is the best way to deploy, run, and scale MongoDB in the cloud. With Atlas, you’ll have a MongoDB database running with just a few clicks, and in just a few minutes.
So, let’s look at the steps needed to get started using MongoDB Atlas.
Getting started with MongoDB Atlas
To begin using MongoDB Atlas, you’ll need to do the following:
- Create a MongoDB Cloud account
- Create a MongoDB Atlas cluster
- Configure network access and create a cluster user
- Connect to the cluster
MongoDB Atlas has a free tier, so you won’t need any payment or credit card information.
Now, let’s get started!
Creating a MongoDB Atlas account
Registration
In order to create an Atlas account, navigate to https://www.mongodb.com/cloud/atlas/register.
You can sign up using your Google account. This would be the preferred method; however, you can also register using your email address.
Organizations and projects
At the end of the sign-up process, you will be prompted to create an organization and a project.
Organizations allow you to group and define users and teams, and grant them access to the different projects.
Projects allow you to define and organize resources such as database clusters, triggers, and data lakes. A common way to use projects is to define each environment as a project. For example, you can have a separate project for development, testing, and production.
You can skip this step and go directly to the management console for MongoDB Atlas. But you will need an organization and a project in order to create a database cluster, so it makes sense to do this step now. If you decide to skip it, you’ll be able to create an organization and a project later.
Setting up a cluster in MongoDB Atlas
Once you have an Atlas account and have created an organization and a project, you’ll be able to create a database cluster.
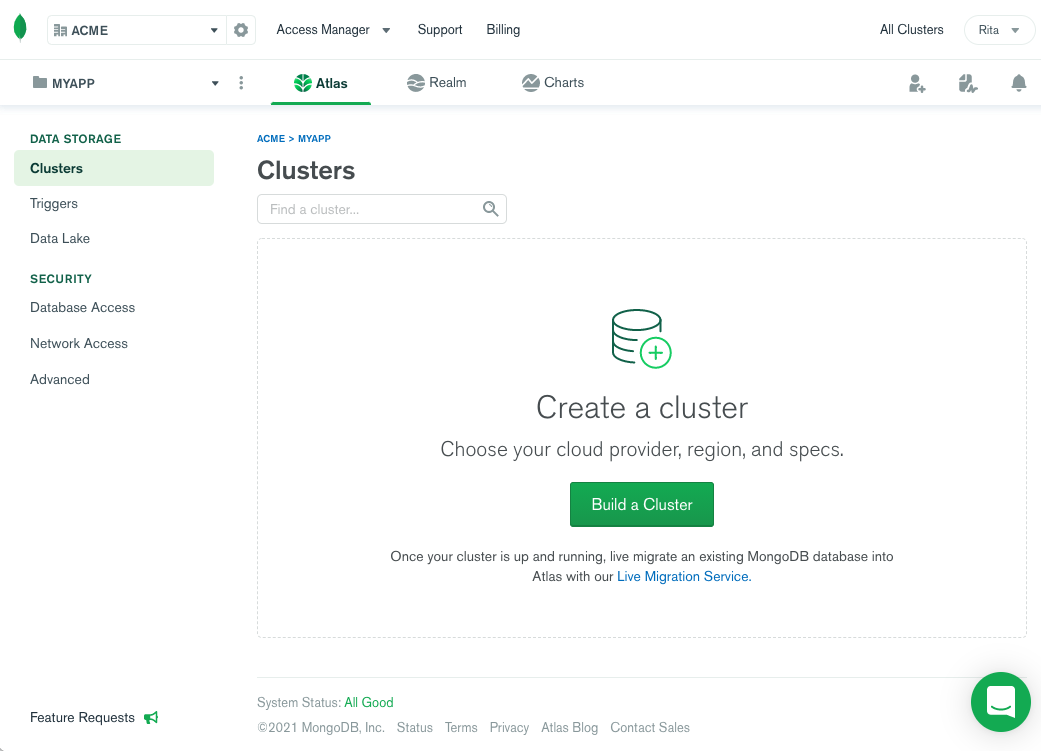
Make sure you have the desired organization and project selected in the top navigation dropdowns. Then, select “Clusters” from the left navigation menu and click on the Build a Cluster button.
You’ll be presented with a choice of Shared Cluster, Dedicated Cluster, and Multi-Cloud & Multi-Region Cluster.
Shared Cluster is the least expensive (or free, depending on the usage) but it utilizes shared hardware resources and network.
Dedicated Cluster provides you with a dedicated set of hardware and network isolation as well as the option to scale automatically within a single region.
The Multi-Cloud & Multi-Region Cluster builds on top of what the dedicated cluster provides. It offers the best availability since it can replicate data across multiple geographic regions. It also allows the creation of multi-cloud clusters using any combination of cloud providers: AWS, Azure, and GCP.
If you’d like to explore a little with the free tier, select the Shared Cluster.
Once you have selected the type of cluster, you’ll be able to choose from the top three cloud providers (Amazon Web Services, Microsoft Azure, and Google Cloud Platform) and select a region for hosting the cluster.
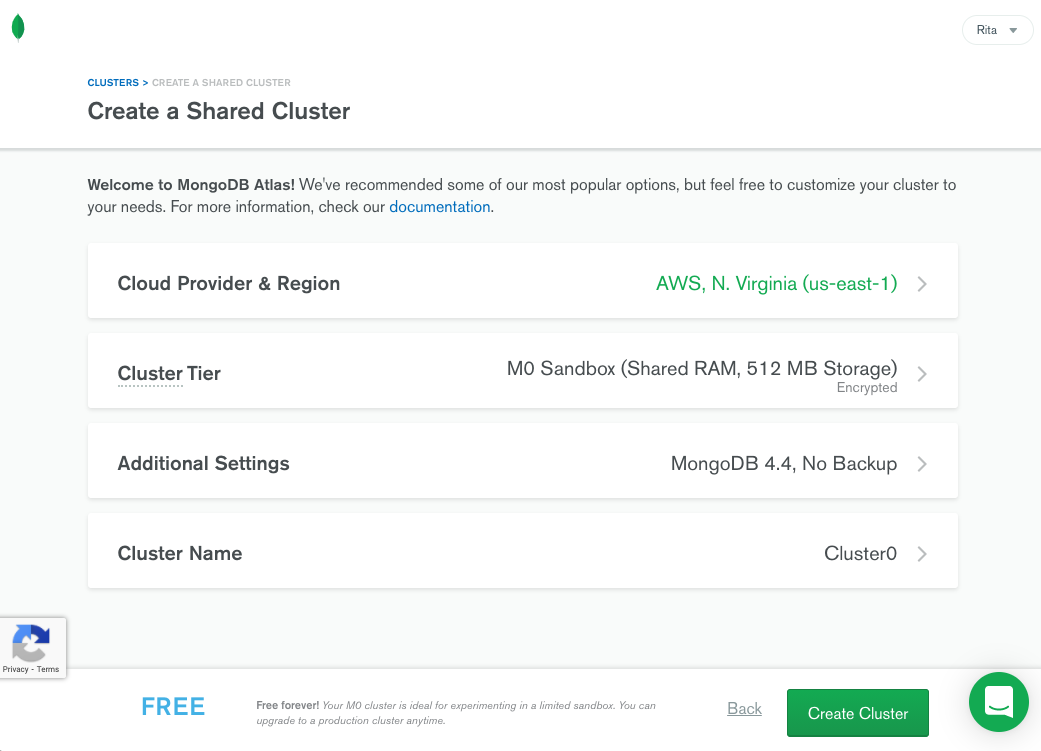
You’ll also be able to select the cluster tier and additional settings, such as turn on backup and cluster name. Some options, such as the MongoDB version cloud backups, are only available with the paid cluster tiers.
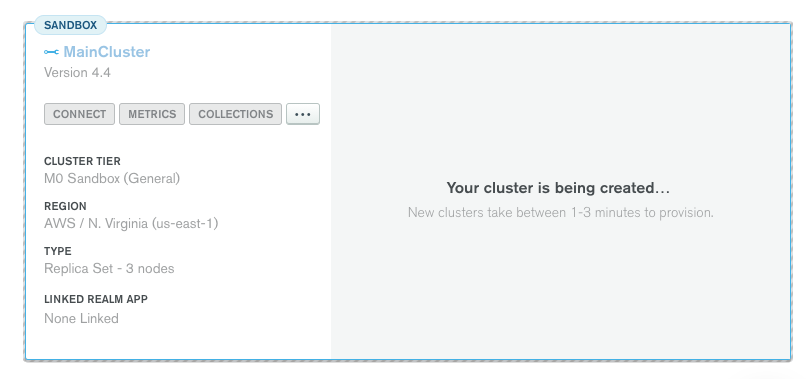
Once you are satisfied with your selection, click the Create Cluster button. It may take a couple of minutes for Atlas to launch your cluster in the selected cloud hosting provider.
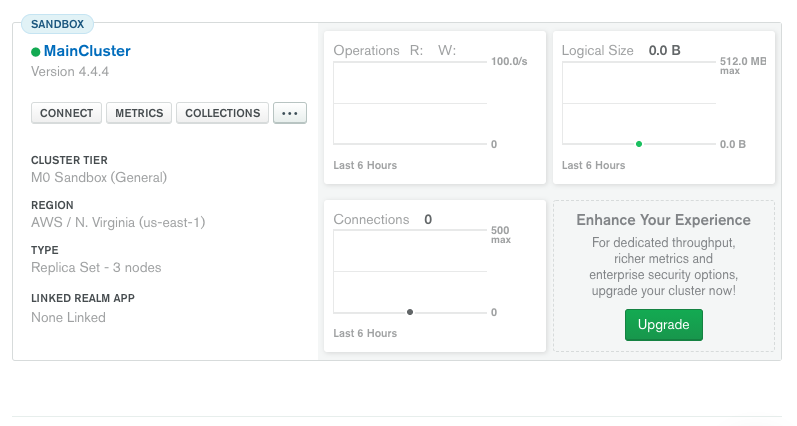
When the cluster is ready, you will see the cluster name with a green circle next to it, indicating a successful setup. You will also see several metrics next to it indicating connections, operations, and the size of your cluster.
Accessing a MongoDB Atlas cluster
In order to access your MongoDB Atlas cluster, you’ll need to enable network access for your network or IP address and create a database user for connecting to the cluster. After that, you can generate a connection string for your application or script.
Allowing access to your IP address
For security reasons, new database clusters do not have network access enabled by default. You need to enable network access explicitly by whitelisting the addresses that will connect to the cluster.
Each entry can be an IP address, a subnet, or you can enable access from any location. In general, you would grant access only to a list of subnets or IP addresses rather than grant access to any location. This limits the connections your cluster accepts, making it more secure.
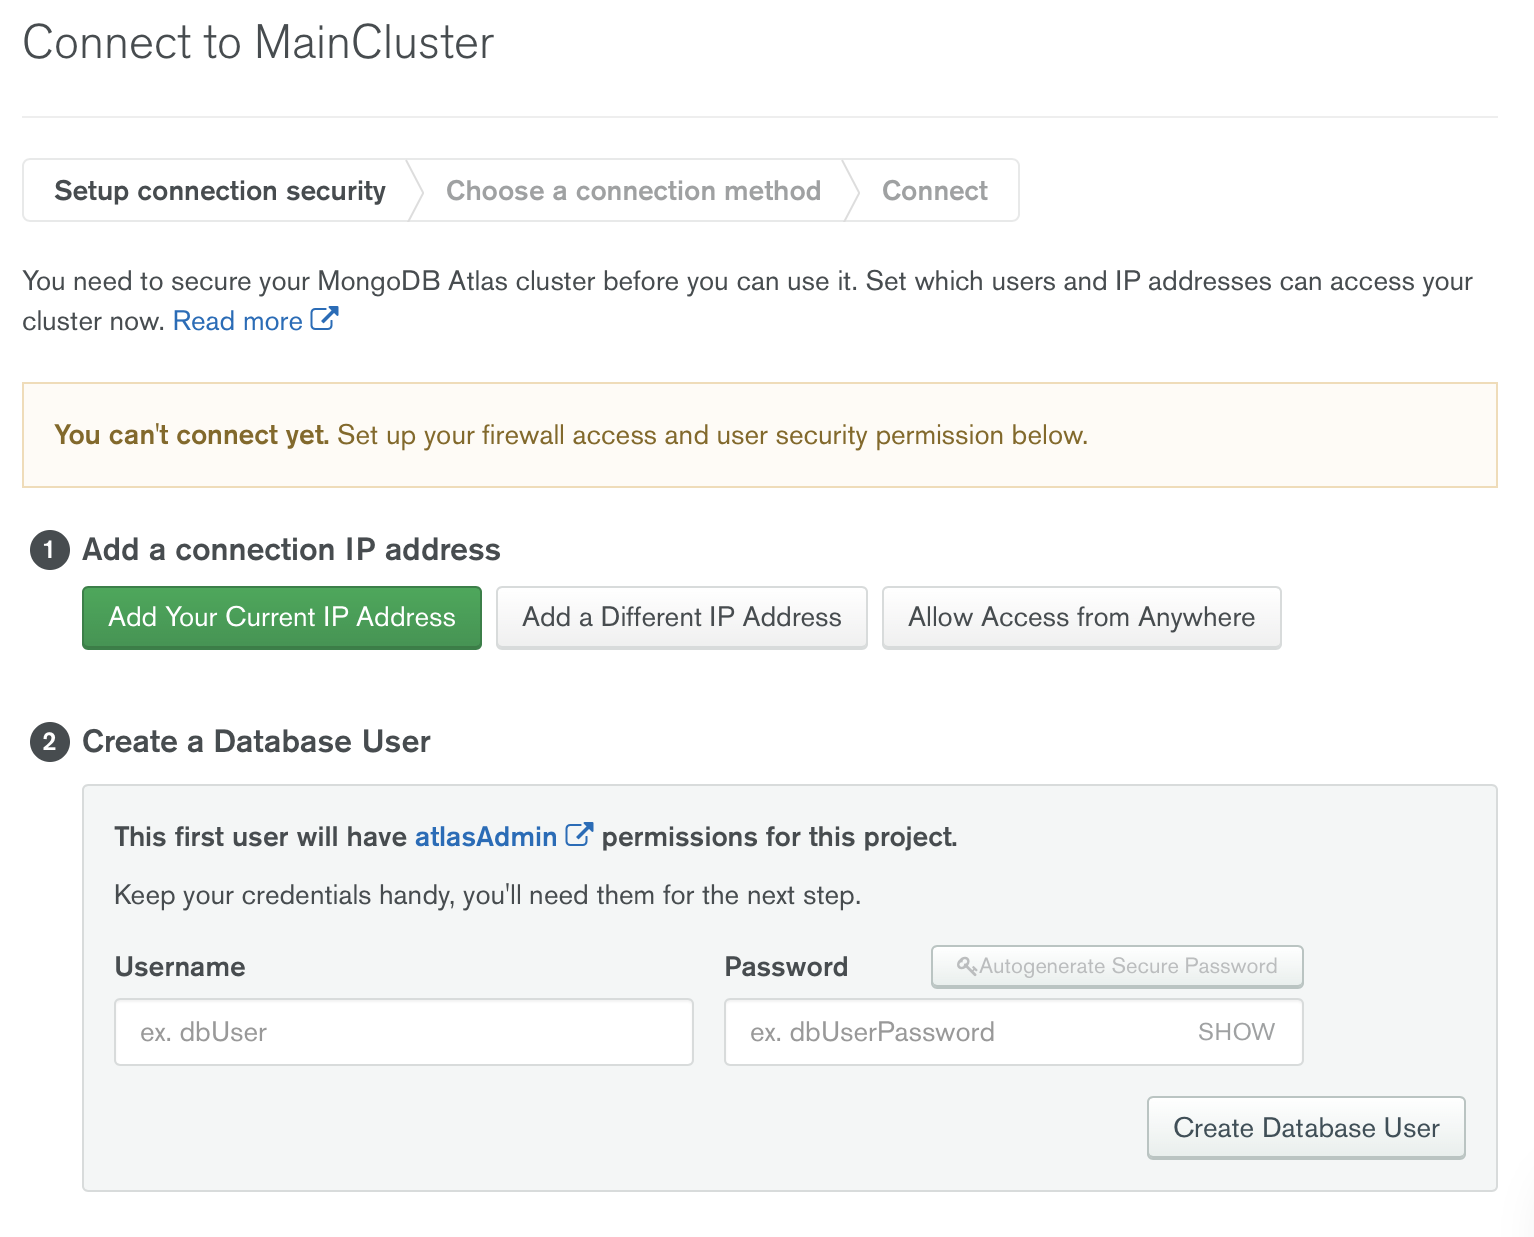
To enable network access to your cluster, click on the Connect button from the clusters view in the Atlas management console. This will open up the connection settings wizard.
In order to allow access from your current IP address, click on the Add your current IP address button. If you need to access it from a different IP address or subnet, click on the Add a different IP address button and enter the IP or a subnet using the CIDR notation, such as 172.10.1.0/24.
Creating a cluster user
In order to connect to the database from a script or an application, you must first create a MongoDB database user. The database user allows you to connect and use the databases. Please note this is _separate _from the user that logs in and manages the clusters and resources in Atlas.
Database users are created per project and have access to all the clusters in the project. You can also assign different roles and privileges to the database users. Note that the first user you create will automatically be granted administrative privileges.
Right below the network access settings, you can create a database user. First enter the username and password and then click on the Create database user button.
If you later need to add more users to the project, you can do it from the Security tab.
Generating a database connection string
Depending on your application, you may need to install a driver (library) corresponding to your platform in order to connect to a cluster in Atlas. You can see the full list of supported drivers here. If you’re using Compass (the MongoDB UI application) or the mongo shell application, the drivers are already built in.
Regardless of your application, you’ll need to generate a database connection string for your cluster. If you are just creating your cluster, the last step in the process will allow you to create a connection string. Once you have enabled network access and created a database user, you can click on the Choose connection method button, which will allow you to generate a connection string for your application. You can also create the connection string by clicking on the Connect button on your cluster from the Clusters tab in Atlas.
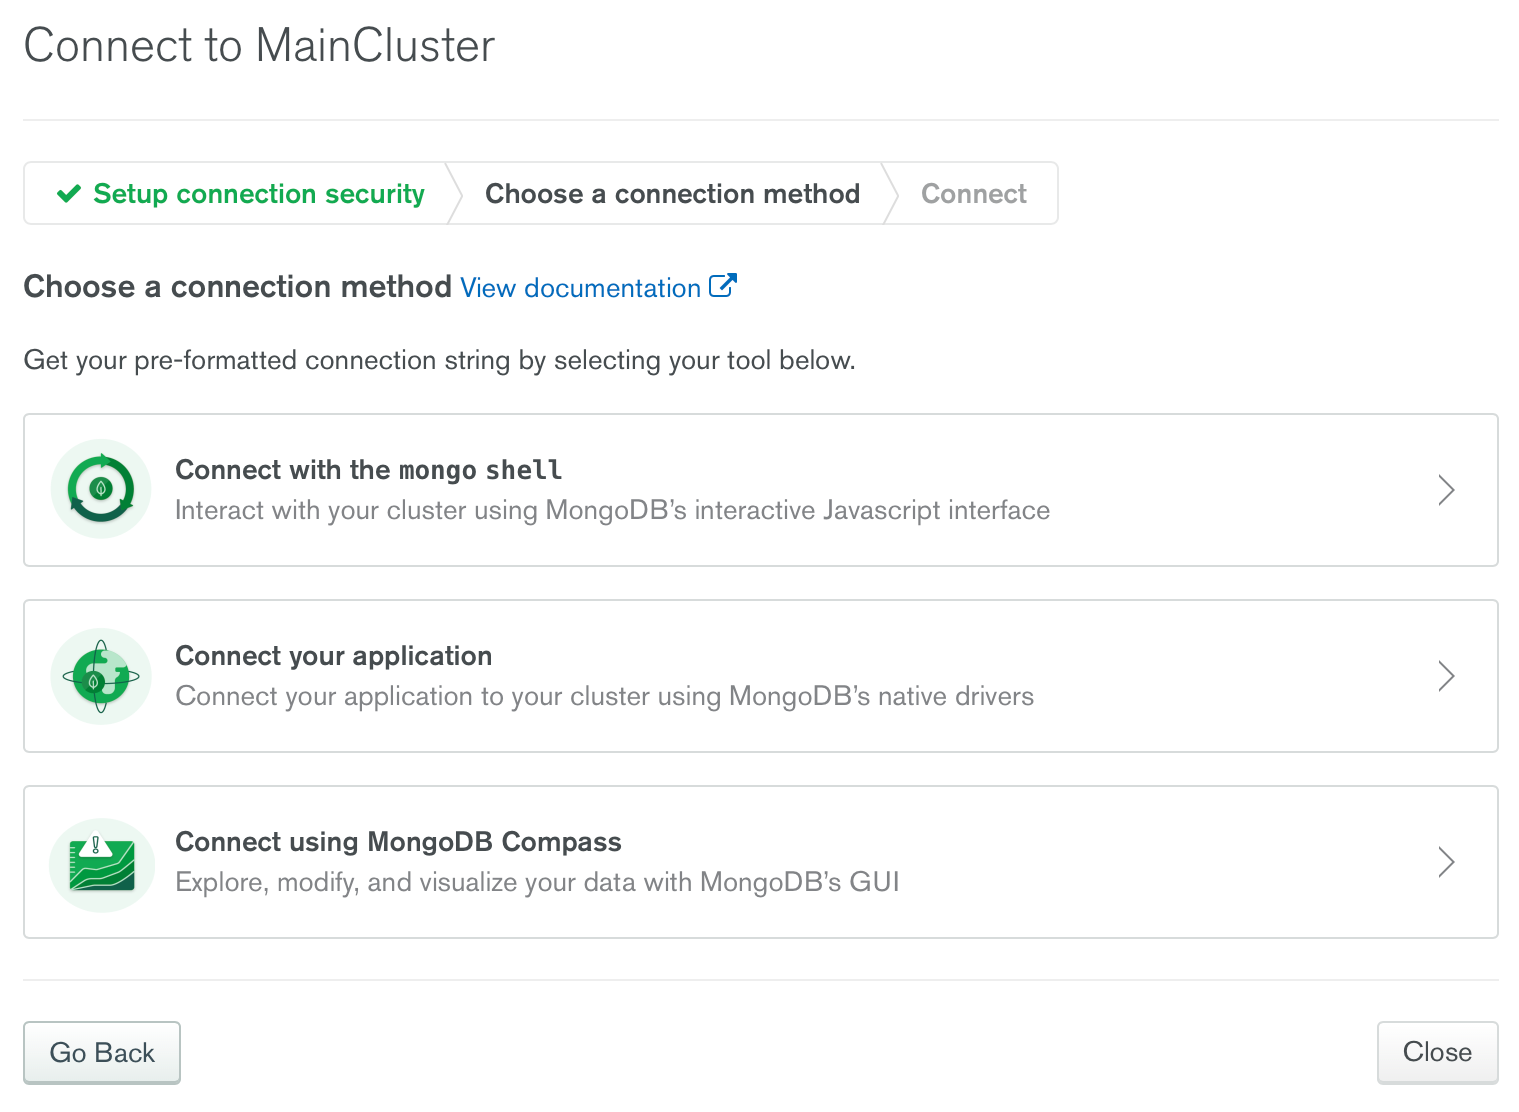
Click on the Connect your application button and then select the driver, such as Node.js, Python, or another language. Then, select the version to generate the connection string for your application. You can even check the “Include full driver code example” option in order to generate the code to test the connectivity.
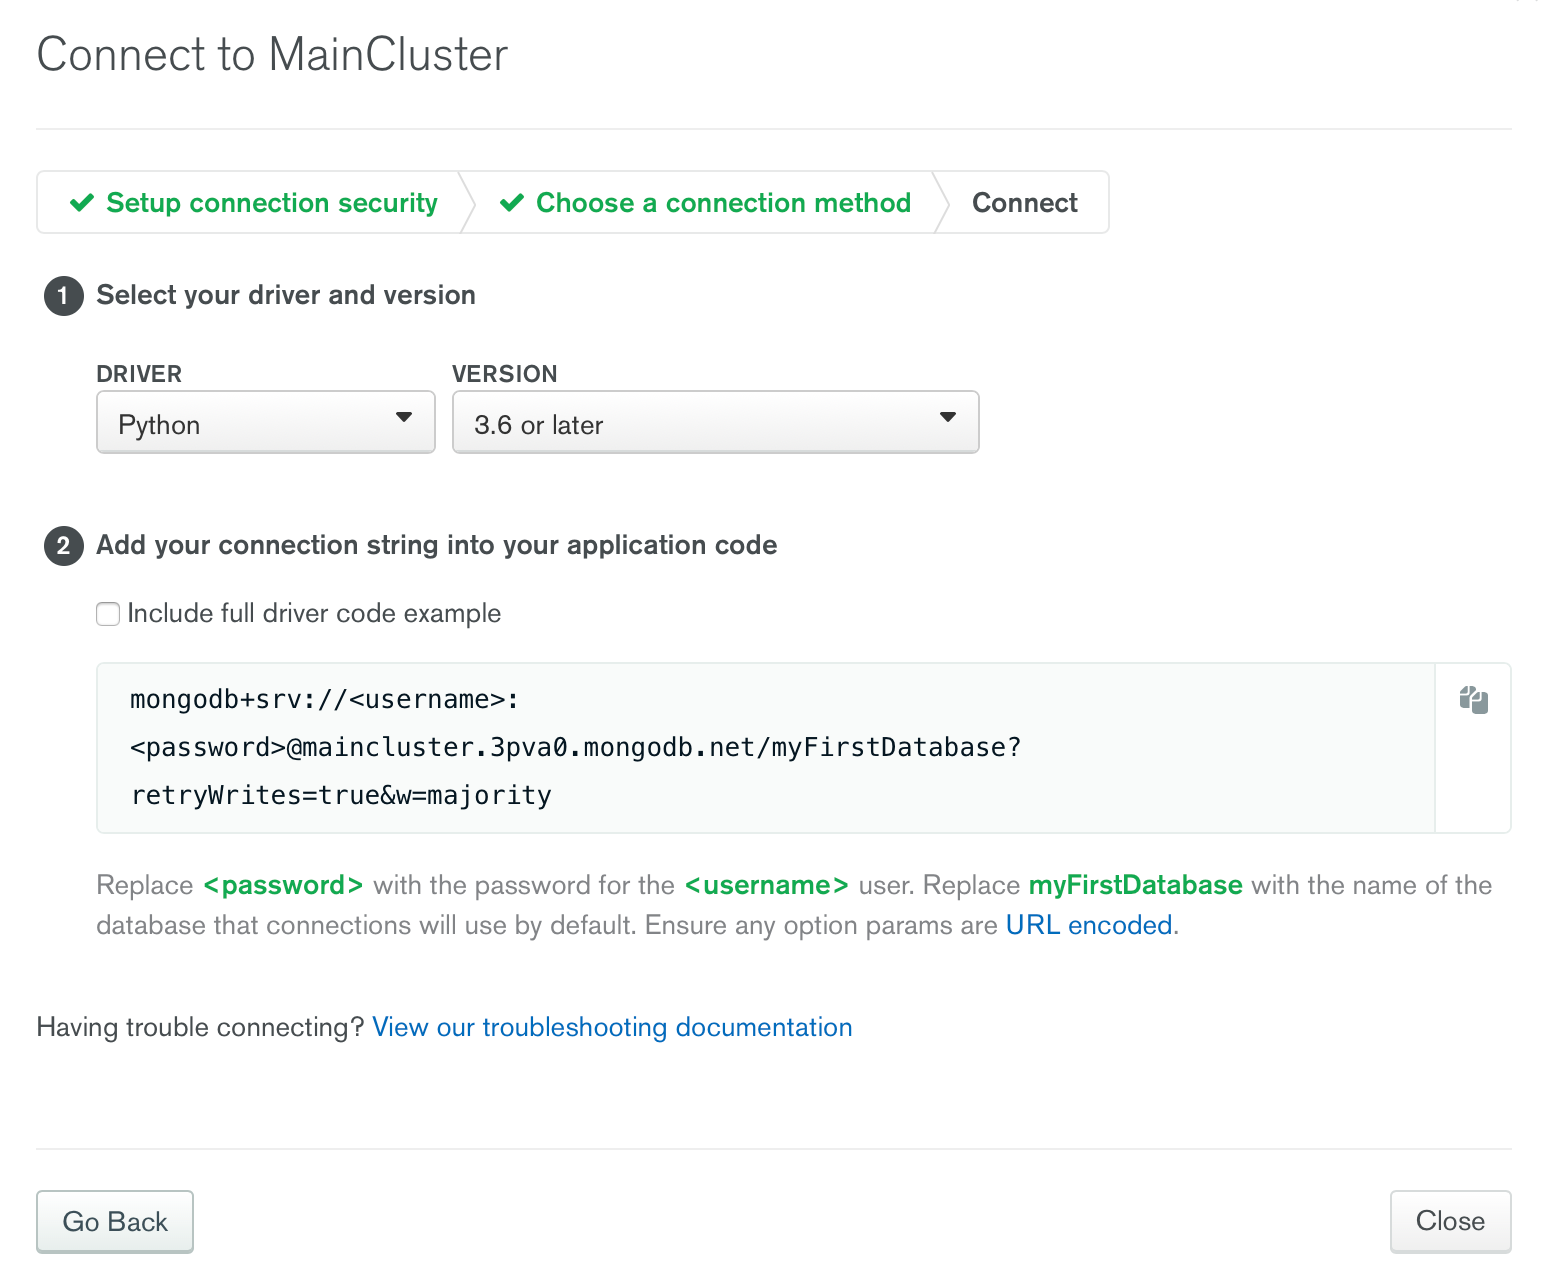
Note that the connection string generated does not include the actual cluster user login. You will need to replace the
Sample data
If you are just starting with MongoDB, you may want to load a sample data set.
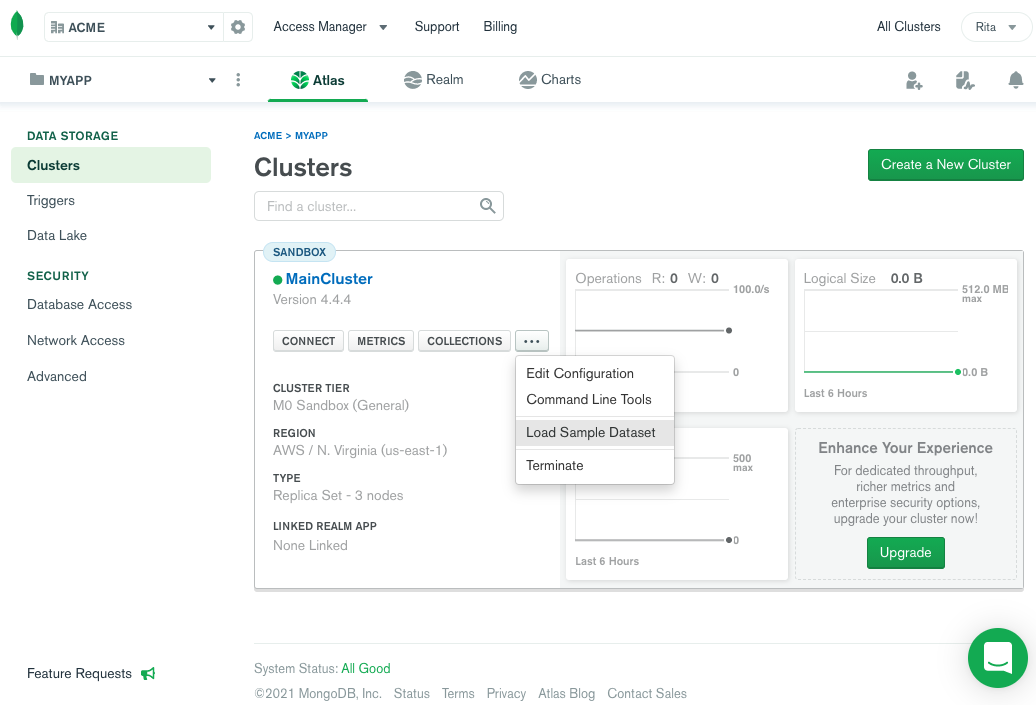
From the cluster view in the Atlas management console, click on the ellipsis button [...] and select “Load Sample Data” from the menu. Then confirm your selection.
This will load a few sample collections that you can use to run test queries and learn more about MongoDB. You can view the sample collections loaded by clicking on the Collections button on your cluster from the Clusters tab in Atlas.
Conclusion
MongoDB Atlas is a great option for those who don’t have the time or resources to manage all the infrastructure needed for a MongoDB cluster. You can have a cluster up and running in minutes, allowing you to focus on your _application _instead of managing a database. And with the free tier, it’s easy to start exploring.
Be sure to also check out the Atlas documentation and MongoDB University courses for developers. They’re free and will provide you with more in-depth information about how to use MongoDB with Java, Javascript, Python or C#/.Net.