教程:使用触发器、函数和值构建无服务器 GitHub 贡献跟踪器
在此页面上
预计完成时间:30 分钟
在本教程中,您将使用 Atlas App Services 构建一个无服务器应用程序,用于监视 GitHub 存储库并跟踪贡献。
您构建的 App Services App 将具有以下几个功能:
在 MongoDB Atlas collection中追踪为您的项目做出贡献的用户。
在新贡献者提出拉取请求或文件问题时发表评论,表示欢迎。
生成并发送每周报告,总结对存储库的贡献。
完成本教程后,您将了解如何执行以下任务:
编写并运行无服务器函数来处理应用的逻辑。
通过 API 连接到外部服务
先决条件
在开始本教程之前,您需要满足以下条件:
一个Github存储库。 您构建的应用程序将追踪对此存储库的贡献。 您可以 创建新的存储库 或使用您具有管理员访问权限的现有存储库。
MongoDB Atlas 群集。 如果您还没有集群,请注册MongoDB Atlas并免费创建一个。
另请注意,本教程不使用部署草稿工作流程。 部署草稿是应用程序更改的collection,您可以将其作为单个单元进行部署或丢弃。除非禁用了部署草稿,否则可能需要将更改保存到草稿,然后手动部署。
创建新的应用程序
首先,您需要在 App Services 中创建一个应用程序。
要创建应用,请执行以下操作:
在顶部导航栏中,单击 App Services 。
单击 Create a New App(连接)。
将应用命名为
github-tracker-tutorial。选择您的集群以将其链接到新应用。
单击 Create App Service(连接)。
欢迎新的 GitHub 贡献者
我们将使用Github 存储库Github Webhook 将应用程序连接到 存储库 。每当存储库中发生某些事件(例如新的提交或拉取请求)时,Webhook 都会让您的应用程序知道。 每个事件都运行一个无服务器函数,您可以在其中执行某些操作以进行响应。
在本教程中,我们将使用GithubREST API 每当贡献者在存储库上打开第一个拉取请求或问题时,向其发送欢迎消息。
创建终结点
Webhook 的工作原理是将有关事件的请求发送到您的应用控制的 URL。在您的应用中,您需要公开具有唯一 URL 的自定义终结点,以接收和处理 Webhook 请求。
要创建端点,请执行以下操作:
在左侧导航菜单中,单击 HTTPS Endpoints。
单击 Add An Endpoint(连接)。
将端点路由命名为
/greetNewContributors。在Operation Type下,复制端点回调 URL。 稍后设置 GitHub Webhook 时会用到它。
将 HTTP 方法设置保留为帖子 。
对于授权,请选择Require a Secret 。
输入新的密钥名称,然后单击Create以创建新密钥。 然后,输入
tutorial作为密码值。 这要求所有传入请求在请求 URL 中包含查询参数secret=tutorial。为端点创建一个新的Realm 函数并将其命名为
endpoints/greetNewContributors。暂时先设置一个基本处理程序,仅响应传入的调用而不执行其他工作。将以下代码复制到函数主体中:
exports = async function greetNewContributors(request, response) { return response .setStatusCode(200) .setBody("Successfully received a GitHub webhook event") } 单击Save并部署端点。
更新端点函数的身份验证设置
现在您已在应用中创建了终结点,您需要更改终结点函数的身份验证设置,以便接受 GitHub Webhook。
要更新函数的身份验证设置,请执行以下操作:
在左侧导航菜单中,单击 Functions。
找到并选择您的端点函数。
单击 Settings(连接)。
在Authentication下,将身份验证方法更改为System 。
单击Save以部署函数。
将端点连接到 GitHub Webhook
当您的终结点函数准备就绪后,您需要在 GitHub 存储库中设置一个 Webhook,用于将事件发送到终结点。
要在存储库中创建 Webhook,请执行以下操作:
打开存储库的设置,然后在左侧导航菜单中选择Webhooks 。
添加新的 Webhook 设立 Payload URL设置为您刚刚创建的端点的URL ,加上设立为密钥值的
secret查询参数,例如:?secret=tutorial。您的有效负载URL将如下所示,但存在一些差异,具体取决于应用的部署模型。 请注意URL末尾附加的?secret=tutorial:https://us-west-2.aws.data.mongodb-api.com/app/<App ID>/endpoint/greetNewContributors?secret=tutorial 将 Webhook 内容类型设置为application/json 。
将Secret留空。 HTTPS 端点会忽略此处输入的任何值,因此我们在前面的步骤中将密钥作为查询参数附加在有效负载URL上。
选择单个事件并将 Webhook 配置为仅发送Issues和Pull requests的事件。
单击Add webhook以保存新的 Webhook。
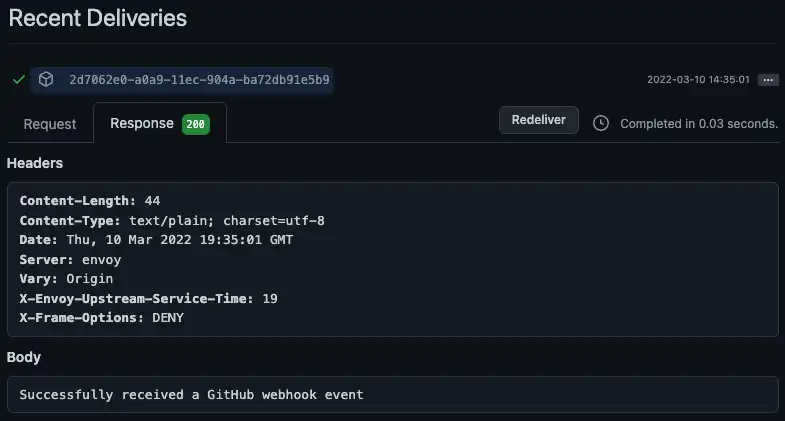
要确认 Webhook 成功调用您的端点,请检查App Services中的应用程序日志是否有类型为Endpoint的条目。 您可以通过单击左侧导航菜单中的Logs来到达那里。
您还可以检查 Webhook 的请求日志 Github在Recent Deliveries 中,在 Webhook 设置页面的 下。每个成功的请求旁边都有一个绿色复选标记。

获取 GitHub 访问令牌
Webhook 现已设置为将来自 GitHub 的事件发送到您的终结点。但是,要在终结点中使用 GitHub API 响应事件,您需要访问令牌。本教程使用个人访问令牌,但您也可以设置 GitHub 应用并使用该令牌。
打开 GitHub 用户设置(而不是存储库设置),然后在左侧导航菜单中选择Developer settings 。
在左侧导航菜单中,选择Personal access tokens ,然后单击Generate new token 。
使用描述性名称和合理的到期时间配置令牌。由于这是一个教程,请考虑让令牌在 7 天后过期。
选择
repo范围。单击 Generate token(连接)。
将令牌复制到安全的地方,以便再次使用。此后,GitHub 将不再向您显示该令牌。
将令牌存储为值
返回您的应用,添加一个新值以保存您刚刚生成的个人访问令牌。您将能够从终结点引用该值,而无需将令牌硬编码到函数中。
要创建值,请执行以下操作:
在左侧导航菜单中,单击 Values。
单击 Create New Value(连接)。
将值命名为
GitHubAccessToken。将类型设置保留为Value 。
将个人访问令牌粘贴到值的输入框中。该值必须是有效的 JSON,因此请确保周围有引号。
单击 Save(连接)。
安装 GitHub API 客户端
端点将与Github的REST API交互以留下评论。 您可以使用内置的context.http客户端或外部库直接写入HTTP请求并将其发送到API 。 但是,在本教程中,我们使用Github 的官方 Node.js 库( Octokit) 封装API 。安装后,您将能够从应用中的任何函数导入该库。
要将 Octokit 库添加到您的应用中,请执行以下操作:
在左侧导航菜单中,单击 Functions。
选择 Dependencies 标签页。
单击 Add Dependency(连接)。
输入包名称:
@octokit/request。单击 Add(连接)。
等待 App Services 安装软件包。安装应在几秒钟内完成,但最多可能需要一分钟。
编写端点逻辑
现在您已经拥有访问令牌并安装了 Octokit,您可以更新终结点函数,使其在收到事件时真正执行一些操作。具体而言,该函数应该:
解析传入的 Webhook 事件
在 MongoDB 中记录贡献
通过 GitHub API 添加评论
向 GitHub 发送回信息丰富的响应
要更新函数,请执行以下操作:
在左侧导航菜单中,单击 Functions。
单击endpoints/greetNewContributors打开端点函数编辑器。
将基本函数替换为以下代码:
functions/endpoints/greetNewContributors.jsexports = async function greetNewContributors(request, response) { // Parse the webhook event from the incoming request. const event = JSON.parse(request.body.text()); // Don't do anything unless this is a new issue or pull request if (event.action !== "opened") { return response.setStatusCode(200); } // Get data from the GitHub webhook event. // Based on the webhook configuration the event will be one of the following: // - issues: https://docs.github.com/en/developers/webhooks-and-events/webhooks/webhook-events-and-payloads#issues // - pull_request: https://docs.github.com/en/developers/webhooks-and-events/webhooks/webhook-events-and-payloads#pull_request const sender = event.sender; const repo = event.repository; const contribution = event.issue || event.pull_request; const contribution_url = event.issue ? event.issue.url : event.pull_request.issue_url; const issue_number = contribution.number; // Record this contribution in the user's contributor document. // If this user hasn't contributed to the repo before, create a document for them. const atlas = context.services.get("mongodb-atlas"); const contributors = atlas.db("community").collection("contributors"); const contributor = await contributors.findOneAndUpdate( // Look up the user by their GitHub login { login: sender.login }, // Add this issue or pull request to their list of contributions { $push: { contributions: { date: new Date(), type: event.issue ? "issue" : "pull_request", url: contribution_url, }, }, }, // If they haven't contributed before, add them to the database { upsert: true, returnNewDocument: true } ); // Send a welcome message to first time contributors on their issue or pull request const isFirstTimeContributor = contributor.contributions.length === 1; if (isFirstTimeContributor) { const octokit = require("@octokit/request"); await octokit.request( "POST /repos/{owner}/{repo}/issues/{issue_number}/comments", { headers: { authorization: `token ${context.values.get("GitHubAccessToken")}`, }, owner: repo.owner.login, repo: repo.name, issue_number: issue_number, body: `Hi there ${sender.login} 👋 Thanks for your first contribution!`, } ); } // Configure the HTTP response sent back to GitHub return response .setStatusCode(200) .setHeader("Content-Type", "application/json") .setBody( isFirstTimeContributor ? `This is ${sender.login}'s first contribution!` : `${sender.login} has contributed before.` ); }; 单击Save并部署端点。
测试端点
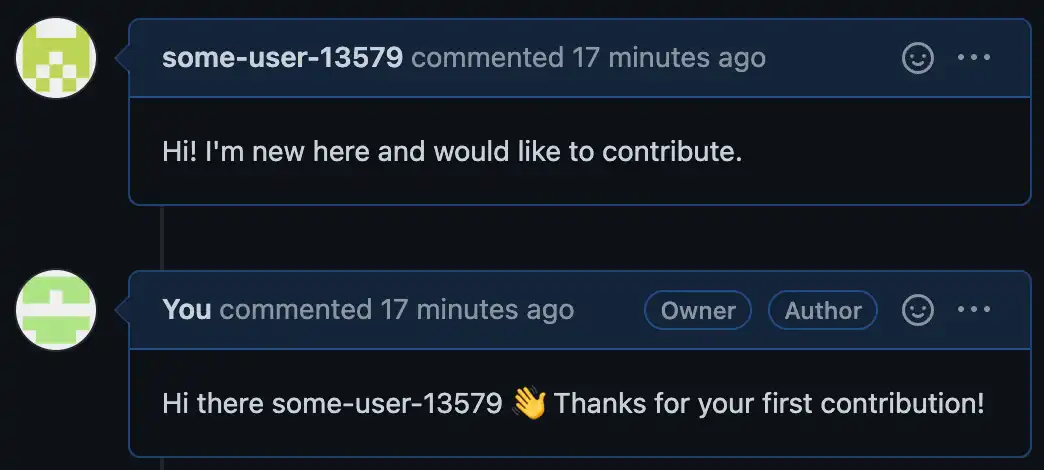
欢迎消息终结点现在应该已完全设置就绪。要测试它是否正常工作,请在存储库上创建一个新问题或拉取请求。终结点将在您第一次执行此操作时向相关讨论添加新评论,但对于后续尝试不会添加欢迎消息。

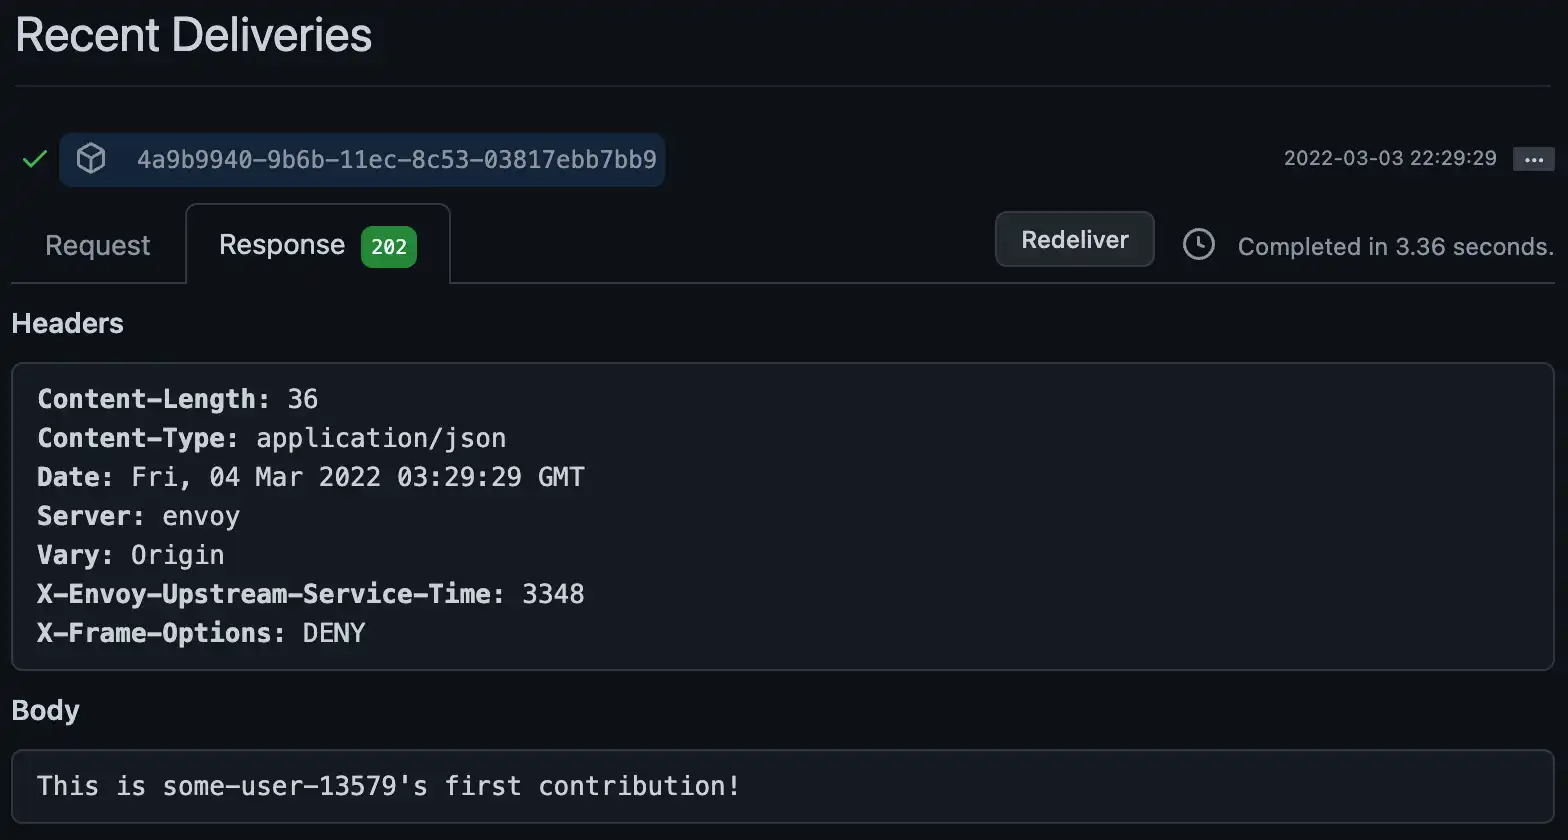
GitHub 记录存储库 Webhook 请求,因此您也可以检查 GitHub 中的日志条目,确认一切正常工作。每个请求日志都包含来自终结点的响应消息。

提示
如果要重置测试,请从community.contributions中删除包含您的 Github 用户名的文档。这样,应用程序就会“忘记”您以前的贡献,并欢迎您下次贡献。
生成每周社区报告
您的应用连接到 GitHub,存储贡献信息,并欢迎新的贡献者。现在,我们将其扩展为自动分析您的存储库并生成报告。
指定哪些存储库应生成报告
您的应用需要通过一种方法来知道它每周应该为哪些存储库生成报告。在本教程中,我们将把列表硬编码在一个值中。
创建一个名为GitHubProjects的新值,其中包含一个对象数组。 每个对象都指定 GitHub 存储库的owner和repo名称。 确保包含您的存储库条目。
[ { "owner": "<GitHub Username>", "repo": "<Repository Name>" } ]
创建生成报告的函数
报告是总结一段时间内对存储库的贡献的文档。我们将使用函数为存储库创建按需报告。
创建一个名为generateCommunityReport的新函数并添加以下代码:
exports = async function generateCommunityReport({ owner, repo, startDate }) { // Look up issues and pull requests that had activity const octokit = require("@octokit/request"); const { data: issuesWithActivity } = await octokit.request( "GET /repos/{owner}/{repo}/issues", { headers: { authorization: `token ${context.values.get("GitHubAccessToken")}`, }, owner: owner, repo: repo, since: startDate, } ); // Look up users that contributed to the repo const atlas = context.services.get("mongodb-atlas"); const contributors = atlas.db("community").collection("contributors"); const allContributors = await contributors .find({ contributions: { $elemMatch: { date: { $gt: new Date(startDate) }, owner: owner, repo: repo, }, }, }) .toArray(); // Keep track of users who made their first contribution const newContributors = allContributors.filter((c) => { new Date(c.contributions[0].date) > new Date(startDate); }); // Return a report with the data return { owner, repo, startDate, issuesWithActivity, allContributors, newContributors, }; };
每周生成并保存报告
您刚刚创建的函数按需为存储库创建报告。但是,此时没有任何对象调用该函数,并且生成的报告未保存在任何地方。要实际使用该函数,我们将创建一个定时 Atlas Trigger,它每周调用一次该函数,并将生成的报告保存在关联集群中。
要创建trigger,请执行以下操作:
在左侧导航菜单中,单击 Triggers。
单击 Add a Trigger(连接)。
选择Scheduled作为trigger类型。
为trigger命名
generateAndSaveCommunityReports选择Advanced安排类型
输入以下 cron 计划,以在每周一上午 5 点 UTC 运行一次:
0 5 * * 1 为trigger创建一个新函数并将其命名为
triggers/generateAndSaveCommunityReports。单击Add Dependency并安装
moment,我们使用它来处理函数中的日期。将以下代码复制到函数主体中:
functions/triggers/generateAndSaveCommunityReports.jsexports = async function generateAndSaveCommunityReports() { const projects = context.values.get("GitHubProjects"); const lastMonday = getLastMonday(); // e.g. "2022-02-21T05:00:00.000Z" // Generate a report for every tracked repo const reportsForLastWeek = await Promise.all( // Call the `generateCommunityReport` function for each project projects.map(async (project) => { return context.functions.execute("generateCommunityReport", { owner: project.owner, repo: project.repo, startDate: lastMonday, }); }) ); // Save the generated reports in Atlas const atlas = context.services.get("mongodb-atlas"); const reports = atlas.db("community").collection("reports"); return await reports.insertMany(reportsForLastWeek); }; // Get an ISO string for last Monday at 5AM UTC function getLastMonday() { const moment = require("moment"); return moment(new Date().setUTCHours(5, 0, 0, 0)) .utc() .day(1 - 7) .toISOString(); } 单击 Save(连接)。
更新新函数的身份验证设置,以匹配本教程前面介绍的新端点函数。
发送报告通知
您的应用现在每周都会自动生成并保存报告。但是,如果没有人看到,这些报告就没有多大用处。我们将创建一个数据库触发器,它在侦听到新报告时会创建格式化消息,您可以将此消息发送给最终用户。
要设置消息:
在左侧导航菜单中,单击 Triggers。
单击 Add a Trigger(连接)。
将trigger类型保留为Database 。
将触发器命名为
sendCommunityReport。community.reportsInsert将trigger添加到collection并侦听事件。启用 Full Document(完整文档)以将每个新报告文档包含在传递给触发器函数的变更事件中。
为trigger创建一个新函数并将其命名为
triggers/sendCommunityReport。将以下代码复制到函数主体中:
functions/triggers/sendCommunityReport.jsexports = async function sendCommunityReport(changeEvent) { // Pull out the report document from the database change event const report = changeEvent.fullDocument; // Format values from the report to include in the message const projectName = `${report.owner}/${report.repo}`; const moment = require("moment"); const formattedDate = moment(report.startDate).utc().format("MMMM Do, YYYY"); const numIssuesWithActivity = report.issuesWithActivity.length; const numContributors = report.allContributors.length; const numNewContributors = report.newContributors.length; // Create a message string that describes the data in the report const message = [ `# Community contributions to ${projectName} since ${formattedDate}`, `Last week, there was activity on ${numIssuesWithActivity} issues and pull requests.`, `We had ${numContributors} people contribute, including ${numNewContributors} first time contributors.`, ].join("\n"); // For this tutorial we'll just log the message, but you could use a // service to send it as an email or push notification instead. console.log(message); }; 单击Save并部署trigger。
测试报告触发器
您的应用设置为每周自动生成、保存和发送报告。为确保一切正常,您可以手动运行此报告流程。
打开定时触发器triggers/generateAndSaveCommunityReports的函数编辑器,然后单击Run按钮。 这将为您在GitHubProjects值中列出的每个存储库生成并保存按需报告。
要确认:
检查
community.reports以获取新的报告文档。检查应用的数据库触发器日志,查找每个报告的格式化消息
接下来的步骤
恭喜!您已成功设置无服务器 GitHub 贡献跟踪器并完成本教程。
继续构建
若要继续开发,您可以尝试为跟踪器添加一些新功能。例如,您可以:
更新端点以处理更多 Webhook事件类型,例如 issue_comment 或 pull_request_review。
更新每周报告以包含来自 GitHub API 的更多信息。
查看文档
App Services 包含许多可以为您的应用提供支持的服务。请查看其余文档以了解有关这些服务的更多信息以及如何使用它们。
给我们反馈
我们一直在努力改进我们的Docs和教程。如果您对本教程有任何建议或有任何问题,请单击本页底部的Give Feedback为教程评分并向我们发送评论。
加入社区
官方MongoDB Community论坛是结识其他开发者、提问和回答问题以及了解Atlas App Services的最新功能和版本的好地方。