Docs Home → Atlas App Services
realm-cli v2 [Deprecated]
On this page
Important
Realm CLI is Deprecated
realm-cli is deprecated and will not receive future features or
bug fixes. Instead, use the App Services CLI.
App Services CLI is available on npm. To install the CLI on your system,
ensure that you have Node.js
installed and then run the following command in your shell:
npm install -g atlas-app-services-cli
Overview
The MongoDB Realm Command Line Interface (realm-cli)
allows you to programmatically manage your Apps.
With realm-cli, you can create or update
Apps from a local directory as well as export
existing applications to a local directory.
Important
Check your CLI version
This page is a quickstart for version 2 of realm-cli. If you need
documentation for version 1 of realm-cli, see: Realm CLI v1.
To check your CLI version, use: realm-cli --version.
To upgrade your global install to the latest version, use: npm upgrade -g mongodb-realm-cli.
Installation
realm-cli is available on npm. To install version 2 of the
realm-cli on your system, ensure that you have Node.js installed and then run the following
command in your shell:
npm install -g mongodb-realm-cli
Authentication
To use realm-cli, you must authenticate. To authenticate, you must generate an
API Key.
Generate an API Key
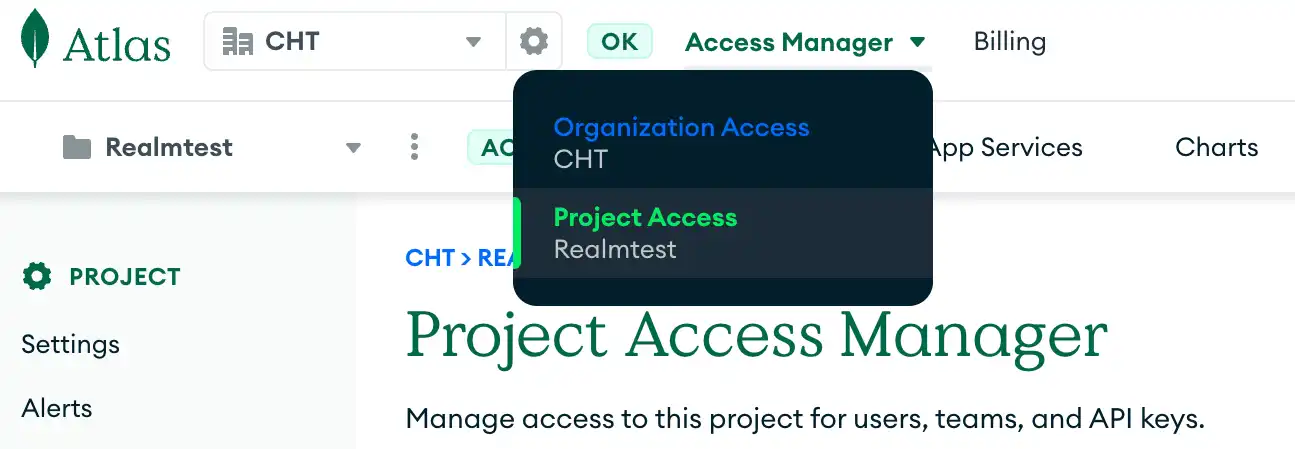
Navigate to MongoDB Cloud Access Manager
The MongoDB Cloud Access Manager allows you to manage access to your project for users, teams, and API Keys. Use the Project Access Manager by clicking the Project Access tab on the access manager dropdown on your screen's top left-hand side.

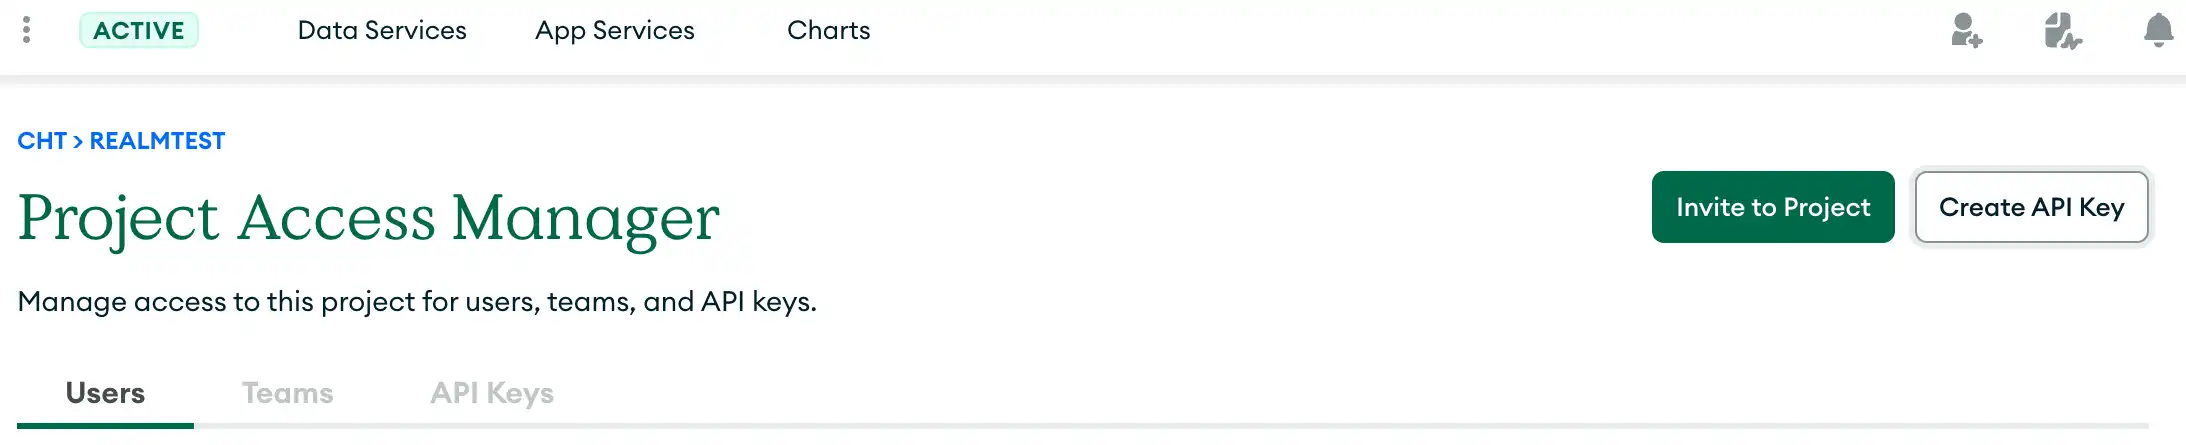
Create an API Key
Project Users can log in using realm-cli tool with a Project API
Key. Create a project API Key by clicking the grey Create
API Key button on the right-hand side of the Project Access Manager.

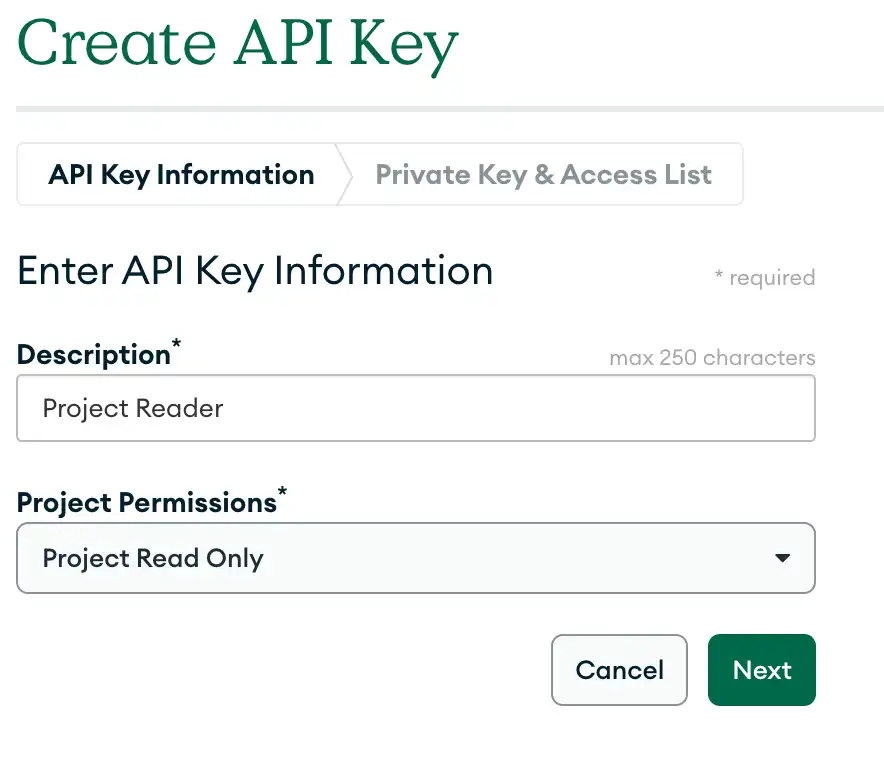
Clicking this button navigates you to the "Create API Key" screen. Set a description for your key.
For write access, the CLI requires an API key with "Project Owner" permissions. For read-only access, you can use "Project Read Only". Use the Project Permissions dropdown to select the appropriate permissions for your use case.
Copy the public key to use later in order to log in. Click next to continue configuring your key details.

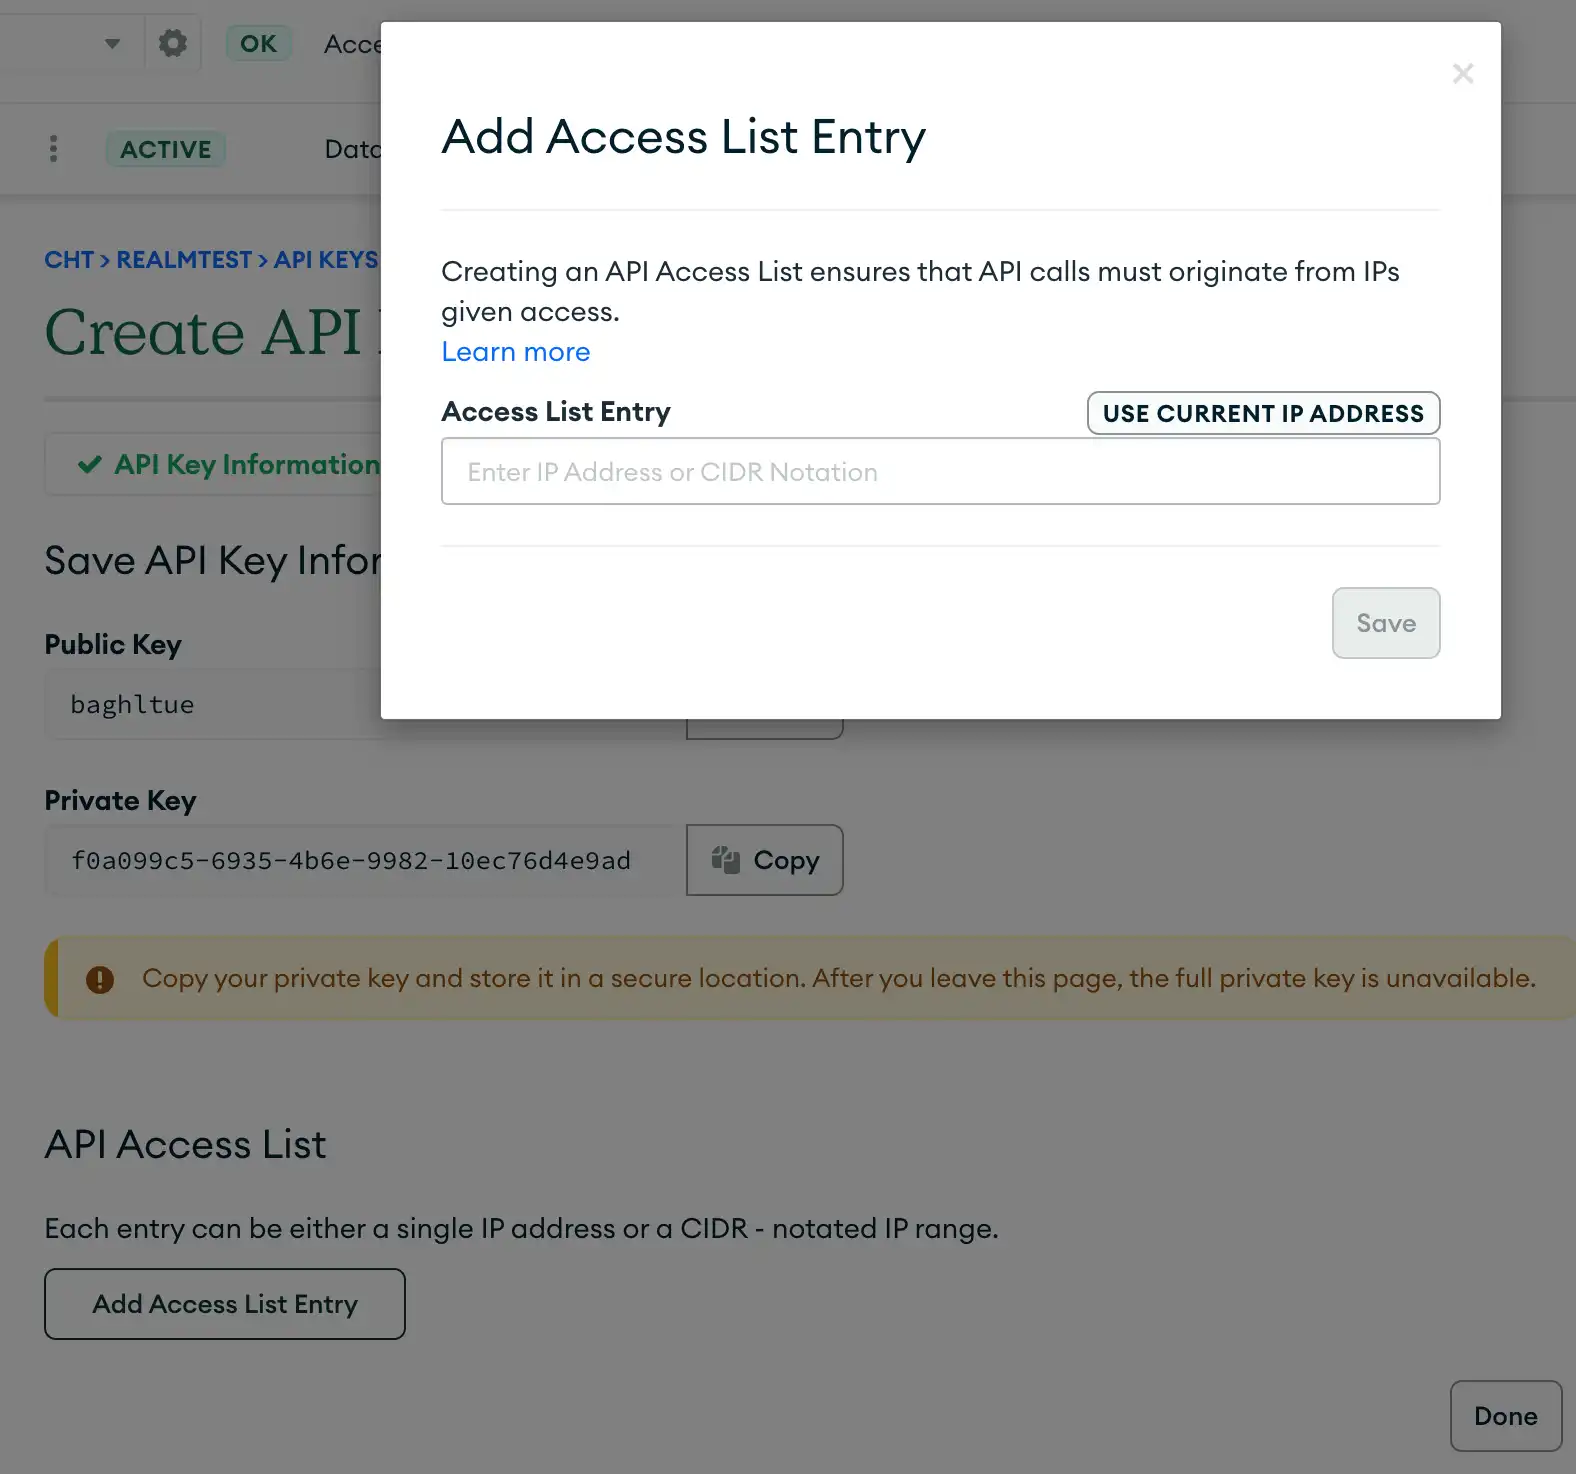
Configure Your API Access List
Copy your Private Key to a safe location for later use. For security, the Private Key will not be visible again after initialization. Another security feature is the API Access List. Creating an API Access List entry ensures that API calls originate from permitted IPs.
The IP Address of the user who will be using the API Key is required to use the key. Click the Add Access List Entry button. Type in the IP Address or click the Use Current IP Address buttton and click save. Finally, click the done button on your screen's lower right-hand to finish setting up your API key.

Authenticate with an API Key
Authenticate a CLI User
Using your newly created public and private key, log in by running the command below.
realm-cli login --api-key="<my api key>" --private-api-key="<my private api key>"
You should see the following result:
you have successfully logged in as <your public key>
Options
Use "realm-cli [command] --help" for information on a specific command
Name | Type | Required | Description |
|---|---|---|---|
--profile | string | no | Specify your profile (Default value: "default") (default "default") |
--telemetry | string | no | Enable/Disable CLI usage tracking for your current profile (Default value: "on"; Allowed values: "on", "off") |
-o, --output-target | string | no | Write CLI output to the specified filepath |
-f, --output-format | string | no | Set the CLI output format (Default value: <blank>; Allowed values: <blank>, "json") |
--disable-colors | no | Disable all CLI output styling (e.g. colors, font styles, etc.) | |
-y, --yes | no | Automatically proceed through CLI commands by agreeing to any required user prompts | |
-h, --help | false | help for realm-cli |
Commands
realm-cli accessList - Manage allowed IP addresses and CIDR blocks
realm-cli apps - Manage the App Services apps associated with the current user (alias: app)
realm-cli function - Interact with the Functions of your App (alias: functions)
realm-cli login - Log the CLI into App Services using a MongoDB Cloud API key
realm-cli logout - Log the CLI out of App Services
realm-cli logs - Interact with the Logs of your App (alias: log)
realm-cli pull - Exports the latest version of your App into your local directory (alias: export)
realm-cli push - Imports and deploys changes from your local directory to your App (alias: import)
realm-cli schema - Manage the Schemas of your App (alias: schemas)
realm-cli secrets - Manage the Secrets of your App (alias: secret)
realm-cli users - Manage the Users of your App (alias: user)
realm-cli whoami - Display information about the current user