Docs Menu
Docs Home
/
MongoDB Connector for BI
/ /

Connect from Tableau Desktop without Authentication or TLS/SSL

On this page

  • Prerequisites
  • Procedure

Connecting Tableau to the MongoDB Connector for BI requires the following:

Connecting Tableau to the MongoDB Connector for BI requires the following:

  • Tableau version 10.4 or later

  • A running mongod instance

  • A running mongosqld instance

1

Download the MongoDB BI Connector ODBC Driver and run the Windows installer (.msi).

2

To securely connect Tableau to the BI Connector, a system DSN configured to use the MongoDB BI Connector ODBC Driver is required. To create a system DSN, follow the steps below:

1

Choose the program version (64-bit or 32-bit) which is appropriate for your system and ODBC driver version.

2
3
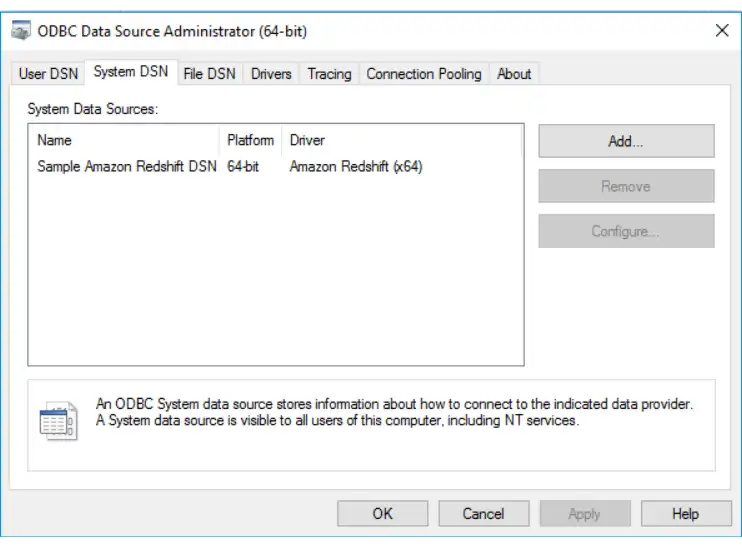
Screenshot of the Windows ODBC Administrator application
click to enlarge
4

Select either the MongoDB ODBC ANSI Driver or the MongoDB ODBC Unicode Driver, then click OK.

Note

The ANSI ODBC driver offers maximum performance but has a limited character set. The Unicode ODBC driver supports a wider character set but may be slightly less performant as a result.

5

Click the Details button to expose the lower half of the form.

The following form fields are required:

Field Name
Description
Data Source Name
A name of your choice.
TCP/IP Server
Address of the server where your mongosqld process is running. If you have enabled BI Connector on MongoDB Atlas, you can find the hostname of the server where mongosqld is running in the connection information for your cluster.
Port
Port number of your mongosqld process.
Database
The name of the database to connect to, e.g. test.
6

If the connection is successful, click OK to add the DSN.

3

Start the Tableau Desktop application or restart it if it is already running.

4
  1. In the left-side navigation under To a server, click on More... then click Other Databases (ODBC).

  2. From the Other Databases (ODBC) dialog box, select your DSN from the dropdown and click Connect.

  3. Once the connection test completes, click Sign In.

1

Download the MongoDB BI Connector ODBC Driver and run the macOS installer (.dmg).

2

To securely connect Tableau to the BI Connector, a system DSN configured to use the MongoDB BI Connector ODBC Driver is required. To create a system DSN, follow the steps below:

1

Note

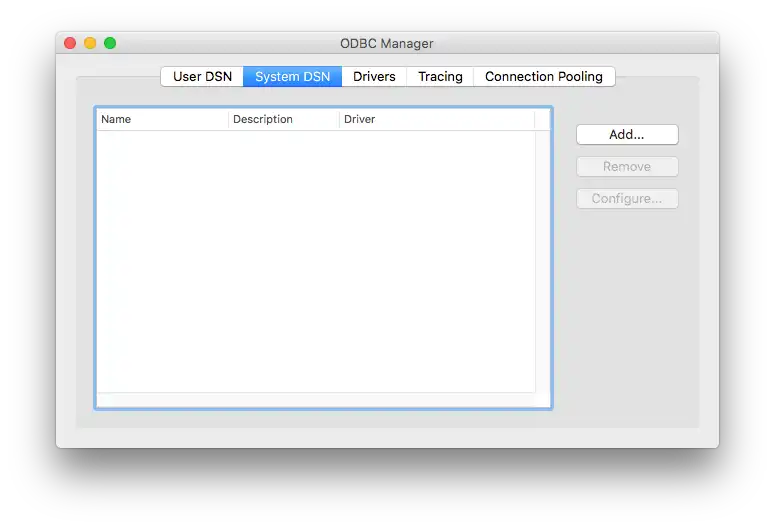
ODBC Manager is included with the MongoDB BI Connector ODBC Driver.

2
ODBC Manager DSN configuration
3

Select either the MongoDB ANSI ODBC driver or the MongoDB Unicode ODBC driver, then click OK.

Note

The ANSI ODBC driver offers maximum performance but has a limited character set. The Unicode ODBC driver supports a wider character set but may be slightly less performant as a result.

4

Optionally enter a Description.

Note

Do not close the setup window. Proceed to the next step.

5
  1. Add a keyword value pair by clicking the Add button.

  2. Modify the Keyword by double-clicking on it, entering the desired keyword, then pressing enter.

  3. Modify the Value by double-clicking on it, entering the desired keyword, then pressing enter.

Using the procedure above, add the following keywords:

Keyword
Value
SERVER

The hostname or IP address of the MongoDB Connector for BI host.

Important

Use 127.0.0.1 to connect via TCP to localhost. Specifying a value other than an IP address, will attempt to connect via Unix socket.

PORT
The IANA port number for the MongoDB Connector for BI. The default is 3307.
DATABASE

The database to use after connecting.

Note

Required when connecting with Microsoft Excel.

For the complete list of ODBC parameters, see Connector/ODBC Connection Parameters.

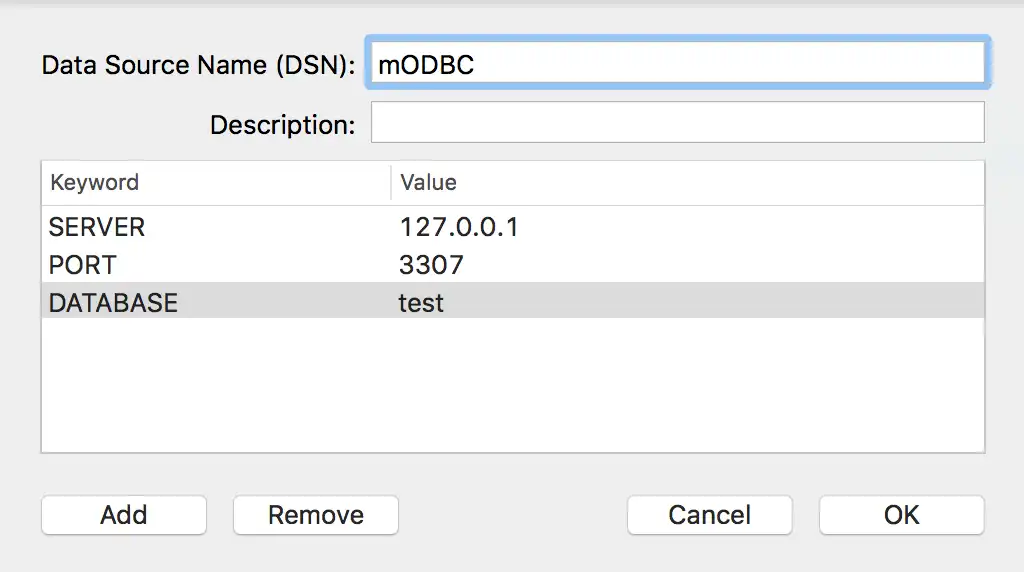
For example, your user DSN configuration should look similar to the following:

ODBC Manager DSN configuration

Note

Do not close the setup window. Proceed to the next step.

6
3

Start the Tableau Desktop application or restart it if it is already running.

4
  1. In the left-side navigation under To a server, click on More... then click Other Databases (ODBC).

  2. From the Other Databases (ODBC) dialog box, select your DSN from the dropdown and click Connect.

  3. Once the connection test completes, click Sign In.